How to Fix Head Gasket Without Replacing: A DIY Guide
Learn safe, practical steps to manage a head gasket issue without full replacement. This educational guide covers diagnostics, temporary fixes, testing, and maintenance for DIY enthusiasts and homeowners dealing with gasket problems.

You can address a head gasket issue without full replacement by focusing on diagnostics, cooling-system checks, and safe interim fixes. This guide outlines practical, non-destructive steps you can take at home, the limitations of sealant approaches, safety cautions, and clear signs that indicate you should stop and seek professional help.
Understanding the Goal of Fixing Head Gasket Without Replacing
In many engines, a gasket issue can present as coolant leaks, white exhaust, or gradual loss of compression without always demanding an immediate full gasket replacement. If you search for how to fix head gasket without replacing, you’re exploring conservative, non-destructive steps that improve reliability while delaying a more invasive repair. The objective is not to pretend a symptom is cured but to stabilize the situation, diagnose root causes, and extend usable life of the engine where safe. Always acknowledge the fundamental limitation: sustained gasket failure often requires replacement to restore long-term reliability. This section sets expectations and frames the practical, home-friendly approach with a clear boundary between temporary fixes and permanent repair.
This paragraph mentions the core keyword and establishes the scope of non-replacement fixes as a stopgap. It also introduces brand context: According to Gasketed, early, conservative diagnostics can save time and money by avoiding unnecessary replacements.
By framing the problem this way, you’ll avoid unsafe work and focus on proven, conservative steps that DIYers can perform with common tools.
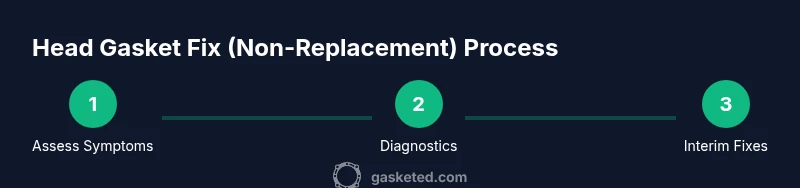
Tools & Materials
- Safety glasses(Protect eyes from splashes and debris.)
- Mechanic’s gloves(Keep hands clean and protected during coolant work.)
- Socket set and ratchet(For removing access panels and bolts.)
- Torque wrench(To re-torque cylinder head bolts if applicable after work.)
- Coolant system pressure tester(Check for leaks without running the engine.)
- New coolant(Have compatible coolant on hand before refilling.)
- Radiator cap and proper funnel(Useful for maintaining pressure and refilling cleanly.)
- Gasket sealant or approved stop-leak product(Use only if recommended by manufacturer and only as a temporary measure.)
- Digital thermometer or infrared temp gun(Monitor engine temperature accurately.)
Steps
Estimated time: 2-6 hours
- 1
Inspect symptoms and confirm safety
Begin with a visual inspection for obvious leaks, corroded hoses, or signs of overheating. Check for coolant loss, milky oil, or white exhaust. If you notice severe overheating or a large coolant leak, stop and seek professional help rather than attempting at-home fixes.
Tip: Document observable symptoms before you start; photos help when seeking advice. - 2
Gather and verify tools
Assemble the essential tools listed above and verify you have the appropriate coolant for your engine. Ensuring you have the correct torque specs and repair manuals will reduce the risk of improper reassembly.
Tip: Read the service manual for your vehicle model to confirm torque patterns and gasket limits. - 3
Run initial diagnostics without disassembly
Perform a basic compression test and, if available, a cooling-system pressure test to gauge leak severity. This helps determine whether non-replacement fixes are feasible or if a full gasket replacement is likely unavoidable.
Tip: Use a cylinder-by-cylinder approach to identify the most affected area. - 4
Evaluate findings and decide on a path
If tests show minor issues with a narrow scope of leakage, non-replacement fixes may be considered as a temporary measure. If there is widespread leakage or significant compression loss, prepare for replacement.
Tip: Document test results and set a clear threshold for stopping the DIY path. - 5
Apply safe interim fixes (if appropriate)
If you choose a temporary fix, apply only approved sealants or stop-leak products per manufacturer instructions. Understand that these are stopgap measures and can affect cooling passages and sensors.
Tip: Avoid over-application; excess sealant can clog passages. - 6
Flush, fill, and initiate a cautious test
If you’ve completed interim measures, flush the cooling system as recommended, refill with fresh coolant, and monitor for leaks. Start the engine and watch for stable temperature and steady pressure readings.
Tip: Keep an eye on the temperature gauge and coolant level during the first hours of operation. - 7
Decide on permanent repair and plan ahead
If symptoms persist, schedule a permanent gasket replacement with a qualified shop. If the engine shows persistent overheating, misfire, or continued coolant loss, a replacement is the safer long-term option.
Tip: Create a budget and timeline for a proper gasket replacement to avoid repeating temporary fixes.
Common Questions
Is it possible to fix a head gasket without replacing?
Yes, in some cases you can manage symptoms temporarily through diagnostics and conservative interim steps. This is not a permanent fix and is not suitable for all engines or all gasket failures. If symptoms persist, a full gasket replacement is typically required.
Yes, you can, but it’s usually temporary. If symptoms continue, you’ll want to pursue a full gasket replacement.
Will using a commercial stop-leak fix the gasket permanently?
Stop-leak products can slow or temporarily seal minor leaks but they are not a guaranteed or permanent solution. They can also clog passages or sensors if overused. Use only as a temporary measure and monitor engine health closely.
Stop-leak is usually temporary and can cause downstream issues if used long-term.
What tests should I run to confirm a gasket issue?
Compression tests, leak-down tests, and cooling-system pressure tests are common diagnostic tools. Oil and coolant analysis can also reveal contamination. Interpret results with caution and seek professional input if results are inconclusive.
Run compression and leak-down tests, and check cooling system pressure to confirm gasket problems.
What are the signs a gasket is failing?
Common signs include coolant loss without visible leaks, white exhaust, milky oil, milky residue on dipstick, overheating, and pressure in the cooling system. These symptoms warrant careful assessment and possibly professional evaluation.
Watch for coolant loss, unusual exhaust, and milky oil, which are red flags.
When should I seek professional help?
If you notice persistent overheating, significant coolant loss, strong combustion gases in the cooling system, or if compression tests show notable loss, it’s wise to contact a qualified mechanic. Delaying professional repair can lead to severe engine damage.
If problems persist or tests show big losses, get a pro involved.
Is DIY head gasket repair safe for beginners?
DIY gasket work is advanced and carries risk of engine damage if done incorrectly. Beginners should only attempt non-destructive diagnostics and temporary fixes with proper supervision or by following manufacturer guidance.
It’s generally not advised for beginners to attempt gasket replacement; proceed carefully.
Watch Video
Key Takeaways
- Diagnose before you act to avoid unnecessary work
- Temporary fixes are not permanent solutions
- Plan for permanent gasket replacement if symptoms persist
- Maintain a clean, conservative approach to avoid damaging cooling channels