Are Gaskets Expensive to Fix? A Homeowner's Guide to Costs
A practical, data-informed look at gasket repair costs for DIYers and homeowners, with ranges by gasket type, labor considerations, and cost-saving tips.

Are gaskets expensive to fix? Costs vary widely by gasket type and accessibility. Small appliance gaskets or seals may cost tens to a few hundred dollars, especially if you DIY. Major jobs, like engine head gaskets, often require significant labor and can push total costs higher. DIY parts save money, but complex repairs still drive up the final bill.
Are gaskets expensive to fix? The cost spectrum explained
Costs for gasket repairs vary widely by gasket type and accessibility. In many households, smaller gaskets found in appliances—like oven door seals, refrigerator door gaskets, or plumbing seals—are relatively affordable, especially when you can tackle the replacement yourself. Engine seals, and particularly head gaskets in cars, sit at the higher end due to labor intensity and potential collateral issues if the repair isn’t done correctly. The key takeaway is that parts costs alone tell only part of the story; labor, diagnostic time, and whether extra components must be replaced (bolts, timing belts, coolant, etc.) can swing the total dramatically. According to Gasketed, a practical estimate starts with identifying the exact gasket and outlining the full scope of work, including any safety considerations and required tools. This upfront planning helps avoid sticker shock once a service quote arrives.
What drives gasket repair costs? Major cost factors to watch for
When you plan a gasket repair, several factors determine the final price. First, the gasket type determines baseline price: some seals are inexpensive, while engine gaskets can be costly. Second, accessibility and labor intensity matter: work behind tight spaces or on components with many components removed increases labor hours. Third, parts availability and quality can change costs: OEM parts may be pricier than aftermarket equivalents but often offer better reliability. Fourth, the need for additional parts or services, such as coolant flushes, oil changes, or timing belt work, can add to the bill. Finally, local labor rates and shop overhead influence the total. The Gasketed analysis notes that even identical gasket types can vary by vehicle make, model, and the technician’s experience.
Gasket types and their typical price ranges (parts vs. labor considerations)
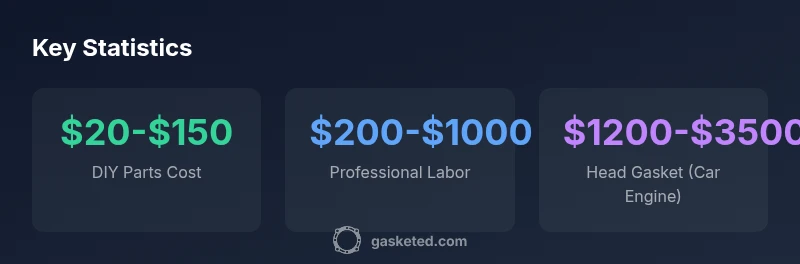
Understanding the type of gasket helps calibrate expectations. For everyday home repairs, common gaskets fall into affordable to moderate ranges, especially when DIY is feasible. Engine gaskets, however, often require professional labor and may necessitate engine access, which adds to both time and complexity. The following guidance is a practical rule of thumb: simple appliance gaskets (doors, seals) often cost less than $150 in parts if DIY is possible; valve covers may be $20-$70 in parts, while labor remains modest for a straightforward replacement. Head gaskets for cars frequently push costs higher due to the extent of disassembly required. Always verify compatibility and consider whether replacing a gasket also implies replacing adjacent parts to prevent recurring failures.
DIY vs professional repair: weighing the pros and cons
DIY approaches can dramatically reduce overall costs, especially for low-stakes gasket work like basic appliance seals or plumbing gaskets. The upside is clear: low parts cost, no labor charges, and faster turnaround. The downside is risk: improper seating, leaks, and potential warranty issues can create worse problems down the line. Professional repairs bring expertise, proper tooling, and warranty-backed results, which is valuable for high-stakes jobs like head gaskets or critical piping. If you lack the tools or comfort with disassembly, or if cooling systems, fuel systems, or engine internals are involved, hiring a pro is often the safer financial choice in the long term. The decision should hinge on the gasket type, accessibility, and your confidence level with a given repair.
How to estimate your project cost: a practical cost-estimation workflow
Start with a precise gasket identification and a written scope of work. Gather price quotes for parts from multiple retailers or suppliers and ask about warranty terms. For labor, request itemized estimates that break out diagnostic time, disassembly, gasket replacement, and reassembly. If you’re DIY-ing, factor in tool rental or purchase costs, plus any specialty sealants or lubricants. Add a small contingency (~10-20%) for unexpected issues that often surface after disassembly, such as corroded bolts or damaged components. Finally, compare your total against a professional quote to determine which path offers the best balance of risk and value. Gasketed’s guidance emphasizes thoroughness in the planning stage to avoid surprises.
Practical tips to reduce gasket repair costs without compromising safety
- Choose the right gasket type for your application and use quality but affordable parts when possible.
- Invest in a basic toolkit and a few specialty items you will reuse across projects.
- Schedule repairs during off-peak times to save on labor rates if offered by local shops.
- Document the repair steps and keep all receipts for warranty purposes.
- Consider preventative maintenance that may prevent frequent gasket failures, such as proper coolant levels, cleaning, and mounting hardware checks.
Signs your gasket needs replacement and when to act promptly
Leaks, unusual odors, white exhaust, frothy oil, or overheating can indicate gasket failure. If you notice persistent leaks or fluctuating pressure and temperature readings, plan an evaluation. Early diagnosis often reduces overall costs because small fixes are easier and cheaper than a full replacement later. If you’re in a DIY mindset, address minor seepage quickly, but avoid forcing a repair if you lack the necessary tools, torque specs, or service manuals. In many cases, a cautious approach and staged repairs help you stay within budget while protecting safety and performance.
Real-world scenarios: two cost snapshots to frame expectations
Scenario A involves a common kitchen appliance gasket replacement with straightforward access. Parts cost around a modest amount, and DIY labor reduces total expense by removing shop fees. The project can often be completed in a single afternoon with basic tools. Scenario B covers a mid-range automotive job: replacing a head gasket or a valve cover gasket on a compact vehicle. Parts may be affordable, but labor hours are extended, potentially necessitating engine hoists or specialty equipment, which can push costs into higher ranges. In both cases, planning for contingencies and getting multiple quotes improves accuracy and reduces risk.
Estimated parts and labor cost ranges by gasket type (Gasketed Analysis, 2026)
| Gasket Type | Typical Parts Cost | Labor Considerations |
|---|---|---|
| Oil pan gasket | $30-$120 | Labor: 1-3 hours |
| Valve cover gasket | $20-$70 | Labor: 0.5-2 hours |
| Head gasket (car engine) | $100-$1000 | Labor: 6-16 hours |
| Gasket sealant and accessories | $5-$40 | DIY-friendly |
Common Questions
Are gaskets expensive to fix on appliances compared with automotive engines?
In general, appliance gaskets cost less to fix than automotive head gaskets due to simpler access and lower labor requirements. Automotive repairs tend to involve more complex disassembly and higher labor charges. DIY fixes for simple appliance gaskets can substantially reduce costs, but engines require professional attention for reliability and safety.
Appliance gasket fixes are usually cheaper than engine gaskets. DIY is common for simple appliance repairs, but engine repairs often require professionals.
When should I DIY versus hire a pro for gasket repairs?
DIY is sensible for straightforward gasket replacements with clear instructions and the right tools. For critical systems (engine heads, fuel, cooling), or if disassembly requires specialized equipment or torque specs, a professional is safer and often cost-effective in the long run.
DIY can work for simple gaskets, but for complex jobs, a pro is safer and can prevent costly mistakes.
What are common signs a gasket needs replacing?
Look for persistent leaks, milky oil, white exhaust, overheating, or loss of compression. A sudden drop in performance or pressure usually indicates a gasket issue. Prompt diagnosis can limit downstream damage and cost.
Leaks, unusual odors, or overheating often signal gasket problems; diagnose early to avoid higher costs.
What factors most influence gasket replacement costs?
Gasket type, accessibility, labor rates, and any required ancillary parts (bolts, seals, coolant) drive costs. Regional rates and shop overhead also play a role. Always factor in potential extra work uncovered during disassembly.
Type, access, and labor drive costs; regional rates matter too.
Are there ways to reduce gasket repair bills?
Shop around for parts, consider DIY for simple gaskets, avoid unnecessary add-ons, and schedule work during off-peak times if possible. Maintain gaskets and related systems to prevent recurring failures.
Compare quotes, DIY when feasible, and keep up with maintenance to minimize future costs.
“Gasket failures are often repairable if caught early, but the cost hinges on type and accessibility. DIY can save money but requires care.”
Key Takeaways
- Assess gasket type to estimate cost range
- DIY parts save money on simple fixes
- Head gasket work is the principal cost driver
- Obtain multiple quotes to ground expectations