Is It Okay to Reuse Exhaust Gaskets? A DIY Guide
Learn when you can safely reuse an exhaust gasket, signs of failure, and a practical, step-by-step replacement approach with tips from Gasketed.

Is it ok to reuse exhaust gaskets? In general, no. Exhaust gaskets endure extreme heat, pressure, and constant vibration, which can deform or compress a reused gasket and lead to leaks, noise, and emissions issues. The safer, longer-lasting option is to replace with a new gasket and follow proper torque specs. This guide explains how to decide, inspect, and replace an exhaust gasket properly.
Why Reusing Exhaust Gaskets Is Risky
According to Gasketed, reusing exhaust gaskets is risky because extreme heat, rapid temperature cycling, and ongoing vibration can permanently deform gasket material and seal surfaces. Even if a gasket looks intact, it may have lost elasticity or developed micro-cracks that only reveal themselves after the system heats up again. Reassembly with a reused gasket often results in exhaust leaks, ticking noises, and reduced engine efficiency, and it can compromise emissions control. Gasketed analysis, 2026, notes that seals in exhaust systems are designed for single use and rely on precise mating surfaces to maintain a proper seal under pressure. For DIYers and homeowners, replacing with a new gasket is usually the safer, longer-lasting option, even if it adds a few minutes to the project. If you want a reliable seal and to avoid revisiting the repair, choose replacement over reuse.
This is particularly true for metal and composite gaskets that experience repeated heat cycles. A fresh gasket re-forms to the mating surface and preserves the intended compression. Across typical passenger vehicles and light trucks, a new gasket is the standard recommendation for any exhaust joint that has been disassembled.
Understanding Exhaust Gasket Materials
Exhaust gaskets come in several material families, and each reacts differently to reuse. Metal gaskets (often copper or steel) can tolerate heat better than some composites, but they still rely on precise flatness and intact sealing surfaces. Graphite-impregnated or composite gaskets provide excellent sealing under compression but can crack or shed fibers after heat cycles. The choice of gasket material is usually dictated by the joint location (manifold-to-downpipe, exhaust manifold, or header-to-downpipe), the temperature range, and whether an aftermarket or OEM part is preferred. Reusing any gasket type increases the risk that the material has already fatigued, which can undermine a fresh seal. When in doubt, consult the vehicle manual or manufacturer’s service bulletin, and consider using an OEM or equivalent replacement to ensure compatibility and performance.
Signs a Reused Gasket Will Fail
You might look at a used gasket and think it’s fine, but signs of hidden fatigue are common. Micro-cracks, flattened or worn surfaces, corrosion on metal gaskets, and areas where the gasket shows uneven compression can all herald failure once the system heats up. If you notice any signs of misalignment, warping, or residue that indicates prior leaks, reuse is not advised. After removing a joint, inspect both sides of the gasket for deformation and check that the sealing surfaces are free of nicks, gouges, or pitting. Even a small imperfection can become a leak path when the joint is reassembled and heated. If you’re unsure, replace the gasket to avoid future nuisance leaks and emissions concerns.
Visual and Surface Inspection Before Replacing
Before deciding to reuse any gasket, perform a thorough inspection of mating surfaces. Use a straightedge to confirm flatness and look for high spots, gouges, or corrosion that could prevent an even seal. Clean all carbon buildup, rust, and oil residue from the flange faces with a non-abrasive scraper and a clean rag. Avoid scoring the metal surfaces; a light pass with a plastic scraper or nylon brush is enough. After cleaning, run your finger across the surface to feel for irregularities. Any roughness or deformation indicates the joint should be replaced and resealed with a new gasket. Keeping the surfaces pristine helps the new gasket seat evenly and prevents leak paths.
Should You Reuse Car Exhaust Gaskets? Practical Guidelines
In most cases, replacing with a new exhaust gasket is the prudent choice. Reuse is generally not recommended due to material fatigue, potential for micro-cracks, and the risk of hidden distortion on mating surfaces. If you are working on a budget or a non-critical joint that may not experience heavy heat cycles, you could consider reuse only if the gasket is a robust metal design, shows no wear, and both mating surfaces are impeccably flat and clean. However, even then, many mechanics advise replacing because the cost of a new gasket is small compared with the cost of a failed repair. Always verify the manufacturer’s torque specs and reassembly procedures after any gasket work.
How to Prepare for Replacement: Planning and Parts
Preparations are key to a successful gasket replacement. Start by verifying you have the correct gasket type and size for your vehicle, including any special anti-seize requirements on fasteners. Gather the right tools, including a torque wrench that covers the expected range, a gasket scraper, and clean rags. Warm-up or heat cycle considerations should be respected only after you’ve cooled the system. If you’re in doubt about the joint location, consult the service manual for the exact torque pattern and seating method. A well-planned replacement reduces the chance of leaks and speeds up the process.
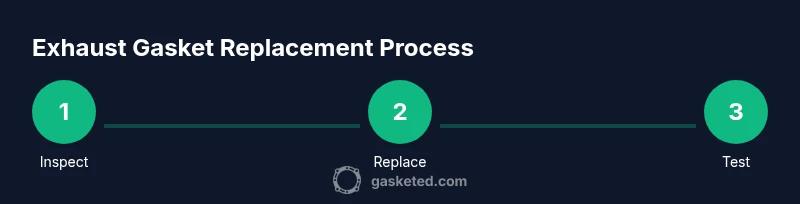
Step-By-Step Replacement Process Overview
A proper exhaust gasket replacement involves removing the joint, inspecting and cleaning the mating surfaces, installing a new gasket, and torquing the fasteners to spec. It’s vital to preserve flange alignment and avoid disturbing other components during removal. The process benefits from a clean, well-lit workspace and a partner to help with heavy components. After installation, a leak test is essential to confirm a proper seal and safe operation.
Best Practices for a Sealed Exhaust Connection
Follow the manufacturer’s torque sequence and use the correct fastener torque settings. Clean surfaces thoroughly and avoid over-tightening, which can warp the flange. If the original bolts are stretched or damaged, replace them with new hardware. Use only sealants approved by the manufacturer on joints that require them, and never apply sealant to gasket faces that do not specify it. When in doubt, opt for OEM parts and follow the manual exactly to preserve emissions compliance and performance.
Post-Repair Testing and Monitoring
After installation, start the engine and listen for leaks at the joint while the exhaust reaches operating temperature. A simple soapy-water test can also reveal small leaks if you spray the joint and look for bubbles. If you notice smoke, hissing, or a strong exhaust odor around the joint, shut down the engine and recheck the installation. Routine inspections after a few hundred miles can help ensure the gasket remains sealed and prevent a repeat failure. Keeping a record of the repair, including parts used and torque values, helps with future maintenance.
Tools & Materials
- New exhaust gasket (exact match for vehicle) (Verify part number and passenger vehicle compatibility; OEM or equivalent must fit the joint (manifold-to-downpipe or header-to-downpipe).)
- Torque wrench(Coverage for the gasket's torque spec; set according to manufacturer's specification.)
- Gasket scraper or plastic scraper(Remove old gasket residue without scratching mating surfaces.)
- Degreaser or solvent(Clean surfaces thoroughly; avoid leaving solvent residues that could affect the new seal.)
- Rags and brushes(Keep surfaces clean and dry during assembly.)
- Penetrating oil or lubricant(Use sparingly on bolts/nuts to prevent galling; follow safety precautions.)
- Anti-seize compound (manufacturer-approved)(Only apply if the manual calls for it; use on fasteners as directed.)
- Safety gear (gloves, eye protection)(Protect hands from sharp edges and chemicals; work with engine cool.)
Steps
Estimated time: 45-75 minutes
- 1
Disconnect power and gain access
Ensure the engine is cool and disconnect the negative battery lead. Remove any components obstructing access to the exhaust joint so you can clearly reach the flange bolts.
Tip: Taking photos before disassembly helps with reassembly orientation. - 2
Loosen and remove exhaust fasteners
Carefully loosen nuts and bolts in a criss-cross pattern to prevent warping the flange. Remove the exhaust clamp or hanger if necessary.
Tip: Use penetrating oil and a breaker bar to avoid stripping threads. - 3
Inspect and clean surfaces
Inspect both mating surfaces for warping, cracks, or heavy corrosion. Clean away carbon buildup and rust with a plastic scraper and rag until the faces are dry and smooth.
Tip: Any unevenness above a hairline should lead to gasket replacement. - 4
Place the new gasket
Position the new gasket carefully so it aligns with bolt holes. Do not stretch or deform the gasket during installation.
Tip: Double-check orientation and hole alignment before tightening. - 5
Torque the joints to spec
Tighten bolts in a criss-cross sequence to the manufacturer torque. Use a torque wrench and verify each fastener reaches the specified value.
Tip: Do not exceed the recommended torque; over-tightening can warp the flange. - 6
Reassemble components and test
Reinstall any removed parts, reconnect the battery, and start the engine. Let it reach operating temperature and inspect for leaks visually and with a soapy-water test if needed.
Tip: Listen for hissing or tapping sounds and recheck if you detect any leaks. - 7
Monitor after operation
Drive gently for a short period to seat the gasket and observe the joint for any new signs of leakage.
Tip: Mark leakage-prone joints after initial drive so you can recheck quickly.
Common Questions
Is it ever acceptable to reuse an exhaust gasket?
Generally not. Excessive heat, vibration, and aging cause hidden damage that compromises seal integrity. Replacing with a new gasket is the safer choice for most joints.
Usually not. Heat and movement wear out gaskets, so replacing is safer.
What are common signs of an exhaust gasket leak?
A ticking or hissing sound, visible exhaust fumes around the joint, and reduced engine performance can indicate a leak. Soot buildup near the joint is another clue.
Listen for ticking sounds and check for visible soot around the joint.
Do I need to retorque after installation?
Yes. After cooling, recheck torque on all bolts to ensure the gasket remains properly seated and to prevent leaks.
Yes, recheck torque after the system cools.
Can cleaning a reused gasket make it safe to reuse?
Cleaning does not restore gasket elasticity or seal integrity. Visual cleanliness does not guarantee a reliable seal after heat cycling.
No—cleaning doesn’t fix the underlying wear.
What gasket should I buy for replacement?
Purchase an OEM-equivalent or manufacturer-recommended gasket for the exact joint. Matching material and thickness is essential for a proper seal.
Buy the exact OEM-equivalent gasket for your joint.
What safety precautions should I follow?
Work with the engine cool, wear PPE, and disconnect the battery if you’re working near electrical components. Use proper lifting techniques for heavier exhaust parts.
Let the engine cool, wear PPE, and stay safe while you work.
Watch Video
Key Takeaways
- Replace, not reuse, exhaust gaskets in most cases
- Inspect mating surfaces for flatness and damage
- Torque bolts to spec in a cross pattern
- Test for leaks after installation
- Maintain a clean workspace and document the process