Pivot Shower Door Bottom Seal Replacement Guide
Learn how to replace the pivot shower door bottom seal to stop leaks, with a step-by-step approach, tools, tips, and maintenance to keep your shower watertight.

You can restore a watertight shower by replacing the pivot shower door bottom seal. This quick answer summarizes how to identify the correct seal, safely remove the worn gasket, trim to fit, install the new seal, and run a leak test to verify proper seating and performance.
Understanding pivot shower door bottom seal: role and common failures
According to Gasketed, the bottom seal on a pivot shower door serves a crucial role in directing water back into the enclosure and preventing it from spilling onto the bathroom floor. When the seal becomes cracked, warped, or detached, water can sneak under the door during use. This not only creates a slip hazard but can contribute to mold and mildew growth in adjacent areas. Gasketed analysis also notes that a healthy bottom seal supports consistent door alignment and smoother operation. Common failures include hardening from mineral buildup, drying out from repeated heat exposure, and damage from aggressive cleaners. If you notice persistent leaks even after gentle wiping, it’s a strong signal your pivot shower door bottom seal needs attention. Understanding the seal’s function helps you choose the right replacement and install it correctly.
This guide differentiates seal types, explains how to measure for an exact fit, and walks through professional tips to maximize durability without overhauling the entire door framework. Maintaining the seal is a simple, cost-effective way to extend the life of your shower and protect surrounding surfaces, a principle echoed by experts at Gasketed.
noteForReadersIdiomLineBreaksToBePreserved':null},
pivot shower door bottom seal
Tools & Materials
- Replacement pivot shower door bottom seal (EPDM or PVC)(Choose the correct profile and length to match your hinge spacing and door width.)
- Utility knife or scissors(For trimming the replacement seal to the exact length.)
- Screwdriver set (Phillips and flat-head)(For removing any screws securing trim pieces or guides.)
- Putty knife or plastic scraper(To lift the old seal without scratching the surface.)
- Measuring tape(Verify length and door width before purchasing the replacement.)
- Cleaning supplies (soft cloth, isopropyl alcohol)(Clean the channel and door edges to ensure good seating.)
- Silicone lubricant (clear) optional(Light lubrication helps seating; avoid petroleum-based lubricants.)
- Safety gloves(Protect hands from sharp edges and cleaners.)
- Rubber mallet (optional)(Gentle taps to seat the seal if it’s stubborn.)
Steps
Estimated time: 60-90 minutes
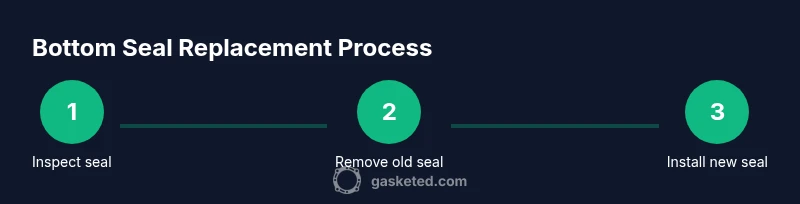
- 1
Inspect door and seal type
Carefully inspect the pivot shower door bottom seal area and identify the seal type (straight strip, bulb, or channel insert). Note orientation and any metal hardware that interacts with the gasket. This ensures you buy the correct replacement profile and avoid returning the part. A quick photo can help you compare profiles later.
Tip: Take clear photos from multiple angles before removing anything so you can match the replacement precisely. - 2
Remove the old seal
Gently pry the old bottom seal away from the door base using a plastic scraper or putty knife. Work slowly to avoid scratching the glass or aluminum frame. If the seal is glued, use a mild solvent and wipe away residue, then dry the surface before installing the new piece.
Tip: Avoid aggressive prying; levers can nick the glass or bend frames. - 3
Prepare the replacement seal
Lay out the new seal next to the door to compare length. If needed, trim to fit using the measuring tape and utility knife. Ensure the seal orientation matches the original—some seals have a specific lip direction for water deflection.
Tip: Trim progressively; test fit a small section before cutting the entire length. - 4
Install the new seal
Gently press the new seal into the bottom channel, making sure it sits evenly without gaps. If your door uses screws or clips, reattach them and verify the seal seats fully along the entire length.
Tip: Press with steady, even pressure to prevent kinks or folds. - 5
Check door alignment and seating
Close the door slowly and observe whether the seal sits flush along the entire width. If there’s a gap in one area, adjust the hinge or frame alignment slightly. Misalignment can cause leaks even with a perfect seal.
Tip: Small hinge adjustments can make a big difference; confirm the door closes squarely. - 6
Test for leaks
Run water along the door edge and watch for drips at the bottom seal. Open and close the door several times to confirm consistent contact. If leakage persists, re-check the seal seating and length, and consider a replacement profile if needed.
Tip: A real-world test helps confirm a successful install beyond visual inspection.
Common Questions
Do I need to replace the entire door to fix leaks, or just the bottom seal?
Most leaks come from a worn bottom seal or misalignment rather than the entire door. If the frame and hinges are solid, replacing the seal is often enough. If hinges or framing are corroded, you may need broader repair or replacement.
Usually just the seal, but check hinges and frame for corrosion before deciding.
What tools are essential for this job?
Key tools include a replacement seal, utility knife, plastic scraper, measuring tape, and basic screwdrivers. Keeping a clean workspace helps prevent losing small parts.
You mainly need a seal, a knife, and some basic tools.
How long does it take to replace the bottom seal?
For a typical residential shower, plan about 60 to 90 minutes, depending on seal type and door hardware. Having a clear plan speeds up the process.
Usually about an hour or so with the right seal and steps.
Can I reuse an old seal if it’s not visibly damaged?
Reusing an old seal is not recommended because compression and aging can reduce effectiveness. It’s best to replace with a new seal that matches your door profile.
New seal is best for a reliable leak-proof seal.
What maintenance helps prevent future leaks?
Regularly clean the seal channel, inspect for wear, avoid harsh cleaners, and re-lubricate lightly as needed. Address minor damage early to prevent bigger leaks.
Keep it clean and inspect it often to catch wear early.
Watch Video
Key Takeaways
- Identify the correct seal profile before replacement
- Measure the door bottom accurately
- Trim precisely to avoid gaps
- Install with even seating for a watertight seal
- Test thoroughly and adjust alignment if leaks persist