Pressure Cooker Gasket Replacement: A DIY Guide
Learn how to replace a pressure cooker gasket safely and effectively with this step-by-step DIY guide. Tools, selection tips, installation, testing, and maintenance to prevent leaks and keep your cooker performing at its best.

By following this guide, you will confidently replace a worn or leaky pressure cooker gasket and restore a tight, steam-safe seal. You'll learn how to identify when replacement is needed, choose the right gasket, and perform a safe, step-by-step installation. Gather a compatible gasket, basic tools, and soap, then proceed with care to prevent leaks. This ensures reliable pressure cooking results and avoids dangerous steam escapes.
Understanding gasket failure in pressure cookers
Gasket life is twofold: material aging and daily use. In most standard home pressure cookers, the sealing gasket sits in a dedicated groove around the lid. Over time exposure to heat cycles, moisture, and food acids causes the silicone or rubber to harden, warp, or crack. When the gasket loses flexibility, it cannot seal properly, leading to steam leaks, reduced pressure, and longer cooking times. According to Gasketed, proactive maintenance starts with recognizing warning signs such as visible cracking, a gummy or tacky feel, or a noticeable odor when the lid is opened. Regular inspection before each cooking session helps prevent surprises and ensures consistent results. If you notice either steam escaping around the lid or difficulty achieving full pressure, plan a gasket replacement rather than attempting a temporary fix. A failed seal is more than an inconvenience—it can affect safety and appliance longevity. By understanding gasket degradation, you’ll be better prepared to perform pressure cooker gasket replacement with confidence.
Choosing the right gasket for your model
The gasket you buy must match your pressure cooker’s lid diameter and groove profile. Most brands use one of a few standard shapes—flat ring, cross-section O-ring, or a molded silicone gasket—and using the wrong size leads to leaks or poor sealing. Start by locating the model number on the appliance (usually under the lid or on the base) and cross-checking with the manufacturer’s gasket compatibility list. If you own a legacy device, look for an aftermarket gasket labeled as compatible with your make and model. When shopping, prefer food-grade silicone gaskets from reputable suppliers; they resist heat, oils, and cleaning agents better than lower-grade materials. Some cooks also keep a spare gasket in the kitchen—rotating to a fresh ring extends life and reduces downtime during busy cooking sessions. If your cooker uses a metal seal or a metal-to-metal ring, do not substitute with a standard silicone gasket; consult the manual for the correct replacement part. In short, the right gasket ensures a tight seal and reliable pressure cooking results, not guessing.
Safety first: prep and precautions
Safety should guide every gasket replacement. Always perform the task with the cooker completely cool and unplugged from any heat source. Wear heat-resistant gloves when handling hot lids and parts, and keep the work area clean to avoid slips. Read the manual for model-specific cautions, as some lids require screw-fastened assemblies while others rely on a simple snap-in groove. Never force a gasket into a groove that does not align with the gasket’s shape or size. After installation, perform a gentle check to ensure there are no sharp edges or burrs along the groove. A careful prep phase is essential for a successful pressure cooker gasket replacement.
Cleaning and prepping the lid and groove
Before installing a new gasket, clean the lid groove thoroughly to remove old residue, soap film, and mineral deposits. Soak the lid in warm, soapy water for a few minutes, then use a soft brush to reach tight corners. Rinse with clean water and dry completely; any moisture left behind can affect sealing. Wipe the gasket groove with a dry cloth to ensure a smooth seating surface. A clean groove helps the new gasket seat evenly and reduces the chance of leaks during initial pressure build.
Removal of the old gasket and inspection
Remove the old gasket by gently pulling it out of the groove, working around the circumference to avoid tearing. Check for cracks, hardening, or deformities, and examine the groove for nicks or scoring. If the groove shows signs of wear, address it before or during replacement because a damaged seat will undermine the new gasket. Do not reuse a gasket that is stiff, cracked, or brittle. Inspecting the old gasket provides a clear baseline for assessing the new one’s condition and helps ensure a solid seal.
Installing the new gasket correctly
Position the new gasket in the groove, aligning any directional marks with the lid. Press all around the circumference to seat it evenly—avoid creating folds or twists. If the gasket has a lip, ensure it faces inward toward the dish. Double-check that the gasket sits flat and is not pinched by the lid edge. A properly seated gasket is the foundation of a reliable pressure seal and a successful gasket replacement.
Lubrication, seating, and alignment
Lightly lubricate the inner lip of the gasket with a food-grade silicone grease to aid seating and prevent sticking, especially if your cooker uses higher heat cycles. Do not over-lubricate; a thin layer is enough to maintain seal performance without attracting debris. Rotate the lid to confirm the gasket remains evenly seated across the full circumference. Proper lubrication and alignment reduce resistance during closing and help avoid leaks during initial pressurization.
Testing the seal with a water test
Reassemble the cooker and add a small amount of water (about a cup) to the pot. Close the lid and bring to pressure according to your model’s guidelines, watching for any steam leakage around the gasket. If there’s no steam and the unit reaches pressure as expected, release and inspect the seal again. If you notice any drips or steam, repeat the seating process or consider replacing the gasket if the issue persists. A water test provides a safe, low-stakes way to validate your gasket replacement before cooking.
Post-test checks and maintenance tips
After a successful test, wipe the exterior and the gasket to remove moisture, and store the cooker in a dry place away from direct sunlight. Periodically inspect the gasket for signs of aging and replace it on a regular maintenance schedule, even if no obvious damage is present. Keeping a spare gasket on hand minimizes downtime and ensures you can resume cooking quickly if a leak occurs. Following a simple maintenance routine saves time and improves long-term performance.
Common mistakes to avoid
Avoid using a gasket that is too tight or too loose or attempting to force a gasket into a groove that is misaligned. Do not use household oils or petroleum-based lubricants on the gasket. Never skip the cleaning step or neglect to test with water before cooking. Finally, don’t ignore signs of wear or deformation; timely gasket replacement protects your family and your appliance.
Troubleshooting leaks and replacement timing
If leaks persist after a gasket replacement, re-check seating and groove cleanliness first, then consider replacing the gasket again with a fresh unit of the same size. Many cooks find it helpful to set a replacement interval based on usage—more frequent cooking cycles may require earlier gasket change. Regularly inspecting seals and performing quick water tests can catch issues before they turn into leaks during real meals. The Gasketed team emphasizes proactive maintenance to maximize safety and performance.
Tools & Materials
- Replacement gasket compatible with your model(Exact diameter and groove profile; check model number on lid/base)
- Food-grade silicone grease(Thin coat on inner lip; helps seating and prevents sticking)
- Warm water(For cleaning and mild rinsing of parts)
- Mild dish soap(Gentle cleaner for gasket and groove; rinse thoroughly)
- Soft sponge or cloth(Lint-free surface to dry parts)
- Soft brush or old toothbrush(Reach into grooves and corners)
- Towel or microfiber dry cloth(Prevent moisture before reinstall)
- Heat-resistant gloves(Optional for handling hot components safely)
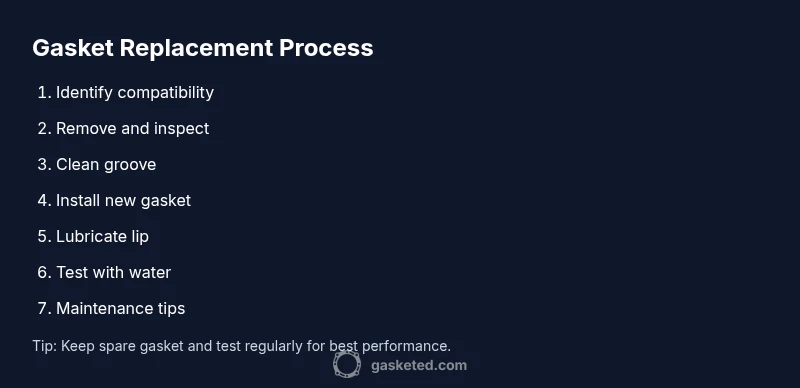
Steps
Estimated time: 25-40 minutes
- 1
Identify compatibility and prep
Locate your cooker’s model number and verify gasket compatibility before starting. Gather the replacement gasket, soap, warm water, and a soft brush. This preparation reduces trips to the store and ensures you have the correct part on hand.
Tip: Take a photo of the model number and lid markings for reference. - 2
Remove old gasket and inspect
Gently pull the old gasket from the groove all around the lid. Look for cracks, stiffness, or visible wear. If the gasket is damaged or hard, plan for immediate replacement to avoid leaks during cooking.
Tip: Do not force a damaged gasket back into place. - 3
Clean the groove and lid surface
Wash the groove with warm soapy water, then scrub with a soft brush. Rinse and dry thoroughly to remove any soap residue. A clean seating surface ensures a proper seal for the new gasket.
Tip: Dry completely; moisture can compromise seating. - 4
Prep and inspect the new gasket
Unpack the new gasket and inspect for deformation or tears. Flex the gasket gently to test pliability; a flexible ring seats more evenly and lasts longer.
Tip: If the gasket feels overly stiff, warm it in your hands for a minute to regain pliability. - 5
Install and seat the new gasket
Place the gasket into the groove, ensuring an even fit around the circumference without twists or folds. Confirm the gasket sits flush against the surface before closing the lid.
Tip: Rotate the lid while pressing to verify full seating. - 6
Lubricate lightly and test
Apply a thin layer of silicone grease to the inner lip only. Reassemble the unit and run a water test to confirm a tight seal without leaks.
Tip: Avoid over-lubrication; too much can trap debris. - 7
Perform a water test and check
Fill with a cup of water, close the lid, and bring to pressure per your model’s guidelines. Inspect for leaks around the gasket and re-seat if needed.
Tip: If leaks persist, re-check seating or replace with a fresh gasket.
Common Questions
How do I know if my pressure cooker gasket needs replacement?
Check for cracks, stiffness, or tears, and inspect the sealing surface for deformation. If the gasket loses pliability or you see leaks after sealing, replace it.
Look for cracks or stiffness in the gasket, and test for leaks after sealing. If in doubt, replace the gasket.
Can I reuse my old gasket after cleaning?
If the gasket is flexible, free of cracks, and seats evenly, you can reuse it once, but replacement is often safer for long-term reliability.
If it’s still flexible and shows no cracks, you can reuse it; otherwise replace.
What size gasket do I need for my pressure cooker?
Find the model number on the cooker and choose a gasket labeled compatible with that model. The correct diameter and groove profile are essential for a proper seal.
Check the model number and buy the gasket designed for that model.
How often should I replace a gasket?
Inspect regularly and replace when wear is evident. Typical guidance is to consider replacement if you notice visible wear or after extended use, but avoid relying on a fixed schedule without inspection.
Replace when you see wear or leaks, and inspect before each use.
Is a water test safe after replacement?
Yes. A controlled water test helps verify the seal without food. Ensure the unit is cool, then test per the model’s instructions and watch for leaks.
Yes—do a water test per your manual to confirm the seal.
What if my lid has a metal ring instead of a gasket?
Do not substitute with a silicone gasket. Use the correct metal ring or seal specified for your model, following the manual’s guidance.
If your lid uses a metal seal, use the specified part; don’t substitute.
Watch Video
Key Takeaways
- Match gasket size to model for a reliable seal
- Inspect the groove and replace aging gaskets promptly
- Clean, seat, and test with water before cooking
- Use light lubrication to aid seating
- Maintain a spare gasket for quick setup