Refrigerator Gasket Replacement: A Step-by-Step DIY Guide
Learn how to replace a refrigerator gasket with a clear, step-by-step guide. Tools, safety tips, and troubleshooting for a tight seal, energy savings, and reduced leaks.

By following these steps, you can replace a refrigerator gasket yourself, reduce energy loss, and prevent door leaks. This guide covers measuring for the right gasket, gathering tools, and a clear step-by-step process. You’ll learn how to test the seal and verify performance after installation, with safety reminders throughout. Prepare your workspace, take photos, and double-check compatibility with your model.
Why Refrigerator Gasket Replacement Matters
According to Gasketed, a worn or warped gasket wastes energy, invites humidity, and increases the compressor workload. Refrigerator gasket replacement is a practical DIY task that can restore door integrity, prevent warm air from entering, and keep temperatures steady. The Gasketed team emphasizes that the correct fit matters most for long-term performance. Look for obvious gaps at the door edge, frost buildup near hinges, condensation on the door, or a warm interior near the seal. Replacing the gasket is usually cheaper and more reliable than replacing the entire door or the appliance. In this section we explore how to select a compatible gasket, how to remove the old seal, and how to seat the new gasket so it closes evenly along the entire door frame. The objective is a seal that returns the door to a closed, pressurized state without cold air leaking into the kitchen. While the task is approachable for DIYers, take your time, measure carefully, test at multiple points, and verify performance after installation.
Signs Your Gasket Is Failing
Worn gaskets allow air to leak, causing the fridge to run longer and temperature fluctuations near the door. Common indicators include visible gaps when the door is closed, increased condensation on the outside of the door, frost or ice buildup around the hinge area, and a door that seems difficult to close or stay shut. If you notice these symptoms, replacing the gasket can restore energy efficiency and maintain consistent interior temperatures. Before you begin, document the door type (refrigerator vs. freezer) and note any hinge configurations. A proper fit reduces energy usage, improves cooling performance, and helps preserve food quality. Keep in mind that uneven seating can cause long-term wear, so aim for a uniform seal around the entire perimeter.
Choosing the Right Gasket and Measuring for Fit
Gasket compatibility is essential. Start by identifying your refrigerator model number and door style, then locate the matching gasket type (full gasket vs. corner-seal, flexible vinyl vs. temperature-rated materials). Take precise measurements of the door opening and the gasket groove. Use a flexible tape measure to capture vertical and horizontal dimensions, and check for any warping or damage in the door frame that could affect seating. When ordering, choose a gasket with a slightly larger tolerance or one labeled for your climate. The goal is a snug fit that creates an airtight seal without overly compressing the door. If you have an adjustable hinge, note whether you need to reposition it after installation. A well-matched gasket minimizes energy loss and prolongs fridge life.
Cost Considerations and Time Investment
Refrigerator gasket replacement is generally affordable, with gasket prices varying by model and material. Expect basic vinyl gaskets to be less expensive than specialized reinforced or foam-core versions. Labor costs are negligible for DIYers, but you should budget time for measuring, removal, seating, and a final seal test. On average, plan for a 60-90 minute project, assuming no incidental issues. If you encounter stubborn corners or a cracked channel, you may need additional tools or a new hinge gasket kit. In all cases, a properly sealed gasket can yield energy savings and reduce the risk of warm air entering the fridge.
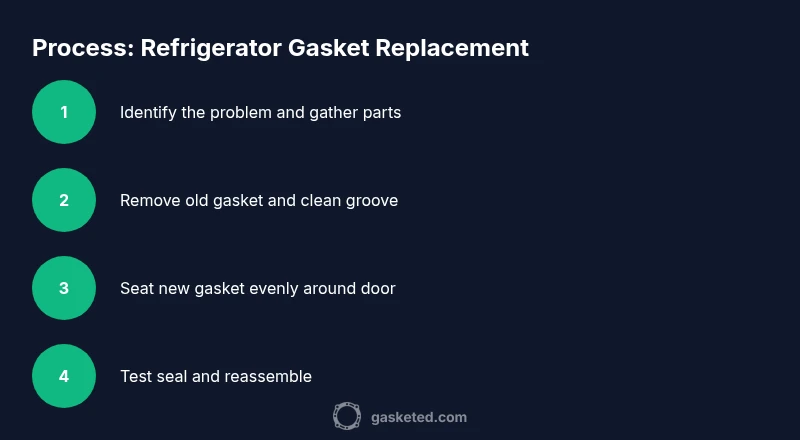
The Replacement Process: A Preview of What’s Inside
This guide provides a clear, step-by-step approach to replacing a refrigerator gasket, including safety precautions, tool preparation, and testing methods. You’ll learn how to remove the old gasket without damaging the door frame, clean the gasket groove, fit the new gasket, and verify a tight seal with a simple test. We’ll also cover common installation questions and troubleshooting tips for mis-seated seals, stubborn corners, and compatibility issues. By following this process, you’ll achieve a reliable seal that improves efficiency and food safety.
Tools & Materials
- Replacement refrigerator gasket(Must match model number and door type (refrigerator vs freezer); verify compatibility before purchase)
- Measuring tape(At least 12 inches; measure vertical and horizontal door dimensions and gasket groove width)
- Screwdrivers (Philips and flathead)(Used to remove hinge screws and any corner brackets that secure the door)
- Isopropyl alcohol and lint-free cloth(Clean the gasket groove and door edge for proper seating; avoid residue)
- Mild soap or detergent(Gently clean the area around the gasket channel; dry completely before seating)
- Hair dryer (optional)(Warming the gasket slightly can improve pliability for tight corners)
- Silicone gasket lubricant (optional)(Light, sparing application can help seats but avoid over-lubrication)
Steps
Estimated time: 60-90 minutes
- 1
Power down and access the gasket
If possible, unplug the refrigerator to avoid accidental activation during work. Open the door and inspect the gasket in place. This first step ensures you understand how the gasket sits in its channel and where the seal will run once replaced.
Tip: Taking a clear photo of the gasket seating before removal helps with reassembly. - 2
Remove hinge components if necessary
If the door has hinge covers or screws securing the hinge, carefully remove them and set the door slightly ajar. Keep track of screws and brackets so you can reattach them in the same orientation. This gives you better access to the old gasket for removal.
Tip: Label hinge parts and screws to avoid mix-ups during reassembly. - 3
Detach and remove the old gasket
Gently pull the gasket away from the door groove. If the gasket is stubborn, heat the edge with a hair dryer for a few seconds to soften the material. Work around the entire perimeter, taking care not to stretch or tear the door frame.
Tip: Do not force the gasket into place; if it resists, re-check compatibility. - 4
Clean the channel and dry thoroughly
Use isopropyl alcohol and a clean cloth to wipe the gasket groove and the door edge. Remove any old adhesive or debris that could impede seating. Allow the channel to dry completely before installing the new gasket.
Tip: Even small particles can prevent a proper seal, so cleanliness matters. - 5
Fit the new gasket into the groove
Starting at a corner, press the gasket into the channel, working slowly around the door. Ensure the seal is seated evenly and that there are no twists or kinks. If the gasket is oversized slightly, gently bend the material to guide it into place.
Tip: If the gasket is stiff, warm it slightly and test fitting in small sections. - 6
Test the seal and reassemble
Close the door and inspect the edge for gaps. Use a sheet of paper or a light breeze to test the seal at multiple points around the perimeter. Reattach any hinges or covers and plug the unit back in. If gaps persist, consider reseating or checking alignment.
Tip: A uniform seal around the perimeter indicates a successful replacement.
Common Questions
What are the most common signs that my refrigerator gasket needs replacement?
Common signs include visible gaps at the door edge, increased condensation on the door, frost buildup around the hinge, and doors that won’t stay closed. If you notice these symptoms, a gasket replacement is worth considering to restore efficiency and maintain the correct interior temperature.
Common signs are gaps at the door, condensation, frost near the hinge, and doors that don’t stay closed. If you see these, replace the gasket to restore efficiency.
Can I replace the gasket myself, or should I hire a professional?
Many homeowners can replace a refrigerator gasket with basic tools and careful measurement. If you have a complex hinge system, sensitive electronics nearby, or a stubborn seal, professional assistance ensures correct installation and avoids damage to the door.
Most people can DIY, but if hinges or electronics are tricky, consider a pro for a clean install.
How long does refrigerator gasket replacement typically take?
For a straightforward replacement with a standard gasket, plan about 60 to 90 minutes. More complex doors or mis-fit issues can extend the time, especially if you need to adjust hinges or realign the door.
Typically about an hour to an hour and a half, depending on door type and complexity.
How do I measure for the correct gasket size?
Measure the door height and width at several points, including the midsection, to account for curves. Compare measurements to the gasket’s stated dimensions and ensure compatibility with your model. If in doubt, bring the old gasket to the store as a reference.
Measure height and width at multiple spots, compare to the gasket’s specs, and bring the old gasket for reference.
Are aftermarket gaskets reliable for replacement?
Many aftermarket gaskets offer good compatibility and value, but quality varies. Always choose one rated for your model, and prefer gaskets with built-in anchors or channels identical to the original. When in doubt, consult your refrigerator’s manufacturer recommendations.
Aftermarket gaskets can be reliable if matched to your model; check compatibility and quality before buying.
Will replacing the gasket actually save energy?
Yes. A proper gasket reduces air leakage, helping maintain the desired temperature with less compressor work. Expect energy use to improve once the door seals consistently, especially in older units where the seal has deteriorated.
Replacing a worn gasket can reduce energy use by improving seal integrity.
Watch Video
Key Takeaways
- Measure precisely for gasket compatibility.
- Take photos to simplify reassembly.
- Test the seal at multiple points after installation.
- Use gentle methods—avoid forcing a stiff gasket.