Shower Door Bottom Seal: Fix and Replace Guide
Learn to diagnose, measure, replace, and maintain a shower door bottom seal with a clear, step-by-step guide. Save water and prevent leaks in your bathroom.

Fixing a shower door bottom seal stops leaks, preserves heat, and keeps water off the floor. You’ll identify the seal type, remove the worn gasket, clean the track, cut the new seal to length, and install it with the appropriate adhesive or fasteners. This 5-step plan covers common glass and acrylic doors and both replacement and maintenance scenarios.
What is a shower door bottom seal?
A shower door bottom seal is a flexible gasket that runs along the bottom edge of a glass or acrylic shower door. Its primary job is to channel water back into the shower enclosure and prevent it from seeping onto the bathroom floor. Over time, exposure to cleaners, mineral buildup, and repeated opening and closing can cause the seal to crack, peel, or lose compression. A worn seal not only leaks but can also allow drafts and squeaks as the door drags along the track. For many homes, replacing a damaged bottom seal is a quick, affordable fix that restores water-tight performance without replacing the entire door. In this guide, we’ll cover how to identify the correct seal type, measure accurately, and install a replacement that fits snugly. The goal is a secure, leak-free shower with minimal maintenance.
Types of seals and their applications
Shower door bottom seals come in several profiles. Vinyl bulbs are common for standard glass doors and provide a forgiving seal that compresses against the door. U-channel seals slide into a track and hold a flexible strip in place, which is good for uneven tracks. Sweep-style seals act like a tiny weather strip and can seal rough thresholds. Some doors use a simple flat gasket you press into place, which is easier to install but less durable in heavy-use showers. When choosing, consider door type (glass vs acrylic), track width, and whether you prefer a trim that sits on top of the sill or a seal that nests inside the track. For DIY repairs, stock a few common thicknesses and widths to verify compatibility before cutting. Always follow the manufacturer’s guidelines for your door model to avoid incorrect sizes or incompatible materials.
Signs of wear and failure
Watch for water pooling along the door base, a persistent draft, or a visible crack or deformation in the seal. Leaks that appear after a shower or after cleaning products are common indicators the seal has lost elasticity. Mildew and mold can also form where moisture remains; a degraded seal makes cleaning harder because water lingers at the track. If you notice gaps between the seal and glass, or you can flex the seal with slight pressure, it’s time to replace. Replacing worn seals not only reduces leaks but also protects adjacent metal tracks from corrosion and helps keep the door aligned for smoother operation.
How to measure and select the correct seal
Start by removing the existing seal and measuring its thickness and width at multiple points along the door to account for uneven wear. Check the track type: some doors use a U-channel that slides over a flexible strip, while others rely on a vinyl bulb seated in a groove. Match the seal profile to the track and the door thickness. If you’re between sizes, choose the larger option and trim carefully. Don’t assume a universal seal will fit; compatibility with track width, door thickness, and frame style is essential for a proper seal and long-term durability. When in doubt, bring a sample or measurements to a hardware store or check the door manufacturer’s guidance.
Preparing the shower and safety basics
Before touching any seal, turn off the water supply to the shower and lay down a towel to catch drips. Gather your tools and seal samples, and put a protected mat on the floor to prevent slips. Clean the door edges and track with a mild cleaner and a soft cloth to remove mineral buildup, soap scum, and old adhesive residue. A clean surface helps the new seal seat evenly and improves adhesion. If glazing or metal tracks show rust, address that separately with a metal polish or corrosion inhibitor per product directions. Finally, lay out masking tape to protect adjacent surfaces during installation.
Removing the old seal and cleaning the track
Carefully pry away or unclip the old seal without forcing it, as rigid seals can crack the glass if bent. Once removed, use a plastic scraper or an old card to lift any stuck residue from the track. Clean the groove or channel with a mild cleaner, rinse, and dry thoroughly. If any rust or corrosion appears on the track, treat it after the seal replacement. A clean, dry track ensures the new seal seats properly and lasts longer.
Installing the new seal: a practical guide
Position the new seal according to the track profile and door orientation. For u-channel types, slide the seal into the channel or snap the bulb into place with even pressure along the length. If you’re using an adhesive-backed seal, apply the adhesive evenly and press the seal into the track, ensuring no gaps. For flush or clipped seals, align and secure with the provided hardware. Trim excess length with sharp scissors or a utility knife, making sure the cut is square for a clean appearance and optimal fit. Avoid over-tightening any screws or clips, which can distort the door glass.
Finishing touches and testing the seal
After installation, run warm water along the door to verify the seal channels water back into the shower. Check for any gaps at the corners and along the sides, and re-tighten or reseat the seal as needed. If sealant is used, allow it to cure fully according to the manufacturer’s instructions before heavy use. Clean away any excess adhesive from the glass surface with a soft cloth. Finally, inspect periodically for wear and replace promptly to maintain a leak-free shower.
Maintenance tips to extend life
Regular cleaning of the seal and track reduces mineral buildup and preserves elasticity. Wipe down the seal after each shower to remove water and soap residue. Inspect for signs of cracking or compression loss at least quarterly and trim or replace as needed. Use a mild, non-abrasive cleaner to avoid degrading the material, and avoid harsh solvents that can dry out rubber gaskets. If you have hard water, consider a light mineral remover to prevent mineral deposits from hardening on the seal.
Tools & Materials
- Replacement shower door bottom seal (correct profile)(Buy based on door type and track profile; bring measurements if unsure)
- Measuring tape(To verify seal length and door thickness)
- Utility knife or sharp scissors(For trimming the seal to length)
- Pliers or gloves(Grip and handling of metal components safely)
- Masking tape(Protects adjacent surfaces during installation)
- Mild cleaner and microfiber cloth(Clean tracks and glass before installation)
- Silicone sealant (if required by seal type)(Use only if recommended by seal manufacturer)
- Caulk gun(If sealant is used, appropriate for the product)
- Rubbing alcohol or mineral spirits(For removing adhesive residue)
- Safety glasses(Eye protection during cutting and scraping)
- Soft cloths and a small brush(Detail cleaning of track corners)
- Step ladder or stable stool(Accessing higher door edges safely)
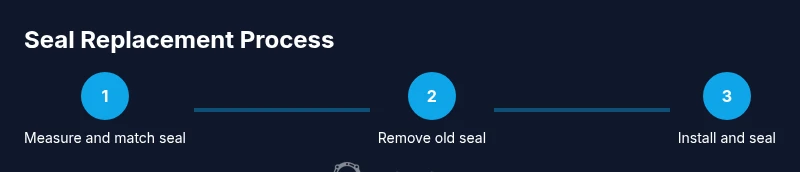
Steps
Estimated time: 30-60 minutes
- 1
Assess and measure
Take precise measurements of the door thickness and track width. Compare with seal profiles and select the correct type. If you’re unsure, choose a slightly larger size to trim later.
Tip: Always measure at multiple points to catch any irregularities. - 2
Prepare the work area
Clear the area, wipe surfaces clean, and lay down protective material. Turn off water and ensure the shower space is dry before starting.
Tip: Keep a bucket handy for rinsing and avoid slippery floors. - 3
Remove old seal
Gently pry away the old gasket without scratching glass. Remove any adhesive residue and clean the groove.
Tip: If the seal resists, gently cut at gaps to release sections—do not force. - 4
Trim and fit the new seal
Position the new seal and trim to length using a straight edge. Dry-fit first to confirm fit, then trim to final length.
Tip: Cut slowly and squarely; a beveled cut can cause gaps. - 5
Install the seal
Slide or snap the seal into the track as required by its profile. For adhesive types, press firmly along the full length.
Tip: Make sure corners align and there are no buckles or folds. - 6
Sealant and cure (if required)
If your seal uses silicone, apply a thin bead where the seal meets glass and tool smooth. Allow proper cure time before use.
Tip: Wipe excess sealant promptly to prevent staining glass. - 7
Test and adjust
Run warm water along the door and observe leakage. Re-seat or reseal any problem areas.
Tip: Check after 24 hours for any settling or shrinkage.
Common Questions
What is the best seal type for a frameless shower door?
For frameless doors, vinyl bulb or U-channel seals are common choices. The right option depends on track width and door thickness. Always match profile to your door’s design.
For frameless doors, vinyl bulb or U-channel seals are typically best. Pick the one that fits your door’s track width and thickness.
Can I replace the seal myself or should I hire a professional?
Many homeowners can handle a seal replacement with the right tools and the correct seal type. If the door is unusual, damaged glass, or the track is corroded, consider a professional.
Most DIYers can replace the seal, but call a pro if the door setup is unusual or corrosion is present.
How long does installation take?
Typical replacements take under an hour for an average door, with longer times if you’re sealing and curing sealant. Plan for a little extra time if you’re new to the process.
Most installations take under an hour, with a bit more time if you’re applying sealant that needs curing.
What if the door still leaks after replacement?
If leaks persist, recheck seal alignment, inspect for gaps at corners, and verify the seal type matches the track. There may be multiple problems, including track warping or door misalignment.
If leaks persist, recheck alignment and corners, and make sure the seal matches the track. There could be multiple issues.
How should I maintain the seal long-term?
Wipe the seal after showers, clean the track regularly, and inspect for wear every few months. Replace worn seals promptly to prevent recurrent leaks.
Keep the seal clean, inspect it periodically, and replace worn seals as needed to prevent leaks.
Can I reuse the existing track with a new seal?
Often you can reuse the track if it’s clean and undamaged, but some seal types require a fresh track or clips. Check manufacturer guidance for compatibility.
Often you can reuse the track if it’s in good shape, but always check compatibility with the new seal.
Watch Video
Key Takeaways
- Identify the correct seal profile before purchasing.
- Measure door thickness and track width accurately.
- Clean tracks thoroughly for a long-lasting seal.
- Test the seal after installation and perform maintenance regularly.