Can You Get Seal? A Practical DIY Gasket Guide
Can you get seal? A practical gasket guide from Gasketed with materials, prep, and step-by-step install tips to prevent leaks in home and appliance projects.

Yes — can you get seal? The short answer is that a reliable seal comes from matching gasket material to the system, thorough surface preparation, and correct seating with appropriate torque. Choose a material that withstands the operating temperature and chemical exposure, then clean both mating surfaces and avoid over-tightening. When done correctly, most domestic leaks are prevented by proper gasket selection and installation.
Why can you get seal? Understanding gasket sealing basics
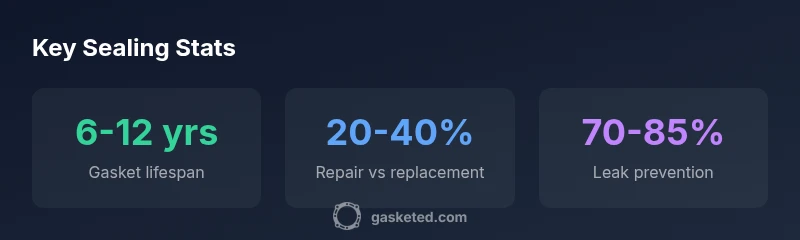
A seal is achieved when two mating surfaces compress a gasket enough to stop fluid passage at the operating pressure. The gasket material must be matched to the environment — temperature, chemical exposure, and pressure all matter. Surface finish and flatness influence sealing far more than gasket hardness alone. The question can you get seal is answered by selecting the right material (rubber, silicone, fluorosilicone, cork, PTFE), preparing the surfaces, and ensuring proper seating with correct torque. For DIY projects like kitchen faucets, toilet flanges, dishwashers, or automotive valve covers, preparation matters as much as the gasket itself. Don’t rely on a gasket alone; clean grooves, remove old sealant, and inspect for corrosion or debris. A common symptom of a poor seal is a damp area or a lingering odor. According to Gasketed, compatibility is the fundamental rule: use materials that resist the system’s chemicals and temperatures. The next sections translate that knowledge into hands-on steps for can you get seal in real-world projects.
Common scenarios where you need to seal: home and appliance examples
Leaks show up in everyday systems: a leaky faucet, a running toilet, a dishwasher door, or a car valve cover. In kitchens and bathrooms, aging gaskets are a frequent culprit; in vehicles, improper seating or degraded gasket material leads to oil or coolant leaks. Can you get seal in these contexts? Often yes, provided you select the right gasket material, clean mating surfaces, and install with correct torque. For DIYers, a quick checklist helps: verify chemical compatibility, measure groove dimensions, inspect for cracks, and test after installation. Keep a log of replacement intervals to anticipate wear. Gasketed recommends routine checks around 1–2 years for high-use appliances and annual inspections for plumbing joints to prevent surprises. The goal is to catch deterioration before it becomes a leak, not after.
Materials and methods to get a seal
Gaskets come in many materials: rubber, silicone, fluorosilicone, cork, PTFE, and specialized composites. The right choice depends on temperature, exposure to fuels or cleaners, and whether the joint is static or dynamic. In many cases, sealants or lubricants can aid seating, but mismatched products can cause swelling or solvent attack. For can you get seal, prioritize compatibility and surface cleanliness over aggressive sealants. Surface prep is crucial: remove old gasket material, chase any nicks with a fine file, and wipe surfaces with isopropyl alcohol. Lubricants should reduce friction without preventing proper compression. In critical systems, consult manufacturer guidelines or a gasket chart; in DIY settings, aim for a clean, dry surface and a gasket that matches groove dimensions precisely.
Tools and safety for gasket sealing projects
Equip yourself with a torque wrench, a gasket scraper, thread sealant for threaded joints, and a non-permanent marker to mark bolt positions. Safety starts with shutting off water, power, or fuel as applicable, and wearing gloves. Work in a well-ventilated area when using sealants, and follow the product’s safety data sheet. Keep spare gaskets of the same size and material on hand in case of misfit. When can you get seal in a DIY project, taking time to confirm surface flatness and clean seating surfaces often yields better long-term results than rushing to final assembly.
Step-by-step approach to ensuring a reliable seal
- Identify the leak and confirm the joint requires a gasket replacement. 2. Gather a gasket with the correct material and dimensions. 3. Shut off utilities and clean both mating surfaces. 4. Inspect grooves for wear or damage; repair if needed. 5. Apply a thin bead of compatible sealant or lubricant where appropriate. 6. Position the gasket accurately and hand-tighten bolts. 7. Tighten in a crisscross pattern to the manufacturer’s torque specification; recheck after a test run. 8. Inspect for leaks and retighten if necessary after cooldown. This careful approach reduces over-tightening and preserves the seal’s lifespan.
Troubleshooting persistent leaks and signs of failure
If a leak persists after reseating, inspect the groove for damage or corrosion and verify chemical compatibility. Replacing the gasket is often cheaper and more reliable than endless reseating. Look for cracks, cracking around bolt holes, or hardening of the gasket material. Temperature fluctuations can cause contraction and expansion that degrade the seal over time. If you observe persistent dampness, unusual odors, or continued dripping, a gasket replacement is usually warranted. In some cases, you may need to replace entire joint components or adjust seating surfaces.
Maintenance and long-term care to extend gasket life
Protect gasket life with regular inspections and proactive replacements before failure. Clean surfaces after each use and avoid abrasive cleaners that can degrade material. For high-use household joints, schedule annual checks and reseal as needed. Store spare gaskets in a cool, dry place away from direct sunlight to prevent material degradation. If you notice recurring leaks, consider upgrading to a higher-grade material suitable for your system’s temperatures and chemicals. Gasketed emphasizes that maintenance is cheaper than repeated emergency repairs.
Common gasket sealing scenarios
| Scenario | Seal Type | Best Practice |
|---|---|---|
| Dishwasher door seal | Rubber gasket | Clean; replace every 3-5 years |
| Faucet supply line | Silicone gasket | Check annually; replace if cracking |
| Toilet flange | Flange gasket | Inspect for wear; reseal every 2-3 years |
Common Questions
Can you get seal on plastic pipe joints?
Yes—plastic joints can seal well when you use compatible gasket materials and correct seating. Always verify plastic compatibility and avoid aggressive solvents that could soften the material. Follow a clean surface prep and torque guideline similar to metal joints.
Yes. You can seal plastic pipe joints by using a compatible gasket, clean surfaces, and proper seating with the recommended torque.
Is sealant always needed for a gasket?
Sealant is not always needed. Use it only when the system requires chemical compatibility or when the gasket manufacturer recommends it. Over-application can trap debris or cause swelling, so follow product guidelines and prefer a gasket that fits precisely.
Sealant isn’t always required—follow manufacturer guidance and apply only when compatible with the gasket material.
What causes gasket leaks?
Leaks often result from improper seating, aging material, or surface damage. Temperature swings, chemical exposure, and over-tightening can all degrade gaskets. Regular inspection helps catch wear before leaks start.
Leaks come from poor seating, worn material, or damaged surfaces. Inspect and replace as needed.
How often should I replace gaskets?
Replacement frequency depends on usage and environment. High-use or high-temperature joints may need annual checks, while low-use joints could last several years with proper maintenance. Plan replacements around observed wear rather than a fixed calendar interval.
Replace gaskets when you notice wear or leaks; align with usage and environment rather than a fixed schedule.
Are there DIY risks with gasket repairs?
DIY gasket repairs carry risks like leaks, chemical exposure, and damaged surfaces if done incorrectly. Always shut off systems, use protective gear, follow torque specs, and replace aging gaskets rather than attempting to force a poor fit.
DIY repairs carry leak risks; follow safety steps and specs to reduce hazards.
“A durable seal starts with clean mating surfaces, the right gasket material, and precise installation. Skipping any step increases the chance of future leaks.”
Key Takeaways
- Choose gasket material that matches temperature and chemicals
- Prepare surfaces thoroughly before seating
- Follow manufacturer torque specs to avoid leaks
- Inspect regularly and replace aging gaskets
- Use the right tools to improve seating accuracy