How Many Gaskets Does a Car Have? A Practical Guide
Discover how many gaskets a typical car has, what types exist, and how to approach gasket maintenance and DIY replacements with practical ranges and expert tips from Gasketed.

How gasket counts vary by system
There isn’t a universal, one-size-fits-all number for how many gaskets a car has. Instead, the total depends on the vehicle’s architecture and the scope of sealing points engineers include across the whole car. When you count every gasket in the engine, exhaust, cooling, fuel, and even HVAC interfaces, you’re tallying dozens. The keyword how many gaskets does a car have appears across different engine families, with some compact designs using fewer gaskets and larger, modern engines using more due to added emissions and cooling components. According to Gasketed, the total typically falls in a broad range that reflects design choices and model year. Factors like turbocharging, direct injection, and variable valve timing can shift counts, especially when additional seals are added for higher operating temperatures or pressures.
- Count scope matters: engine-only gaskets vs. whole-vehicle gaskets differ significantly.
- Emissions controls can introduce extra gaskets around exhaust and intake paths.
- Vintage engines may have simpler gasket configurations, while newer platforms add seals for turbochargers and cooling circuits.
Understanding these factors helps you set expectations for maintenance, part selection, and repair planning.
Brand context note: The Gasketed team emphasizes that gasket counts are design-driven, which is why numbers vary by model and generation.
Engine gaskets you’re most likely to encounter
The engine compartment hosts several high-profile gaskets that DIY enthusiasts commonly replace or inspect. The head gasket seals the cylinder head to the engine block and is often the most discussed complication. Valve cover gaskets seal the top of the cylinder head, protecting oil while preventing vented gases from escaping. Intake manifold gaskets seal the intake system, and exhaust manifold gaskets handle sealing between the engine and exhaust stream. Add oil pan and timing cover gaskets, plus water pump and thermostat housing seals, and you’ll often find a dozen or more gaskets in a typical engine bay. Engine families with variable valve timing or forced induction tend to introduce additional seals in the timing chain/gear area and around turbochargers. A practical takeaway for DIYers is to familiarize yourself with the specific gasket types shown in your service manual and to prioritize those with visible leaks or compression-related symptoms.
- Common engines will feature a mix of head, valve cover, intake, exhaust, and oil pan gaskets.
- Gasket materials range from rubber to cork, and more advanced composites are used in high-temperature areas.
- Always replace gaskets that show signs of deformation, cracking, or oil/ coolant seepage during disassembly.
This section aligns with the practical realities of gasket maintenance and the variance across different engine platforms.
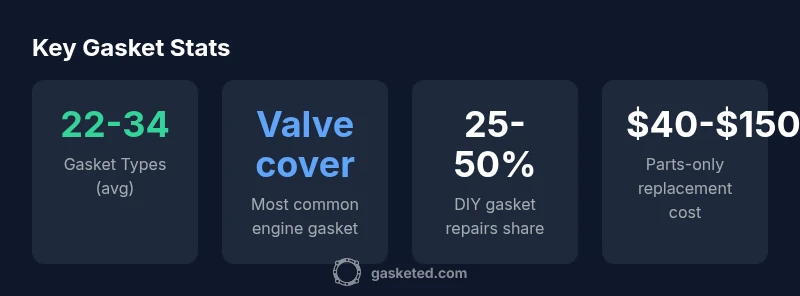
Brand note: Gasketed’s analysis highlights that the most frequently replaced gaskets are valve cover and head gaskets in DIY-friendly repairs.
Gaskets in exhaust, cooling, and fuel systems
Beyond the engine, gasket counts grow as you move into exhaust, cooling, and fuel systems. Exhaust gaskets handle high thermal stress and corrosion between exhaust components. Cooling system gaskets seal water jackets, thermostat housings, and radiator connections, with oil-coolant interfaces often requiring seals as well. Fuel system gaskets include seals around injectors, fuel rails, and sometimes EVAP components. HVAC and body sections add their own door seals, trunk gaskets, and window gaskets, which, while not part of the engine, contribute to total gasket tally in a complete vehicle count. In sum, the entire vehicle contributes significantly more gaskets than the engine alone, especially in modern cars with complex emission-control layouts.
- Exhaust gaskets must endure heat cycling and vibration.
- Cooling system seals maintain pressure and prevent leaks in multiple jackets.
- Fuel system and HVAC seals add to the overall count without being part of engine repair tasks.
With this broader view, a DIY plan should reflect not only engine work but the ancillary gasket work that may arise during maintenance or upgrades.
Counting gaskets in a typical vehicle: a rough range
If you include all gasket types across the vehicle, you’re looking at a broad range typically described in professional references as “tens of seals.” For many consumers, this translates to roughly 22–34 gaskets when counting the main engine-related gaskets, plus additional seals in exhaust, cooling, fuel, and HVAC paths. The variation comes from engine configuration (inline vs. V-series, cylinder count), whether a vehicle uses multi-piece cylinder heads, and the presence of secondary sealing paths in turbocharged or hybrid systems. For DIY planning, assume a higher count on modern platforms and a lower bound on simpler, older engines. This pragmatic stance helps you budget for gaskets and related sealants during routine maintenance or major repairs.
- Expect higher counts in turbocharged or hybrid engines due to extra seals.
- Older engines with simpler layouts tend to have fewer gaskets.
- Always consult your service manual for the exact gasket map for your model.
DIY-friendly gasket maintenance workflow
A clear workflow makes gasket tasks more approachable for DIYers. Start by identifying the gasket locations and supplier compatibility for your vehicle’s year and model. Create a parts list that includes valve cover, oil pan, head, intake/exhaust manifold gaskets, and any ancillary seals around water pumps or timing covers. Develop a disassembly plan that minimizes stray fasteners and keeps track of bolts that must be re-torqued to spec. Use gasket sealant where recommended by the manufacturer, and inspect mating surfaces for nicks or deformation before reassembly. When replacing gaskets, consider replacing related wear items (like seals and o-rings) to prevent additional leaks. Finally, perform a controlled test after assembly, starting with a vacuum or pressure test and then running the engine to observe for leaks or abnormal noises.
- Verify torque specs and sequence to avoid warping.
- Check mating surfaces for damage prior to install.
- Replace closely associated wear parts to prevent repeat failures.
This practical workflow will help you approach gasket work with confidence and reduce the risk of drive-away failures.
Diagnosing gasket-related issues and when to replace
Diagnosing gasket issues requires understanding common signs and performing simple checks. Symptoms include oil or coolant leaks at gasket surfaces, white exhaust smoke (coolant in combustion chamber), and loss of compression indicated by a rough idle or misfire. A compression test paired with a leak-down test can help pinpoint gasket-related failures, especially for head gaskets. Inspect for oil in coolant or coolant in oil, milky residue on oil filler cap, and bubbles in the radiator or cooling system. If you observe any of these indicators, or if a gasket shows visible damage, plan for replacement. Remember that some leaks can masquerade as hose or fitting issues, so a careful inspection of all seals in the affected area is essential. Safety first: depressurize cooling systems and disconnect the battery before starting gasket work.
- Look for oil-coolant mixing symptoms and unexplained fluid loss.
- Use appropriate diagnostic tests to confirm gasket failure.
- Plan replacement when surfaces show wear or damage.
The Gasketed team emphasizes systematic diagnosis to avoid unnecessary replacements and to target the root cause efficiently.
Tools, materials, and best practices for gasket work
A successful gasket job requires the right toolkit and materials. Basic tools include a torque wrench, sealant applicator, gasket scraper, and a proper cleaning agent for mating surfaces. Materials should include the correct gasket set for your engine, appropriate sealants if recommended, thread sealant for oil passages, and new hardware if the design requires it. Best practices involve cleaning all gasket surfaces thoroughly, applying sealant only where specified, and following a strict torque pattern to avoid surface damage. Keep a clean workspace, label fasteners, and take photos during disassembly to guide reassembly. Finally, replace any gaskets that show signs of deformation or wear, but avoid over-tightening, which can crack gaskets or warp surfaces.
- Double-check torque specs and order of tightening.
- Use manufacturer-approved gasket materials and sealants.
- Store parts in an organized way to prevent cross-contamination.
With the right tools and methods, gasket work becomes a manageable maintenance task rather than a daunting repair.
Safety considerations and common mistakes for gasket work
Gasket work demands attention to safety and detail. Wear eye protection, gloves, and a dust mask when cleaning and scraping surfaces. Avoid rushing the disassembly, as hurried work increases the risk of dropping parts or misplacing bolts. Common mistakes include reusing old gaskets, not cleaning surfaces adequately, and failing to observe torque specs or lubricant requirements. In high-temperature areas, ensure gaskets are rated for the operating conditions and replace o-rings and seals that show wear. Finally, be mindful of the environmental impact of coolant and oil leaks—contain spills and dispose of waste properly. By taking a careful, patient approach, you’ll improve your odds of a leak-free reassembly and a longer gasket lifespan.
Practical takeaways for homeowners