Gasket Count in Floating Head Exchangers
Learn how many gaskets are typically used in gasketed floating head exchangers, with practical ranges, design factors, and maintenance tips for DIY enthusiasts and homeowners.

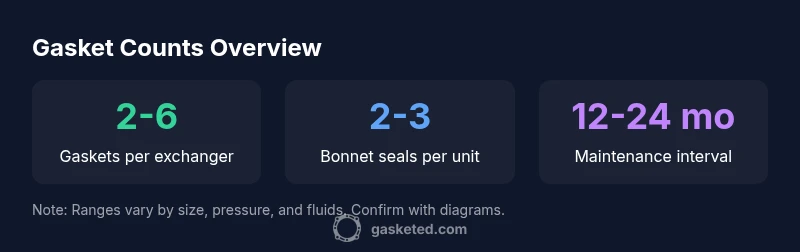
Typically, a gasketed floating head exchanger uses two primary gaskets per unit, with additional seals possible at the shell-side bonnet and the floating head bonnet. In practice, gasket counts commonly range from 2 to 6 gaskets per exchanger, depending on bonnet design, number of seals, and service conditions. Always reference manufacturer diagrams for your specific model.
Understanding the question: how many gaskets used in floating head exchanger
The phrase how many gaskets used in floating head exchanger often seems like a single number, but the reality is more nuanced. In gasketed floating head exchangers, the gasket count depends on the bonnet design, the number of seals required on the shell side, and the service conditions. For DIYers and homeowners, interpreting mechanical drawings and maintenance manuals is essential to determine the exact count for your unit. This section sets up the factors that drive gasket counts and frames how to read the diagrams you’ll encounter in service documentation.
Anatomy of a gasketed floating head exchanger
A floating head exchanger consists of a shell, a fixed rear head, and a floating front head that slides along the tubes. Gaskets are used at the interface between the floating head and shell, between the rear head and shell, and often at bonnet seals that allow the floating head to expand and contract with temperature changes. The number of gaskets varies with the number of bonnets, the complexity of the seal arrangement, and whether retrofit kits add extra sealing options. Understanding this anatomy helps you anticipate how many gaskets you may encounter when performing maintenance or a replacement.
Typical gasket counts by bonnet design
Different designs require different sealing schemes. Simple, small units with a single bonnet often use 2–3 gaskets (one on the floating head and one on the rear head, plus an additional seal where required). Larger or higher-pressure units with dual or multiple bonnets can use 4–6 gaskets or more, as each bonnet seam or stage adds its own gasket. The exact count should always be confirmed by the unit’s stamped diagrams or the manufacturer’s service manual, since configuration changes can occur across model lines and service histories.
Inspection and counting: practical steps
To count gaskets in an existing floating head exchanger, begin with the inspection plan: isolate the unit, depressurize, and drain fluids per lockout/tagout procedures. Remove access covers according to the drawings, and catalog each gasket by location (floating head interface, bonnet seals, rear head interface). Record thickness, material, and any wear. Taking photos at each step helps confirm the exact count when you reassemble. If any gasket shows cracking, hardening, or deformation, plan replacement rather than reusing.
Material choices and compatibility
Gasket materials must match the service chemistry, temperature range, and pressure class. Common materials include fluoropolymers, elastomers, or reinforced composites. When counting gaskets, consider whether you’re using standard replacement kits or specialized, high-temperature designs. Material compatibility can influence not only count but the longevity of the seal and the risk of leaks. Always verify compatibility in the service manual and with the gasket supplier recommendations.
Practical steps for counting and replacement
Create a parts list before disassembly, labeling each gasket by its location. Use a clean, lint-free work area to prevent debris from entering the tube side. When replacing, install gaskets in the correct orientation and ensure uniform compression around the seal interfaces. If you’re unsure about the exact count for a retrofit, contact the OEM or a qualified service technician. Keeping spare gaskets of the correct sizes simplifies future maintenance and reduces downtime.
Safety considerations during gasket work
Handling gaskets in heat exchangers involves energy and chemical risks. Ensure equipment is fully depressurized and cooled before opening access ports. Wear appropriate PPE (gloves, eye protection, flame-resistant clothing as needed) and follow your site’s safety protocols. If the system contained hazardous fluids, arrange for proper containment and cleanup. These precautions help ensure a safe, efficient gasket maintenance process.
dataTableCaptionOverrideNameOverridePlaceholderText???":null
dataTableCaptionOverride":null},
dataTable
headersSample: placeholder
rowsSample: placeholder
Gasket count ranges by bonnet design
| Design Variant | Estimated Gasket Count (per exchanger) | Notes |
|---|---|---|
| Single-bonnet gasketed front, fixed rear head | 2-3 | Common for smaller units |
| Dual-bonnet with floating front head | 4-6 | Higher pressure/Large units |
| Multi-bonnet design | 5-8 | Specialized configurations |
| Removable gasket kit designs | 3-4 | Maintenance-friendly options |
Common Questions
How many gaskets are typically used in a gasketed floating head exchanger?
Most gasketed floating head exchangers use two primary gaskets, with additional seals possible at bonnet interfaces or shell-side seals depending on the design. The exact count is defined in the unit’s diagrams.
Usually two main gaskets, with extras in more complex designs.
Why does gasket count vary between designs?
Design differences in bonnet arrangements, number of seals, and service requirements drive gasket count variations. Always refer to the specific unit’s documentation.
It varies because designs differ; check your diagrams.
What maintenance steps affect gasket counts?
Regular inspection, cleaning, and timely gasket replacement can change the effective seal configuration and count you observe during service.
Maintenance can change what you find during inspection.
What signs indicate gasket leakage or failure?
Look for external leaks at bonnet seams, pressure drops, and unusual noises. Worn or damaged gaskets should be replaced to restore integrity.
Watch for leaks and odd noises; replace worn gaskets.
Can gasket counts be changed during refurbishment?
Yes. During refurbishment, gaskets may be replaced with different sizes or numbers if required, aligning with fluids and operating conditions.
Yes, counts can change with refurbishment.
Are there safety considerations when handling gaskets in FHEs?
Always depressurize and follow lockout/tagout procedures. PPE is essential, and some gaskets may involve hot surfaces or hazardous fluids.
Depressurize, use PPE, follow safety protocols.
“The correct gasket configuration depends on bonnet design and service conditions; selecting the right count minimizes leaks and downtime.”
Key Takeaways
- Check manufacturer diagrams for your specific model
- Expect a gasket count range of 2-6, depending on bonnet design
- Inspect gaskets during routine maintenance and replace worn parts
- Match gasket material to service conditions and fluids
- Keep a spare gasket kit and proper tools for quick maintenance