How to Check Gasket Failure: A DIY Guide
Learn practical, step-by-step methods to check gasket failure at home. This guide covers common signs, safe testing techniques, and guidance on when replacement is the best option for DIY homeowners.

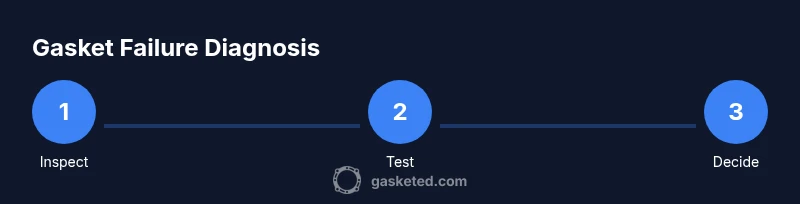
Goal: Confirm gasket failure using safe, at-home checks. Look for visible leaks, dampness, cracks, or deformation around the gasket. Check seal integrity by applying gentle pressure and observing for ongoing seepage, listening for hissing, and noting pressure loss. This quick answer sets expectations and prerequisites for the full guide today.
Understanding gasket failure and why it matters
Gaskets are essential seals that prevent leaks between mating surfaces in appliances, engines, plumbing, and equipment. When a gasket fails, fluids or gases escape, which can cause water damage, decreased performance, unusual odors, or overheating. Understanding typical failure modes—aging materials, improper installation, chemical attack, and thermal cycling—helps you spot problems early. For DIY enthusiasts, a methodical approach that combines visual checks with safe, simple tests often saves time and money, avoiding unnecessary part replacements.
Early detection matters because minor leaks can cascade into bigger problems if left unchecked. A well-informed inspection routine keeps you ahead of costly repairs and protects your home and belongings.
Signs of gasket failure by system
Gasket failure exhibits different signs depending on the system. In plumbing, look for damp patches, musty smells, or persistent wet spots near joints. In automotive applications, you may notice white smoke from the exhaust, coolant loss, or milky oil. In appliances, uneven operation, reduced sealing, or water leaks around seams are common indicators. Gasket degradation often presents as soft, hardened, cracked, or deformed edges that no longer sit flush. Documenting consistent signs across occasions helps differentiate a one-off issue from a recurring gasket problem.
Visual inspection checklist
A thorough visual check is your first line of defense. Look for:
- Cracks, splits, or gouges along gasket lines
- Deformation, flattening, or compressed areas
- Residue, corrosion, or mineral buildup that indicates leaks
- Misalignment or gaps between mating surfaces
- Discoloration or swelling from chemical exposure
Use a bright light and a clean cloth to wipe away grime, then recheck for any fresh moisture or staining after gentle contact. Mark areas of concern for later testing.
Non-destructive testing basics
Non-destructive tests help you assess seal integrity without ripping apart systems. Common at-home approaches include:
- Visual verification after depressurizing and re-seating the joint
- Gentle pressure testing with the system at a safe, low level
- Dye or UV tracer tests for leaks (where appropriate and safe)
Always follow safety guidelines and manufacturer recommendations. If a gasket is in a critical system (engine cooling, gas lines, high-pressure plumbing), avoid risky tests and seek professional guidance.
Pressure testing basics
Pressure testing involves temporarily increasing system pressure to see if the gasket holds. Prepare by isolating the area, wiring off hazards, and reading the system's safety manual. Use a pressure gauge to monitor the rise and hold, and watch for steady pressure without drop. If pressure falls and no external leak is visible, inspect joints and seals closely while maintaining safety distances. Do not exceed recommended pressure limits.
Interpreting results and next steps
If you observe leaks, seepage, or pressure loss, the gasket is failing or compromised. Minor weeping that stabilizes after reseating may still require replacement if it recurs. For visible damage or repeated failures, plan replacement rather than continued resealing. Document observations and compare them against service manuals or gasket material specifications. When in doubt, err on the side of replacing damaged gaskets to avoid hidden issues.
Maintenance to prevent gasket failure
Adopt a routine that extends gasket life: inspect seals during seasonal maintenance, replace gaskets that show wear, ensure correct torque on fasteners, use compatible gasket materials, and avoid chemical exposures that degrade seals. Keeping mating surfaces clean and dry reduces premature wear and helps maintain a reliable seal over time.
Quick-reference troubleshooting cheat sheet
- Inspect for cracks, deformation, and residue around gasket seams
- Check for moisture and wet spots after system cycles
- Perform a safe pressure hold test within manufacturer guidelines
- If uncertainty remains, replace the gasket or consult a professional
Tools & Materials
- Flashlight or headlamp(Bright, clean light for visual inspection)
- Clean cloths or rags(Wipe surfaces to observe leaks clearly)
- Mirror on a stick or small handheld mirror(Aid visibility in tight joints)
- Gloves and safety glasses(Personal protection when handling pressurized components)
- Basic leak-detection fluid or dye (optional)(Helps identify tiny leaks)
- Digital pressure gauge or manometer (if available)(For simple pressure hold tests)
- Marker or tape(Mark areas of concern for later testing)
- Electrical insulation tools (if electrical components involved)(Only when safe and necessary)
- Safety gloves for high-temperature areas (if applicable)(Use where temperatures are elevated)
Steps
Estimated time: 30-60 minutes
- 1
Perform visual inspection
Carefully inspect the gasket and surrounding surfaces for cracks, tears, deformation, or residue. Note any misalignment or gaps that could allow leaks. This step sets the baseline for all following tests.
Tip: Use full illumination and a mirror to see hard-to-reach areas. - 2
Document system baseline
Record system type, gasket material, installation orientation, and torque specifications if available. Baseline data helps compare post-test results and guides replacement decisions.
Tip: Take clear photos of the gasket in place for reference. - 3
Isolate and depressurize safely
Before any testing, ensure the system is depressurized and powered down. Isolating the area reduces the risk of sprays and burns during testing.
Tip: If hot, allow components to cool before touching. - 4
Conduct a leak test
Seal accessible joints and apply gentle pressure within safe limits. Look for fresh seepage or droplets within a defined observation window.
Tip: Hold pressure steady and watch for changes over 60–120 seconds. - 5
Perform a controlled pressure test
Where appropriate, increase pressure gradually and monitor with a gauge. A steady hold indicates seal integrity; a drop suggests gasket failure or seat misalignment.
Tip: Do not exceed recommended pressure ratings. - 6
Interpret results and decide
If leaks or pressure loss persist, plan gasket replacement or resealing. If tests pass, monitor over time to confirm stability.
Tip: Keep records and re-test after any system changes.
Common Questions
What is gasket failure and why does it happen?
Gasket failure occurs when the seal between two surfaces degrades, allowing leaks or pressure loss. Causes include aging materials, improper installation, chemical exposure, and thermal cycling. Regular inspection helps catch failures early.
Gasket failure is when the seal between parts degrades, causing leaks. It happens due to aging, improper installation, or exposure to chemicals and heat.
Can I check gasket failure without special tools?
Yes. Start with a visual inspection for cracks or deformation, then perform a safe leak test and light pressure test where applicable. Use your senses and manufacturer guidance to decide if replacement is needed.
You can start with a visual check and a safe leak test. If you notice leaks or deformation, consider replacement.
How often should I inspect gaskets?
Inspect gaskets during major maintenance cycles or when you notice performance changes. For critical systems, a quarterly check is reasonable; for noncritical setups, biannual checks may suffice.
Check them during regular maintenance or if performance changes. For critical systems, check quarterly.
What are the risks of ignoring gasket failure?
Ignoring gasket failure can lead to refrigerant, coolant, or fuel leaks, equipment damage, safety hazards, and higher repair costs. Early detection minimizes risk and downtime.
Ignoring gasket wear can cause leaks, damage, and safety hazards; catch it early to avoid bigger costs.
What is the best approach to test a gasket on an appliance?
For appliances, follow the manual, depressurize safely, inspect the door seals, and perform a gentle leak test with clean surfaces. If uncertain, seek professional guidance to avoid electrical or water hazards.
Follow the manual, depressurize safely, and test gaps with clean surfaces. If unsure, get help.
When should I replace a gasket rather than reseal it?
Replace if you observe deep cracks, hardening, deformation, or repeated leaks after resealing attempts. Seals that fail under normal use usually need replacement for reliability.
Replace if cracks or warping are evident or resealing keeps failing.
Watch Video
Key Takeaways
- Inspect gasket areas thoroughly before testing.
- Document baseline conditions for accurate comparison.
- Test safely within system ratings and guidelines.
- Replace damaged gaskets to prevent hidden failures.
- Maintain a preventive routine to extend gasket life.