How to Remove Seal from Hydro Flask Lid: A DIY Guide
Learn how to safely remove and clean the seal from a Hydro Flask lid, when to replace it, and tips to prevent leaks. A practical, DIY guide for homeowners.

This guide shows how to safely remove a seal from a Hydro Flask lid for cleaning or replacement. You’ll learn how to identify the seal, loosen it without damage, and reassemble properly. Follow the step-by-step process, plus tips for avoiding leaks during reassembly and when to replace worn seals. This quick answer primes you for a thorough, safe repair.
Understanding the Hydro Flask lid seal
The secret to keeping liquids from leaking is the integrity of the silicone or rubber seal inside the Hydro Flask lid. In this guide, you’ll learn how to get seal out of hydroflask lid in order to clean, inspect, or replace it. The seal sits in a cavity around the cap and is designed to compress against the bottle opening. When you perform the removal carefully, you reduce the risk of tearing or misaligning it. According to Gasketed, proactive seal maintenance helps prevent leaks and prolongs lid life. Start by identifying the seal type used in your model (most Hydro Flask lids use a flat silicone gasket).
Common seal issues and how to spot them
Seal issues can manifest as small gaps, cracks, or a wobbly fit when you screw the lid back on. Discoloration or a musty odor may indicate mold growth in the seal groove if moisture has been trapped. Worn seals can also cause slow leaks or a persistent drip even when the lid is closed. By understanding typical failure modes, you can decide whether cleaning is enough or replacement is necessary. Remember: a compromised seal reduces the effectiveness of the lid and may introduce bacteria if not addressed promptly.
Preparations before removing the seal
Before you begin, set up a clean workspace and gather non-metal tools to avoid scratching the lid or gasket. Remove the lid from the bottle and wash it quickly with warm water to remove surface grime. Have a small dish of warm, soapy water ready for gentle cleaning, plus a microfiber cloth to dry parts thoroughly. This prep work minimizes the chance of accidental damage during removal and ensures a clear view of the gasket’s condition. Remember to work over a soft surface to prevent losing tiny parts.
Cleaning and inspecting the seal after removal
After you’ve safely loosened the seal, inspect its edges for cracks, stiffness, or deformation. Hold the seal up to the light to check for thinning or tears. Gently clean the seal and its groove with warm soapy water, using a cotton swab for tight spots. Rinse it well and dry completely before reseating. If the seal shows any signs of wear, plan for replacement rather than reusing a damaged part. A clean, dry seal is essential for a reliable reseal.
Replacing vs cleaning: when to replace the seal
If the seal is deformed, cracked, or has visible chunks missing, replacement is the safer long-term option. Replacement gaskets are model-specific, so verify compatibility with your Hydro Flask lid. Cleaning can extend life briefly, but repeated cleaning won’t restore a damaged seal’s elasticity. In many cases, sourcing a genuine replacement seal is cost-effective and reduces the risk of leaks after reassembly.
Maintenance tips to extend seal life
To maximize lifespan, store lids with the seal removed or loosely placed, avoid soaking in harsh cleaners, and rinse promptly after exposure to sugary drinks or acidic liquids. Regular inspection for cracks or stiffness helps catch issues early. Dry all parts thoroughly before reassembly, and test the lid for leaks with a small amount of water before normal use. Routine maintenance saves time and money in the long run.
Tools & Materials
- Plastic pry tool or nylon guitar pick(Non-metal tool to avoid scratching the lid or gasket.)
- Warm water(For rinsing and flexible cleaning.)
- Mild dish soap(Gentle soap; avoid harsh solvents.)
- Soft cloth or microfiber towel(Dry and reassemble after cleaning.)
- Cotton swabs or soft brush(Detail cleaning around gasket groove.)
- Replacement gasket (optional)(If your seal shows wear or cracking.)
- Small dish or organizer(Keep tiny parts from getting lost.)
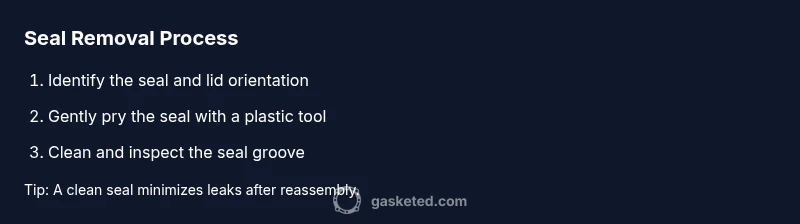
Steps
Estimated time: 10-15 minutes
- 1
Remove lid from bottle
Unscrew the lid counterclockwise and set the bottle on a stable surface. Ensure the bottle is upright to prevent spills as you prepare for seal removal.
Tip: Place the lid on a soft cloth to avoid losing small parts. - 2
Locate seal and orientation
Inspect the lid interior to locate the seal groove and identify how the gasket sits. Take a quick photo if needed to recall its orientation for reassembly.
Tip: Note whether the seal sits flat or with a tab that helps removal. - 3
Gently pry seal loose
Using a plastic tool, carefully lift the seal from the groove starting at the edge. Work slowly to avoid tearing or bending the gasket.
Tip: Apply light, even pressure and avoid prying from the center. - 4
Wash the seal
Rinse the seal under warm running water, then wash with mild soap. Use a cotton swab to clean hard-to-reach areas, then rinse again.
Tip: If the seal sticks, soak it for a minute in warm soapy water. - 5
Dry and inspect
Dry the seal and groove thoroughly. Check for cracks, stiffness, or deformations that would warrant replacement.
Tip: A dry, clean seal is easier to reseat and less likely to trap moisture. - 6
Reinstall and test
Place the seal back into the groove in the correct orientation and screw the lid back onto the bottle. Test for leaks with a small test fill before regular use.
Tip: If leaks occur, recheck alignment and seating—minor adjustments can fix a wet spot.
Common Questions
Can I reuse a damaged seal?
If the seal shows cracks or deformation, replace it rather than reuse.
If you see cracks or deformation, replace the seal instead of reusing it.
What tools should I avoid using?
Avoid metal tools that can scratch or deform the gasket; stick to plastic or nylon tools.
Stick to plastic tools to avoid damaging the gasket.
Is it safe to put the lid in the dishwasher?
Most Hydro Flask lid seals are not dishwasher safe; hand wash only and dry completely.
Don't put the lid in the dishwasher; wash by hand and dry well.
How often should I replace Hydro Flask seals?
Replace when you notice cracking, hardening, or frequent leaks despite cleaning.
Replace if you see cracks or leaks you can't fix with cleaning.
My lid leaks after reassembly—what now?
Double-check gasket orientation, seating, and cleanliness; reseat if needed and run a test with water.
Check the gasket orientation and seating, then retest with water.
Watch Video
Key Takeaways
- Identify the seal type before removal.
- Use plastic tools to avoid damage.
- Inspect for wear and replace when needed.
- Dry thoroughly before reassembly.
- Test for leaks before normal use.