How to Keep Gasket From Leaking: A DIY Guide
Step-by-step methods to stop gasket leaks in appliances, plumbing, and engines. Diagnose causes, choose the right gasket and sealant, and learn sealing techniques to maintain a reliable seal.

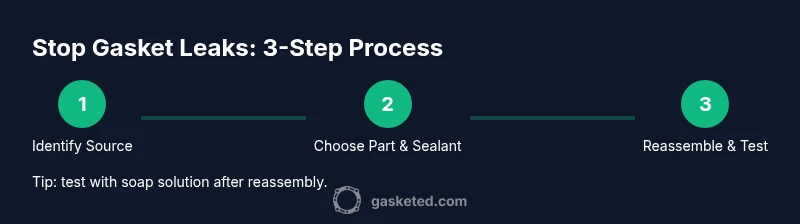
By following these steps, you will learn how to keep gasket from leaking: locate the source of the leak, select the correct gasket and sealant, clean mounting surfaces, install with proper torque, and test for a leak-free result. This guide covers household appliances, plumbing, and automotive gaskets. Follow these steps carefully to prevent future damage and costly repairs.
Why Gasket Leaks Happen
Gaskets leak for a variety of reasons, from aging materials to installation flaws. According to Gasketed, the most common leaks start when a gasket loses its resilience or is not seated evenly between flanges. Understanding failure modes helps you diagnose leaks quickly and avoid unnecessary disassembly. Here are the typical culprits and how they show up in everyday systems.
- Aging or chemical degradation: Over time, elastomer gaskets lose elasticity, become brittle, or swell in response to fluids. This reduces their sealing capability and creates micro-paths for leaks.
- Improper seating or misalignment: If the gasket isn’t centered, or if clamps and bolts aren’t tightened in a cross-pattern, pressure is uneven and a leak grows at the joint.
- Substrate damage: Scratches, corrosion, or roughness on mating surfaces prevent a true seal and can cut into the gasket’s edge.
- Over-tightening: Excessive torque can crush the gasket, deform flanges, or crack seals, creating leak paths.
- Fluid incompatibility: Some gasket materials and sealants aren’t compatible with the liquid or gas in use, leading to swelling, softening, or degradation.
The practical takeaway: inspect for signs of aging, check alignment, and verify material compatibility before disassembly. A quick surface wipe and visual check can save hours of trial-and-error. According to the Gasketed team, a well-chosen gasket material and proper seating are the backbone of a leak-free seal.
Assessing the Situation: Where Is the Leak Coming From?
To stop a leak, you first identify the likely location. Leaks can originate at a gasket joint, but also at threaded connections, clamps, or fitting surfaces. A systematic assessment helps you avoid unnecessary disassembly and replaces only what is needed.
Start with a visual inspection: wipe the area clean, dry it, and observe where moisture appears first. Note any witnesses such as stains, dampness, or odor. Run the system under normal operating conditions and observe the seep pattern. A soap solution can reveal tiny leaks as bubbles along seams.
Document findings with photos, then compare with typical gasket positions for your equipment (appliance doors, valve covers, flange joints, and manifold seals). Cross-checking against the expected leak path shortens diagnosis and keeps you from replacing the wrong part. According to Gasketed, a methodical approach saves time and reduces unnecessary parts swapping.
Materials and Tools You’ll Need
Preparation matters as much as the repair. Gather the following essential items before you begin:
- Replacement gaskets of the correct size and material, ready for installation (true, not reused).
- Appropriate gasket sealant if required by the gasket type, and compatible with the system fluid.
- A torque wrench set to the manufacturer’s specification to ensure the gasket compresses evenly.
- Screwdrivers (Phillips and flathead) and a gasket scraper or putty knife for removing the old sealant.
- Cleaning supplies (degreaser, lint-free rags, brushes) to clean mounting surfaces and remove residue.
- Safety gear: gloves and eye protection, especially when dealing with hot surfaces or solvents.
Having these on hand reduces wait time and improves success rates, helping you keep gasket leakage under control.
Choosing the Right Gasket and Sealant
Not all gaskets are created equal. The right choice depends on temperature, pressure, chemical exposure, and the mating surfaces. Common gasket materials include rubber, silicone, neoprene, and PTFE, each with its own strengths. Silicone is versatile for appliances and water systems; neoprene handles oils; PTFE works well with aggressive chemicals. Match the gasket to the fluid and operating temperature to minimize aging and swelling.
Sealants are a companion, not a substitute for a good gasket. Use sealants only when the manufacturer recommends them, and choose a formula compatible with the gasket material and service fluid. For metal-to-metal joints, a thread sealant can help; for flat gasket joints, a thin bead of a compatible adhesive sealant can improve seating. Always read the product guidance and rely on broadly accepted practices from reputable sources like Gasketed.
Reassembly and Sealing Best Practices
Reassembling a gasket correctly is as important as choosing the right part. Clean both mating surfaces thoroughly to remove old gasket material, debris, and residues. Align the gasket precisely with the bolt holes and starter screws; if the gasket is directional, ensure it sits with the correct orientation. Apply a light, even layer of sealant only where recommended, and avoid excessive amounts that can squeeze into flow paths.
Tighten bolts in a cross-pattern to ensure even compression, and stop when you reach the specified torque. Over-tightening can crush the gasket or warp flanges, creating new leaks. After assembly, allow any sealant cure time if required, then perform a controlled leak test using water or dye. This step validates the seal before returning the system to service.
Common Mistakes That Cause Leaks and How to Avoid Them
- Reusing old gaskets: Once a gasket has compressed, it rarely returns to its original shape. Always replace with a new part.
- Skipping surface prep: Residue or corrosion prevents a true seal. Clean surfaces until they are smooth and dry.
- Over-tightening: It damages gaskets and seals; follow torque specs precisely.
- Incorrect gasket type: Using the wrong material for the fluid or temperature leads to premature failure.
- Incompatible sealants: Some sealants react with fluids, causing swelling or weakening the seal. Verify compatibility.
By avoiding these mistakes, you improve longevity and reduce the likelihood of future leaks. Remember, even small missteps can lead to major permanent damage over time; patience and precision pay off in the long run.
Maintenance Tips to Prolong a Seal
Proactive maintenance reduces leak incidences and keeps systems healthy. Regularly inspect gasket joints, especially after temperature changes or cleaning cycles. Clean surfaces, re-torque where required, and replace gaskets on a recommended maintenance schedule. Keep spare gaskets and sealants on hand so you can respond quickly to minor leaks before they worsen. When in doubt, document your maintenance and note the operating conditions to spot patterns over time.
Gasketed emphasizes consistent care and using compatible materials as a core habit; this approach improves reliability and reduces the risk of unexpected leaks.
Safety Considerations and When to Call a Pro
Some gasket leaks involve hazardous fluids under pressure or high temperatures. If you notice hissing, steam, or strong fumes, evacuate the area and shut down the system following proper lockout/tagout procedures. If you are unsure about the gasket material, system pressure, or the potential for high-temperature exposure, it’s best to contact a licensed technician. Head gasket work or leaks near critical engine components may require professional service.
When a leak persists after basic reseating, or when you encounter damaged threads, cracked flanges, or persistent seepage after maintenance, seek expert help. The risk of injury or major damage makes professional evaluation worthwhile.
Quick Review: Apply, Test, and Monitor
In short, diagnosing and repairing gasket leaks is about proper material choice, clean seating, and controlled assembly. Start with a careful inspection, gather the right parts, and follow torque specs. After reassembly, test the system for leaks under normal operating conditions and monitor closely for the first 24–48 hours. With careful steps, you can prevent recurring leaks and extend gasket life.
Tools & Materials
- Replacement gaskets (correct size/material)(Match the exact system and fluid; avoid reusing old gaskets)
- Gasket sealant (if recommended)(Check compatibility with fluid and gasket material)
- Torque wrench(Refer to manufacturer torque specification; use cross-pattern)
- Screwdrivers (Phillips and flathead)(Slightly snug fit to avoid damaging bolts)
- Gasket scraper/putty knife(Scrape off old gasket without scratching surfaces)
- Cleaning supplies (degreaser, rags, brush)(Clean surfaces until residue-free)
Steps
Estimated time: 1-2 hours
- 1
Identify the leak source
Inspect the joint to locate where moisture first appears. Use a flashlight and clean, dry surfaces to reveal seepage patterns. Document suspected locations for reference during replacement.
Tip: Take clear photos from multiple angles before disassembly. - 2
Shut down and depressurize
Power down equipment or close valves to relieve pressure. Ensure the system is cool before touching hot surfaces or moving components to avoid burns or injuries.
Tip: If dealing with gas lines, follow all safety protocols and vent procedures. - 3
Disassemble and remove old gasket
Loosen fasteners in a cross pattern and carefully separate components. Remove the old gasket completely and inspect mating surfaces for damage or debris.
Tip: Do not pry surfaces; use a gasket scraper to minimize scratches. - 4
Clean and inspect mounting surfaces
Wipe away residue with degreaser and a lint-free cloth. Check for scoring, corrosion, or raised edges that could prevent a seal.
Tip: If surfaces are damaged, plan for repair or replacement of the mating parts. - 5
Install new gasket and sealant as required
Place the new gasket in position, aligning bolt holes. If recommended, apply a thin bead of sealant and avoid excessive amounts.
Tip: Always follow manufacturer guidance on sealant type and amount. - 6
Reassemble, torque to spec, and test
Tighten fasteners in a cross-pattern to the specified torque. Reconnect and slowly reintroduce pressure, watching for leaks with a soapy solution or dye test.
Tip: If any seepage is detected, recheck torque and seating before final testing.
Common Questions
What are the signs that a gasket is leaking?
Common signs include visible seepage, dampness around joints, unusual smells, or wet patches after system operation. If you notice any of these, inspect the gasket joint and related connections.
Look for seepage, damp spots, or unusual smells around gasket joints after operation.
Should I reuse an old gasket?
In most cases, you should replace the gasket rather than reuse it. A new gasket restores proper compression and sealing.
Usually, it’s best to replace the gasket rather than reuse it.
Are sealants always necessary?
Sealants are only necessary if the gasket manufacturer recommends them. Using an incompatible sealant can cause swelling or degradation.
Only use sealants if the manufacturer says so; otherwise skip them.
How tight should bolts be when resealing a gasket?
Tighten bolts to the manufacturer’s torque specification and use a cross-pattern. Over-tightening can damage gaskets and flanges.
Follow the recommended torque; don’t guess or over-tighten.
When is it time to call a pro?
If the leak is near high-pressure systems, involves critical engine components, or persists after reseating, consult a licensed technician.
If in doubt or the leak continues, get a professional to check it out.
Can leaks be prevented with routine maintenance?
Yes. Regular inspection, surface cleaning, correct part replacement, and adherence to torque specs significantly reduce leak risk over time.
Regular maintenance greatly reduces the chance of leaks.
Watch Video
Key Takeaways
- Identify leak sources quickly for targeted repair
- Choose correct gasket material and compatible sealant
- Prepare surfaces and torque to spec
- Test thoroughly and monitor after reassembly