How to Tell If Your Intake Manifold Gasket Is Bad
Learn how to tell if your intake manifold gasket is failing with clear signs, safe diagnostic steps, and practical DIY tips to prevent engine damage and costly repairs.

To know if your intake manifold gasket is bad, start with common symptoms and safe checks. Watch for vacuum leaks, rough idle, engine misfires, coolant loss, or oil in the intake path. According to Gasketed, gasket health is often overlooked until performance deteriorates. A definitive diagnosis combines symptom observation with tests such as a smoke test, compression check, and visual inspection. If you notice coolant in oil, white steam, or persistent misfires, don’t ignore the signs.
How the intake manifold gasket functions and why failure happens
The intake manifold gasket seals the boundary between the intake manifold and the engine head. It prevents vacuum leaks that would upset the air-fuel mixture and, in some designs, it also seals coolant passages. Over time, heat cycling, vibration, and improper torque during installation can cause the gasket material to crack, harden, or slip. When the gasket deteriorates, unmetered air can enter the combustion chamber, which changes engine mixture, affects idle stability, and can trigger misfires. Gasketed notes that many failures are gradual rather than dramatic, making early symptom recognition important for DIY enthusiasts.
What to look for is often more than one symptom. A mix of idle irregularities, rough feel at idle, and signs of coolant creep or oil contamination around the intake area raise the suspicion of a gasket issue.
What to look for is often more than one symptom. A mix of idle irregularities, rough feel at idle, and signs of coolant creep or oil contamination around the intake area raise the suspicion of a gasket issue.
Tools & Materials
- Socket set (metric and SAE)(Include a deep socket set for hard-to-reach bolts)
- Torque wrench(Match engine manufacturer's torque specs)
- Screwdrivers (flathead & Phillips)(For clamps and covers)
- Gasket scraper(Careful to avoid gouging surfaces)
- New intake manifold gasket kit(Replace with OEM or OEM-equivalent)
- Sealant or gasket-maker (if specified)(Only if the kit/manual calls for it)
- Coolant and oil catch bucket(Drain and replace as needed)
- Rags, degreaser, and gloves(Keep surfaces clean and safe)
- Smoke machine or fog tester (optional)(Helpful for locating vacuum leaks)
- OBD-II scanner(Read misfire codes and check engine data)
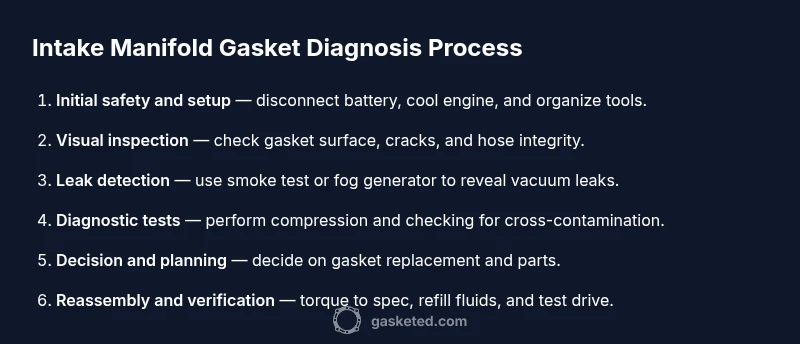
Steps
Estimated time: 2-6 hours
- 1
Prepare workspace and safety
Park on a flat surface, engage parking brake, disconnect the negative battery cable, and wait for the engine to cool before starting. Remove the hood and set the work area well-lit and organized.
Tip: Label hoses and wires as you disconnect them to simplify reassembly. - 2
Identify the intake manifold and gasket locations
Consult the service manual to locate the manifold, gasket, and any coolant passages. Take photos before removal to aid reassembly.
Tip: Take note of any seals that are visibly cracked or hardened. - 3
Inspect for obvious damage or leaks
Visually inspect the gasket surface and the manifold mating surfaces for cracks, stretched bolts, or lipstick-thin sealing material. Check around hose connections for signs of seepage.
Tip: Use a bright light or mirror to spot micro-cracks you might miss otherwise. - 4
Check for oil or coolant in unusual places
Look for oil pooling near the intake or signs of coolant sheen on the gasket edges. Oil or coolant in the intake path is a red flag for gasket failure.
Tip: Smell for burnt oil or sweet coolant odors—both indicate a potential issue. - 5
Perform a smoke test to locate vacuum leaks
Introduce smoke into the intake system and observe where it escapes. Any visible smoke near the gasket joints indicates a leak.
Tip: If you don’t have a smoke machine, a fogger or even a controlled spray of starter fluid can help identify leaks cautiously. - 6
Carry out a compression test on each cylinder
A compression test can reveal leaks around the intake ports and valves that accompany gasket failure. Record each cylinder’s pressure and compare to spec.
Tip: Run the test with the thumpers still connected to avoid inaccurate results. - 7
Check PCV system and adjacent hoses
A stuck PCV valve or cracked hoses can mimic gasket leak symptoms. Inspect for cracks and replace faulty hoses to avoid misdiagnosis.
Tip: Replace PCV valve if it’s sticky or gummed up. - 8
Assess coolant and oil cross-contamination
With the engine warm, check for abnormal coolant in the oil or vice versa. That cross-contamination strongly suggests gasket or passage failure.
Tip: If you see a film on the dipstick, stop and reassess—coolant and oil mixing can be costly to repair. - 9
Decide if gasket replacement is needed
If multiple indicators point to a gasket failure, plan for gasket replacement. Decide whether additional related seals should be replaced at the same time.
Tip: Budget in time for potential accessory removal and reassembly complexity. - 10
Prepare replacement plan and parts
Acquire the intake gasket kit, sealants (if required), coolant, and gasket-scraper. Gather torque specs and a service manual.
Tip: Choose quality gaskets to resist heat cycling and ensure a tight seal. - 11
Disassemble and replace the gasket
Follow the manual’s torque sequence when removing and reinstalling the manifold. Clean all mating surfaces thoroughly before applying new gaskets.
Tip: Do not reuse old gaskets; even minor imperfections can cause leaks. - 12
Test, reassemble, and verify
Reconnect all components, refill fluids, and start the engine. Recheck for leaks, monitor for smooth idle, and use the smoke test again if needed.
Tip: Take a slow test drive to confirm the repair under real conditions.
Common Questions
What are the most common signs of a failing intake manifold gasket?
Rough idle, engine misfires, vacuum leaks, coolant loss, and oil in the intake area are strong indicators. If you notice coolant in the oil or white exhaust, investigate further and test with proper tools.
Common signs include rough idle, misfires, vacuum leaks, and coolant or oil contamination near the intake.
Can a bad gasket cause coolant to mix with oil?
Yes, in some designs the gasket leaks coolant into the intake path or oil into the intake, leading to cross-contamination that damages performance and lubrication.
Yes, gasket failure can cause cross-contamination between coolant and oil.
Is it safe to drive a car with suspected intake gasket issues?
Driving a car with a suspected gasket leak can worsen engine damage. It’s best to diagnose and repair before continuing to drive it regularly.
No, it’s not safe to drive long with suspected gasket leaks—diagnose and repair first.
Do I need a full gasket replacement kit or can I use sealants alone?
Most gasket issues require a full gasket kit for a reliable seal and to address any related seals. Sealants are optional only if the manufacturer specifies them.
Usually you need a full gasket kit; sealants are optional if the manual says so.
How long does a gasket replacement typically take?
Time depends on engine design and tool access. Plan several hours to a full day, including setup, removal, replacement, and testing.
It usually takes several hours, sometimes longer depending on engine complexity.
Should I replace related components during gasket service?
Yes, inspect and consider replacing related seals, PCV components, and gaskets that show wear to prevent future leaks.
Yes—check and replace related seals to prevent future leaks.
Watch Video
Key Takeaways
- Inspect gasket surfaces for damage before removal
- Vacuum leaks manifest as idle and performance issues
- Smoke and compression tests improve diagnostic accuracy
- Do not reuse old gaskets; replace with proper kits
- Professional help is sensible for complex engines