RV Slide-Out Seals: Repair, Maintenance, and Longevity Guide
Inspect, maintain, and replace RV slide-out seals to prevent leaks. A step-by-step guide with tools, common failures, and safety tips for DIY enthusiasts.

You will learn to inspect, diagnose wear, and reseal or replace rv slide out seals to prevent leaks, drafts, and water intrusion. This hands-on guide outlines essential tools, a clear step-by-step process, safety tips, and maintenance routines to extend seal life.
Why RV slide-out seals matter
Maintaining the rv slide-out seals is crucial for comfort, energy efficiency, and long-term reliability. The phrase rv slide out seals refers to the gaskets that seal the space where a slide-out wall extends from your RV. When these seals are in good condition, they prevent water intrusion during rain, stop drafts in cold weather, and keep dirt and pests from sneaking into living areas. Over time, exposure to sun, temperature swings, and repeated extension/retraction can cause the material to crack, become stiff, or detach from its track. Regular inspection and timely resealing are simple, cost-effective ways to protect cabinetry, electronics, and insulation, while reducing the workload on your heating and cooling system. This article, based on Gasketed insights, provides a practical approach to caring for rv slide out seals and keeping your RV weather-tight.
Key takeaway: Proper seal maintenance preserves comfort, saves energy, and prevents expensive water damage on the road.
Common failure modes and symptoms
Slide-out seals can fail in several predictable ways. Cracks or tearing in the rubber or vinyl surface allow moisture to seep behind the wall. Compression set—where the gasket loses elasticity—causes gaps and leaks even when the door or wall is closed. UV exposure from sun can harden the material, making it brittle and prone to cracking with movement. Debris in the track, misalignment, or improper latching can also create uneven compression, accelerating wear. Look for visible gaps, staining around the seal line, condensation inside the slide, or musty smells that indicate moisture intrusion. If you notice water pooling on the floor near the slide or increased drafts in the living space, inspect the seals promptly. Addressing issues early prevents interior damage and preserves resale value.
Assessing your current seal condition
Begin with a visual inspection of the entire seal length for cracks, bubbles, or deformations. Run a gentle finger along the gasket to feel for brittleness or hard spots. Check the door/sill alignment and the track for debris or corrosion. Perform a light water test by spraying around the seal with a hose while the slide is slightly extended to observe any seepage. Compare the seal’s compression against a new gasket by closing the slide-out and applying even pressure along the edge. If you detect any gaps larger than a pencil width, or if moisture is visibly entering the gap, plan resealing or replacement. Record findings with photos to guide replacement decisions and warranty considerations.
Tools and materials you’ll need
A well-stocked toolkit makes seal work smoother. Essential items include a replacement RV slide-out seal kit sized for your model, a utility knife, masking tape, isopropyl alcohol, a soft-bristle brush, lint-free rags, a caulk gun, and an appropriate sealant or butyl tape per manufacturer recommendations. Also have a plastic scraper, gloves, safety glasses, and a flashlight for dark corners. If you’re uncertain about the exact seal type, bring the old gasket to a dealer or reference your RV’s manual to ensure compatibility. Using the correct adhesive and sealant is crucial to prevent leaks and guarantee a lasting seal.
Step-by-step inspection outline
This section provides a high-level, non-redundant outline you can use alongside the formal step-by-step guide.
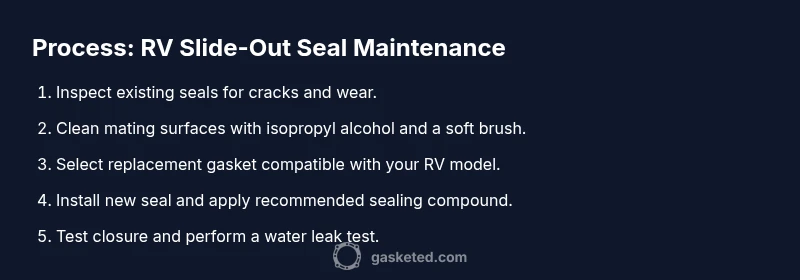
- Park and power down the RV; retract slide fully and remove nearby items for clear access. 2) Clean the seal and mating surfaces with isopropyl alcohol to remove dirt and oils that could prevent adhesion. 3) Inspect the whole length of the gasket for cracks, tears, or hardening; mark any suspicious areas. 4) Inspect the track and edge channel for debris that would impede seal seating. 5) Check alignment by gently pressing the seal along the edge; note any gaps or misalignment. 6) If minor wear is found, consider resealing with compatible sealant; for severe damage, replace the gasket. 7) Re-test with a controlled water spray to verify sealing after work. 8) Recess test: retract and extend the slide to ensure smooth operation post-maintenance.
Replacing or resealing: when and how
Replacement is typically warranted when cracks or deformation are evident across large areas, or when resealing fails to stop leaks. Resealing can be effective for smaller, localized wear if the gasket remains elastic. Always follow the seal manufacturer’s guidance for prep, adhesive, and curing times. Start by removing the old gasket with care to avoid scratching the frame, then clean the channel. Install the new seal evenly, avoiding twists or kinks, and apply sealant or butyl strips per instructions. Allow for proper curing time before testing with water. If you’re unsure, consult a professional—risk of improper sealing can lead to interior damage.
Maintenance routine to extend seal life
Create a seasonal maintenance routine that includes cleaning, lubricating (when recommended by the seal maker), and checking for UV damage. Store an emergency kit with spare gaskets, sealant, and replacement clips. Schedule a mid-season inspection after heavy travel or storms, and re-check seals after any major weather event. Keeping your RV’s exterior clean reduces the build-up of grime on seals, and UV-protective spray (if compatible with your gasket material) can extend life in sunny climates. Document wear patterns and replace proactively rather than waiting for leaks to appear.
Safety considerations and warranty notes
Always disconnect power before starting any repair on an RV slide-out to prevent electrical hazards. Use gloves and eye protection when handling sharp tools and solvents. Work in a well-ventilated area and follow manufacturer curing times for adhesives. Some RVs carry warranties that could be voided by improper resealing—check your contract before replacing gaskets or applying aftermarket sealants. If you’re uncertain about compatibility or sealing approach, contact an authorized service provider to avoid accidental damage.
],
toolsMaterials":{"items":[{
name
replacement RV slide-out seal kit
required
true
note
Choose a kit compatible with your RV model and slide mechanism.
Tools & Materials
- Replacement RV slide-out seal kit(Choose a kit compatible with your RV model and slide mechanism.)
- Utility knife(Sharp blade for removing old seal without scratching framing.)
- Isopropyl alcohol 70%(Cleans surfaces and aids adhesion.)
- Soft-bristle brush(Gently loosens grime without scratching surfaces.)
- Lint-free rags(Wipe down surfaces for a clean bond.)
- Masking tape(Mask areas to guide seal placement.)
- Caulk gun(Apply sealant smoothly and evenly.)
- Butyl tape/Sealant approved by manufacturer(Primary sealing material per gasket type.)
- Gloves and safety glasses(Personal protective equipment.)
- Flashlight(Inspect dark corners and tracks.)
Steps
Estimated time: 1-2 hours
- 1
Prepare workspace and safety gear
Park and power down the unit. Retract the slide completely and clear the area. Wear gloves and eye protection before handling tools or sealants.
Tip: Keep a cleanup plan ready and protect flooring with a drop cloth. - 2
Clean and inspect the old seal
Remove loose dirt with a soft brush, then wipe with isopropyl alcohol. Visually inspect for cracks, tears, or hardening along the entire length.
Tip: Avoid using abrasive tools that could nick the frame. - 3
Check track and mating surfaces
Inspect the track channel for debris and ensure the mating surface is clean and dry. Remove any debris that could cause gaps.
Tip: A clean surface ensures better seal seating. - 4
Assess alignment and compression
Close the slide and press gently along the gasket to test uniform compression. Note any areas that show gaps or misalignment.
Tip: Small alignment tweaks can prevent big leaks later. - 5
Test for leaks with controlled spray
Extend the slide partially and spray around the seal area with water to observe any seepage. Mark any leak paths for repair.
Tip: Use a partner to help observe leaks while you actuate the slide. - 6
Remove old seal if replacement is needed
Carefully peel away the old gasket starting at one end. Avoid scratching the frame and track. Wipe the channel clean before installation.
Tip: Don’t reuse damaged gasket material. - 7
Install new seal and apply sealant
Place the new seal evenly along the channel. Apply the recommended sealant or butyl tape per manufacturer directions, avoiding air pockets.
Tip: Ensure no twists or kinks in the seal. - 8
Re-test and finalize
Retract and extend the slide to ensure smooth operation and re-test for leaks after curing. Record results and reseal if necessary.
Tip: Note curing times and don’t rush the final test.
Common Questions
What causes RV slide-out seals to fail?
Common causes include UV degradation, aging, and wear from opening/closing the slide. Weather exposure and improper alignment also contribute to leaks.
Seal failure is often due to sun damage and aging. If you see cracks or gaps, inspect and consider replacement.
Can I reseal without removing the entire slide-out?
In many cases you can reseal localized wear without fully removing the slide-out. If the gasket is extensively damaged, full replacement is recommended.
Often you can reseal without taking out the slide-out, but extensive damage means full gasket replacement.
What sealant should I use with RV slide-out seals?
Use the sealant or butyl tape recommended by your gasket manufacturer. Avoid silicone in aluminum tracks unless explicitly approved by the seal maker.
Use manufacturer-approved sealant. Avoid generic silicones in metal tracks unless advised.
How often should I inspect RV slide-out seals?
Inspect during seasonal prep and at least quarterly during heavy-use seasons. Check for cracks, gaps, and hardening regularly.
Inspect a few times a year, especially after long trips or severe weather.
Are there safety precautions when resealing?
Disconnect power, use gloves and eye protection, and work in a well-ventilated area. Follow curing times to avoid incomplete seals.
Turn off power and protect yourself with gloves and goggles. Wait for sealant to cure fully.
Watch Video
Key Takeaways
- Inspect seals regularly to catch wear early
- Use the correct gasket and sealant for your model
- Follow a step-by-step process for best results
- Test for leaks after reinstall and during future trips