Silicone Shower Door Seal: Installation and Maintenance Guide
Learn to choose, install, clean, and maintain a silicone shower door seal to prevent leaks and mold. A practical DIY guide from Gasketed with prep, cure tips, and safety reminders.

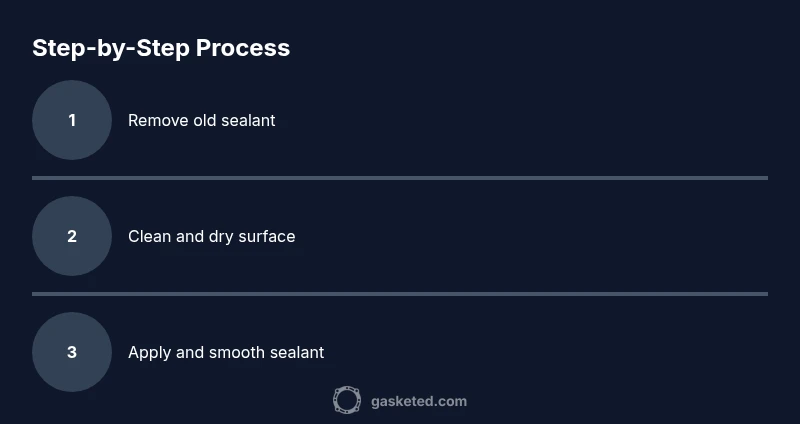
Install a silicone shower door seal by prepping the seam, removing old sealant, and cleaning the surface. Apply a neat bead of neutral-cure silicone with a caulk gun, smooth it with a finishing tool, then wipe away excess. Allow 24 hours to cure before use to prevent leaks.
Why silicone shower door seal matters
The silicone shower door seal is a simple, critical line of defense against leaks, mold, and water damage in bathrooms. A properly installed seal protects the threshold, frame, and nearby walls from moisture, reduces cleaning time, and preserves door performance over time. For DIY homeowners, choosing the right silicone shower door seal and installing it correctly pays off with quieter showers and fewer soggy days. According to Gasketed, silicone seals offer excellent flexibility, chemical resistance, and longevity when prepared and installed correctly. The right seal also accommodates movement between the door and track, creating a consistent gasket profile that seals even if the door shifts slightly with use. The key is to plan for the door geometry, surface condition, and any hardware in the frame. If you neglect these factors, you’ll invite leaks, peeling finishes, and hidden mold behind the seal.
Types and compatibility of silicone seals
Silicone shower door seals come in several profiles, including continuous seals that run along the door edge and corner seals that cap the frame. When selecting a seal, match the profile to your door type (sliding, hinged, or pivot) and the gap width. Silicone is favored for bathrooms because it remains flexible in cold and humid conditions and resists mold growth better than many other elastomers. Look for products labeled bathroom-safe, neutral-cure, and silicone-based; avoid acrylic or solvent-based caulks in wet zones. Always verify compatibility with metal tracks or glass, and consider clear vs. opaque options for aesthetics. The Gasketed team notes that proper compatibility improves adhesion and reduces peeling over time.
Common failure modes and causes
Even the best silicone seal can fail if the installation is rushed or surfaces aren’t prepared. Common issues include poor surface adhesion due to soap scum, hard water residue, or old sealant left behind. Detaching sections, sagging beads, and micro-gaps invite water intrusion and mold growth behind the seal. Harsh cleaners, silicone solvents, or abrasive pads can degrade silicone during cleaning, shortening its life. Temperature fluctuations and door movement also test the seal’s ability to compress and rebound. Understanding these causes helps you diagnose leaks quickly and plan a remedy that lasts.
Tools, materials, and prep
Before you start, gather the right tools and materials to ensure a clean, durable seal. Essential items include neutral-cure silicone sealant suitable for bathrooms, a caulking gun, masking tape, a utility knife, isopropyl alcohol for degreasing, a smoothing tool, and clean rags. Optional but helpful additions are a silicone remover for stubborn old sealant, a scraper, and gloves to protect your hands. Keep a steady, organized workspace and protect adjacent surfaces with painter’s tape. Having everything ready reduces the temptation to rush and compromises seal integrity.
Preparation and surface cleaning techniques
Start with a thorough wipe-down of the door edge and frame using isopropyl alcohol or denatured alcohol to remove soap scum, oils, and mineral deposits. Use a plastic scraper to lift old sealant without scratching glass or metal. After removing the old bead, run a final wipe with alcohol and let the surface dry completely. Moisture on the seam is the enemy of adhesion, so wait until the area is totally dry. If you’re dealing with stubborn residue, repeat cleaning or use a silicone remover following the product’s directions. This prep step is essential for a durable, long-lasting seal.
Installation overview and best practices
Install a silicone shower door seal by applying a continuous bead along the seam where water escapes. Use a steady, even pressure on the caulk gun and avoid stopping mid-bead, which can create gaps. Mask adjacent surfaces before applying sealant to keep the edges neat. After applying, smooth the bead with a caulk tool or gloved finger dipped in soapy water to shape a uniform gasket. Remove excess sealant promptly to prevent unsightly ridges. Allow the sealant to take shape and cure according to the manufacturer’s instructions before testing for leaks.
Sealing corners, joints, and frame relationships
Corners and joints require extra attention because water tends to collect at seams. Apply small, tidy beads at each corner, then bridge into edge seals with a continuous line. For sliding doors, ensure the bead follows the frame curvature without buckling. In metal tracks, keep the silicone bead away from contacts that might abrade the seal during door movement. If your frame has corners with gaps, you may need to trim the seal or use corner pieces designed for your profile. A properly contoured bead maintains compression and helps prevent leaks.
Maintenance, cleaning, and mold prevention
To extend the life of your silicone shower door seal, clean the seal every few weeks with a soft cloth and a mild detergent solution. Rinse well and dry to prevent soap scum buildup that can degrade adhesion. Periodically inspect for cracks, gaps, or hardened silicone—these are signs that replacement is due. Use a 100% bathroom-safe silicone product for best results, and avoid harsh solvents that can break down the seal. Regular maintenance reduces mold risk and keeps doors operating smoothly. Gasketed analysis shows benefits of proactive maintenance.
Troubleshooting and when to call a pro
If you notice persistent leaks after sealing, recheck the surface, bead, and cure time. In some cases, door misalignment or frame warping causes leaks that a seal alone cannot fix. If you’re unsure about compatibility, or the sealant won’t cure properly in your bathroom’s humidity, consult a qualified contractor or the manufacturer. The Gasketed team suggests seeking professional help when the door frame shows structural swelling or persistent water intrusion behind the seal.
Tools & Materials
- Neutral-cure silicone sealant (clear or white)(Bathroom-grade, acetoxy-free preferred; 100% silicone for durability)
- Caulking gun (standard 10 oz)(For consistent, even bead application)
- Utility knife or razor blade(To remove old sealant without scratching surfaces)
- Masking painter's tape(Protect adjacent edges and glass during sealing)
- Isopropyl alcohol (70-90%) or denatured alcohol(Degrease and prep surfaces before sealant)
- Silicone remover (optional)(Helpful for stubborn old sealant)
- Caulk smoothing tool or finger (gloved)(Shape and smooth the bead for a neat finish)
- Clean cloths or paper towels(Wipe up excess sealant promptly)
- Gloves(Protect hands during installation)
Steps
Estimated time: 30-60 minutes active work; 24 hours cure time
- 1
Remove old sealant
Use a utility knife to carefully cut away the old bead while keeping glass and metal surfaces intact. Peel away sections, then scrape residue with a plastic tool. Wipe clean with isopropyl alcohol and allow to dry.
Tip: Keep blade shallow to avoid scratching. - 2
Clean and dry the surface
Wipe the seam with isopropyl alcohol to remove oils and soap scum. Let the surface air-dry completely; moisture will weaken adhesion.
Tip: Do not rush into sealing with any damp edge. - 3
Prep new silicone bead
Cut the nozzle at a 45-degree angle to control bead width. Load into the caulk gun and prime the nozzle by extruding a small amount of sealant.
Tip: Match bead width to gap size for best seal. - 4
Apply silicone along the seam
Slowly run a continuous bead along the door edge where water escapes. Maintain steady pressure to avoid gaps or air pockets.
Tip: Pause briefly if a stop is needed; restart on top of the existing bead. - 5
Smooth bead and remove excess
Smooth the bead with a caulk tool or a gloved finger dampened with soapy water. Wipe away any excess sealant from glass or metal immediately.
Tip: Keep the bead rounded and uniform. - 6
Cure and test
Allow the sealant to cure for 24 hours before exposing to moisture. After curing, run water over the seam to confirm it’s watertight.
Tip: Do not use the shower until fully cured.
Common Questions
Will silicone shower door seal prevent leaks?
A correctly installed silicone seal reduces the chance of leaks around the door by creating a water-tight edge. Proper prep and cure are essential for best results.
A properly installed silicone seal helps prevent leaks when you prep and cure correctly.
How long does silicone sealant take to cure?
Most bathroom silicone cures to handling in 24 hours, with full cure taking longer depending on humidity and temperature. Follow the product instructions for best results.
Most silicone cures in about a day, but always check the label for exact times.
Can I use silicone on metal tracks or glass doors?
Yes, neutral-cure silicone is generally compatible with glass and metal tracks typical of shower doors. Always verify product compatibility with your specific frame and hardware.
Silicone works with glass and metal tracks, but check your product’s compatibility first.
What’s the difference between silicone and acrylic sealants?
Silicone is more durable, flexible, and water-resistant in bathrooms, while acrylic sealants are less flexible and may peel in humid conditions. For showers, silicone is typically preferred.
Silicone is preferred in showers for durability and water resistance.
How often should I replace a worn shower door seal?
Replace a worn seal when you notice recurring leaks, visible cracks, or hardened material. Regular inspection helps catch issues early.
Replace the seal when it starts to crack or leaks return.
Can I paint over silicone sealant?
Painting silicone is not recommended; most paints don’t adhere well to silicone. If color is important, choose a pre-colored silicone or replace with a sealant that matches your decor.
Don’t paint silicone seals; they don’t hold paint well.
Watch Video
Key Takeaways
- Prepare surfaces thoroughly for optimal adhesion.
- Choose a bathroom-rated neutral-cure silicone.
- Apply a continuous bead and smooth evenly.
- Cure fully before testing for leaks.
- Regular maintenance reduces mold risk.