Can Gasket Maker Stop Oil Leaks? A DIY Guide
Learn whether gasket maker can stop oil leaks, when to use it, safety tips, and a practical DIY workflow. Gasketed explains temporary fixes vs permanent repairs for homeowners and DIY enthusiasts.

Oil leaks caused by tiny, clean seam gaps can sometimes be slowed by a gasket maker, but this is not a guaranteed or permanent fix. For most oil leaks, especially from critical seals, replacement is preferred. According to Gasketed, surface prep, correct product selection, and cure time determine success overall outcomes.
Can gasket maker stop oil leaks? What DIYers should know
If you’re asking, can gasket maker stop oil leak, the answer isn’t one-size-fits-all. The short answer is: it may slow a tiny, clean seam leak, but it’s not a reliable long-term solution for most engines. The Gasketed team emphasizes that you should treat gasket maker as a temporary stopgap, not a permanent repair. Before deciding, assess the leak type, surface condition, and engine operating context. If the leak persists after curing, plan for a proper gasket replacement. Remember: safety matters—never work on a hot engine, and use the right product with compatible temperature ratings.
How gasket maker works and its limits
Gasket makers are silicone or polyurethane sealants designed to fill micro-gaps between gasket surfaces. They cure to form a flexible seal that can accommodate minor movement. The limits are clear: if the leak originates from a damaged gasket surface, a crack in the housing, or a warped component, the sealant will fail over time. Always confirm compatibility with engine oil type and operating temperature. Misapplication can gum up passages or contaminate the oil with curing byproducts.
When to avoid gasket maker and seek repairs
If you notice a steady oil stream or a rapidly growing puddle, avoid relying on gasket maker. Persistent leaks from the oil pan, valve cover, timing cover, or the head gasket area usually require a full seal replacement and correct torque on an unwarp-free surface. Gasket makers can mask leaks temporarily but can complicate future repairs if not fully cured or if the wrong product is used. In high-mileage engines or modern engines with tight tolerances, professional repair is often the safer route.
Oil leak types and how sealants interact
Not all oil leaks are alike. Leaks from a loose drain plug or a degraded valve cover gasket may respond to a properly applied sealant as a temporary fix, but leaks from the main engine gaskets or seals (dipstick, oil filter housing, or head gasket areas) typically require gasket replacement. The interaction between oil viscosity, engine heat, and surface texture determines effectiveness. If you’re unsure, err on the side of caution and consult a professional.
Safety and prep before application
Preparation is critical. Work in a well-ventilated area, wear eye protection, and ensure the engine is cool before you start. Clean the area around the leak thoroughly to remove oil, grime, and old sealant residue. Inspect the mating surfaces for nicks, scratches, or warping. A damaged surface will undermine any sealant’s effectiveness. Always follow the manufacturer’s guidelines for cure time and temperature range.
Step-by-step guide: applying gasket maker for small leaks
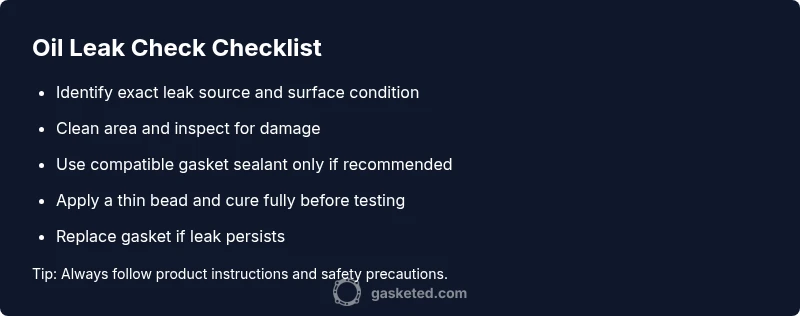
- Identify the exact leak source and isolate the affected component. 2) Clean the mating surfaces with an appropriate solvent and let dry completely. 3) Lightly roughen the surface if recommended by the product instructions; wipe away dust. 4) Apply a thin, even bead along the seam—not a glob. 5) Allow the recommended cure time with engine off and dry air exposure. 6) Recheck for seepage after the cure period and after engine warm-up. 7) If leaks persist, remove the sealant, replace the gasket, and reassemble with proper torque. 8) Dispose of contaminated rags safely and clean tools. 9) Monitor oil level regularly for early warning signs.
Tip: Use the exact product type specified for your engine and oil type. Do not mix brands. If the leak worsens, seek professional help.
Diagnostics after application: does it hold?
After curing, start the engine, let it reach operating temperature, and run for several minutes while checking for seepage. If you see fresh leaks, it’s a sign the sealant isn’t sealing the area properly or the surface isn’t suitable. In that case, you’ll need to remove the sealant and pursue gasket replacement or a more robust repair plan.
Prevention and maintenance to avoid future leaks
Regular maintenance helps prevent leaks: replace aging gaskets on a fixed schedule, use gaskets compatible with your engine, and keep oil levels at recommended ranges. Clean any buildup around gasket joints during oil changes, and inspect for warped or damaged surfaces. Early detection and addressing tiny leaks before they grow saves time and money in the long run.
Common mistakes and quick fixes
Common mistakes include applying gasket maker to hot surfaces, using silicone on metal-to-plastic joints where solvents can degrade the material, and misjudging cure times. Always verify compatibility and cure time, and never rely on a sealant for major leaks. When in doubt, replace the gasket and consult a professional.
Steps
Estimated time: 2-4 hours
- 1
Identify the leak source
Locate the exact origin of the oil leak and confirm it isn’t from hoses or the pan drain plug. This helps you avoid unnecessary sealant usage and ensures you target the correct gasket.
Tip: Use a UV dye or a flashlight to better visualize seepage in shadowed areas. - 2
Prepare the area
Cool engine, then thoroughly clean the area around the leak. Remove grime to ensure the sealant adheres properly to a clean surface.
Tip: Avoid solvents that could damage the gasket surface; follow product recommendations. - 3
Check the mating surface
Inspect the mounting surface for nicks, scratches, or warps. A damaged surface will defeat gasket sealants and require surface repair or replacement.
Tip: Lightly sand burrs if the manufacturer permits it, then clean again. - 4
Apply gasket maker correctly
Follow the product’s instructions for bead size and application method. Apply only a thin, continuous bead at the seam.
Tip: Do not glob or produce an uneven fillet; excess can trap oil and debris. - 5
Cure and test
Let the sealant cure for the recommended time with the engine off. Start the engine and check for leaks after it reaches operating temperature.
Tip: If leaks appear, stop and re-evaluate the area before driving. - 6
Decide on final action
If leaks persist after curing, replace the gasket or seek a professional service to avoid longer-term damage.
Tip: Temporary fixes should not replace a verified gasket replacement in critical areas. - 7
Post-repair monitoring
Monitor oil level and look for earlier warning signs. Keep a log of oil changes and gasket replacements for future maintenance.
Tip: Set reminders for periodic checks and service intervals.
Diagnosis: Visible oil seepage or small puddle forming under the engine after it has cooled
Possible Causes
- highDamaged or warped gasket mating surfaces
- highOld, stiff, or incorrectly selected gasket material
- mediumImproper torque or over-tightening during assembly
- lowCracks in the engine component or housing
Fixes
- easyClean the area and inspect for surface damage; replace warped surfaces if needed
- mediumReplace the gasket with a new one, use approved sealant if recommended, torque to spec
- hardIf leak persists, check for cracks or warps and consider professional head/oil pan gasket service
- easyVerify oil level, top off if needed, and monitor for recurring leaks after repair
Common Questions
Can gasket maker permanently stop an oil leak?
No. Gasket maker is typically a temporary measure for minor leaks. Major leaks or damaged gaskets require replacement and professional repair.
No. It’s usually only a temporary fix unless the leak is very minor and the surfaces are pristine.
Is it safe to use gasket maker on engine oil?
Only with products designed for engine oil and compatible with your engine’s materials. Using an incompatible sealant can cause contamination or degraded seals.
Only use sealants that are designed for engine oil and your engine type.
When should I avoid gasket maker altogether?
Avoid if you have a large or persistent leak, warped surfaces, or a suspected cracked housing. In these cases, replacement is safer.
Avoid for large leaks or damaged parts; replacement is safer.
How long does gasket maker take to cure?
Cure time varies by product; typically a few hours to overnight. Do not run the engine until curing is complete.
Cure times vary; most need several hours, sometimes overnight.
What if the leak returns after applying gasket maker?
If the leak returns, remove the sealant and inspect the gasket; replace if damaged, and torque to spec. Seek professional help if needed.
If it leaks again, you likely need a proper gasket replacement.
Can gasket maker affect engine oil pressure?
If used improperly, it can contaminate oil passages or hinder proper sealing, potentially affecting oil filter performance. Use only as directed.
Improper use could cause issues with oil flow; follow directions precisely.
Watch Video
Key Takeaways
- Apply gasket sealants only for tiny, clean leaks
- Prep and cure correctly; follow manufacturer instructions
- Permanence depends on surface condition and leak origin
- Do not rely on sealants for major leaks or damaged components
- Regular maintenance prevents future gasket failures