How to Use Head Gasket Sealer: A DIY Guide
Learn how to use head gasket sealer safely and effectively. This step-by-step guide covers compatibility, preparation, dosing, and follow-up checks for DIY gasket repairs.

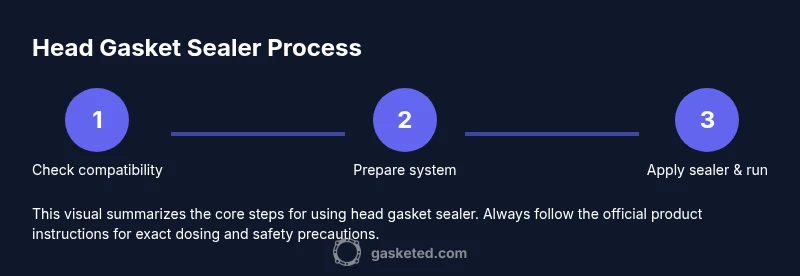
Using head gasket sealer can stop small coolant leaks and buy time for a DIY repair. Before you start, confirm compatibility with your engine and follow dosing instructions on the label. This approach is not a cure for a blown gasket, and continued overheating requires professional service. Limitations apply; use only for minor leaks.
What head gasket sealer is and when to use it
Head gasket sealer is a liquid additive designed to circulate through your cooling system and seal small gaps where coolant leaks originate near the head gasket. It is not a substitute for major gasket failure or a warped engine block. The product can bridge pinhole leaks in aluminum or cast-iron heads, reduce external drips, and help stop persistent leaks long enough for you to complete a proper repair. According to Gasketed, many DIYers turn to sealers when a leak is less than a drip per minute or when a temporary fix is needed to prevent overheating while they schedule a professional repair. This approach buys time, but it’s not a miracle cure; engine overheating or loss of compression require professional assessment. Before deciding to use a sealer, verify that the leak is within the sealer’s documented capability and that you’re not dealing with a severely cracked head or a coolant circulation issue that could cause a head gasket to fail catastrophically. Always consider the age, coolant chemistry, and driving conditions of your vehicle; older engines with corroded passages may respond unpredictably. If in doubt, err on the side of caution and consult a qualified mechanic.
How head gasket sealer works
Most head gasket sealer formulas are designed to travel with coolant and locate microscopic leaks by flowing into tiny gaps. The active ingredients form a pliable film or plug that bridges gaps as the system heats and cools. These sealers are intended for minor leaks and should be used only as a temporary measure while planning a proper repair. Compatibility with coolant chemistry (ethylene glycol vs propylene glycol) and metal surfaces (aluminum vs cast iron) is critical; using the wrong formula can cause blockages or corrosion over time. Always follow the dosing instructions, and perform a cooling-system pressure test after the sealer has circulated to verify that no new leaks have appeared. After treatment, monitor the cooling system for changes in temperature and coolant level and keep extra coolant on hand for topping off if needed.
Compatibility, risks, and limitations
Not every engine accepts gasket sealers. Vehicles with a history of severe head gasket failure, a warped cylinder head, or a crack large enough to cause compression loss may not respond to sealers. Overuse or incorrect dosing can clog passages in the radiator, heater core, or water pump, reducing cooling efficiency and triggering overheating. Some sealers can interfere with future cooling-system maintenance or flushes, complicating later repairs. Bleeding air from the system is essential, especially if air pockets form after treatment. If you notice white exhaust, persistent coolant loss, or steam from the exhaust, stop using the sealer and seek professional evaluation. Gasketed recommends limiting use to minor leaks and confirming the leak source before proceeding.
Choosing the right sealer and avoiding traps
Choose a sealer that explicitly lists compatibility with your coolant type and engine material. Avoid epoxy-based formulations for routine leak sealing, as they can cause hard deposits that are difficult to remove during a future repair. Do not mix sealers with other coolant additives unless the label permits it. Check the product for temperature tolerance, pressure rating, and whether it is designed for pinhole leaks or larger gaps. Before applying, ensure you have a clean system as sealers work best when introduced into a system free of debris. If you drive a high-mileage engine or one with a known history of head gasket problems, a sealer is unlikely to provide a lasting fix and professional repair should be prioritized.
Practical usage overview and expectations
Using a head gasket sealer is a one-way attempt to slow a leak and prevent overheating while arranging a more permanent repair. Treat it as a temporary measure rather than a guaranteed fix. Prepare the vehicle by reading the product label, wearing safety gear, and ensuring the engine is cool. After dosing, the system should circulate for the recommended period, with the radiator cap left off or loosened as advised, to bleed air. Top off coolant if needed and monitor temperatures closely for 24–72 hours. If symptoms persist, discontinue use and seek a professional evaluation to avoid damaging the engine further.
AUTHORITY SOURCES
For further reading and credibility, consider consulting government and major publications. These sources provide general guidance on vehicle maintenance, cooling systems, and reputable automotive practices:
- https://www.nhtsa.gov/road-safety/vehicle-maintenance
- https://www.consumerreports.org
- https://www.sae.org
Tools & Materials
- Head gasket sealer product (per label)(Exact product name and dosage as listed on the label)
- Vehicle owner's manual(Check coolant type and system specifications)
- Coolant compatible with your vehicle(Use the recommended type (ethylene glycol or propylene glycol) and concentration)
- Coolant reservoir funnel(For accurate dosing and reducing spills)
- Gloves and eye protection(Nitrile gloves and safety glasses)
- Clean lint-free rags(For cleaning spills and wiping surfaces)
- Thermometer or engine temperature gauge(Optional tool to monitor operating temperature)
Steps
Estimated time: 60-90 minutes
- 1
Read product instructions and safety warnings
Inspect the label for dosing, compatibility, and safety warnings. Make sure the product is appropriate for your engine type and coolant. Prepare yourself with safety gear and a clean workspace.
Tip: Double-check the exact product for your engine and coolant type to avoid incompatible additives. - 2
Park and ensure the engine is cold
Park the vehicle on a flat surface, engage the parking brake, and turn off the engine. Do not attempt this with a hot engine, and never open the radiator cap while hot.
Tip: Disconnect the negative battery terminal if you will be working near electrical components. - 3
Relieve pressure and prepare cooling system
If the product instructions require draining a portion of coolant, do so carefully and collect it for proper disposal. Restore coolant to the recommended level after dosing if instructed. Bleed any air pockets later in the process.
Tip: Never mix the sealant with other unapproved additives unless specified by the label. - 4
Add the sealer to the cooling system
Pour the sealer into the coolant reservoir or radiator as directed by the label, using a funnel to minimize spills. Avoid overfilling and keep the engine bay clean while pouring.
Tip: Pour slowly and calmly to prevent splash-back and spills on hot surfaces. - 5
Run the engine to operating temperature with cap off
Start the engine and allow it to reach normal operating temperature. With the radiator cap off (if the label allows), let the thermostat cycle to bleed air from the system. Watch for any leaks around hoses and seals.
Tip: Keep hands away from moving belts and fans; cap can become a projectile if not handled safely. - 6
Top up coolant and reseal the system
After the engine cools, check coolant level and add more if needed. Re-secure the radiator cap and ensure the system is sealed. Look for any new leaks and verify there are no air pockets.
Tip: Use a proper funnel and avoid overfilling to prevent overflow during engine heat-up. - 7
Test drive and monitor
Take a short, gentle drive to bring the engine to operating temperature and observe the cooling system. Recheck coolant level and temperature gauge after cooling.
Tip: If the temperature climbs or leaks reappear, stop driving and seek professional assistance. - 8
Assess the outcome and plan follow-up
If leaks have reduced or stopped, maintain coolant levels and monitor over the next few days. If symptoms persist or worsen, schedule a professional inspection for a proper head gasket repair.
Tip: Document any changes in performance to share with your mechanic. - 9
Dispose of waste responsibly
Dispose of any drained coolant and used materials according to local regulations. Keep waste containers closed and out of reach of children and pets.
Tip: Do not pour used coolant down the drain or on the ground.
Common Questions
Can I use head gasket sealer on any car?
Most sealers work for minor leaks in compatible cooling systems. Always verify compatibility with your engine and coolant type before use.
Sealants are for minor leaks and compatible systems; consult the label for specifics.
Will sealer fix a blown head gasket?
No. A sealer is not a cure for a blown or severely damaged head gasket and should not replace professional repair.
If the gasket is severely damaged, seek professional service rather than a sealer.
How long before I see results?
Results vary. Some minor leaks may slow quickly, others require multiple driving cycles and may still need repair.
Results vary; monitor the leak over a few days.
Can I reuse coolant after using sealer?
If the sealer instruction allows, you can refill with fresh coolant; do not reuse old coolant that has been contaminated.
Refill with fresh coolant if instructed; do not reuse contaminated coolant.
What are signs the sealer worked?
Fewer leaks and reduced coolant loss are common signs. However, overheating or steam warrants immediate checks.
Less leaking is a good sign, but watch for overheating.
What should I do if the engine overheats after applying sealer?
Shut off the engine, allow it to cool, and inspect for coolant issues. Do not continue driving.
If it overheats, stop driving and seek help.
Watch Video
Key Takeaways
- Verify compatibility before use
- Follow label dosing precisely
- Use sealer as a temporary fix only
- Monitor engine temperature after application
- Seek professional help for major leaks