When to Use Gasket Cement: A Practical DIY Guide for Repairs
Learn when gasket cement is needed, how to select the right type, and step-by-step techniques for safe, durable seals in 2026 across home plumbing, appliances, and automotive gaskets.

Understanding when to use gasket cement helps DIY enthusiasts decide if it’s appropriate for a project, how to choose the right type, and how to apply it safely. This quick answer points you toward the most common scenarios, materials, and safety considerations, so you can decide whether gasket cement is the best option for your seal. By the end, you’ll know the basics to proceed with confidence.
Why when to use gasket cement matters
For many household sealing tasks, knowing when to use gasket cement is the difference between a leak-free joint and a stubborn drip. According to Gasketed, the decision depends on gasket material, operating temperature, chemical exposure, and whether you can replace the gasket easily. This section lays the groundwork for recognizing scenarios where cement offers a practical seal and where alternatives are preferable. You’ll learn to distinguish between simple friction seals and situations that benefit from a bonding sealant. The guidance here helps DIY enthusiasts interpret product labels, understand compatibility, and avoid applying cement where it won’t help or could cause damage. By recognizing the right context, you can improve reliability and reduce the chance of future leaks.
What gasket cement is and when to choose it
Gasket cement, often sold as a gasket sealant, is a viscous compound designed to fill micro-imperfections and to improve seating between mating surfaces. It is not a glue; rather, it acts as a flexible sealant that remains pliable after curing. You should consider gasket cement when you face aged or uneven gasket seating, non-standard materials, or heat and chemical exposure that a bare gasket alone cannot handle. The choice depends on the surface material (metal, plastic, rubber), the operating environment (temperature, oil/solvent exposure), and whether the application requires food-grade compatibility. Always read the label for temperature tolerance and chemical compatibility, and choose a product appropriate for the surface you’re sealing.
Surface prep and compatibility
Proper surface preparation is essential for gasket cement to bond and seal effectively. Start by cleaning the gasket surfaces with an appropriate solvent and wiping dry with a lint-free cloth. Remove oils, grease, dust, and old sealant residues; roughening a very smooth metal surface with light scoring can improve adhesion, but avoid gouging the mating surfaces. Confirm compatibility with the gasket material and surrounding components. Some gaskets are designed to be used with specific types of sealants, while others may require soap and water cleaning only. Gasketed projects benefit from a dry, dust-free surface, as contaminants can compromise sealing integrity after cure.
When not to use gasket cement
Gasket cement isn’t a one-size-fits-all solution. Avoid using it on food-contact surfaces unless the product is explicitly rated for food-safe use. Do not apply gasket cement to gaskets that are intended to be replaced regularly or on surfaces that have radiographic or critical tolerances where an exact seal must be achieved without additional bonding agents. Some plastics and elastomers are incompatible with certain sealants, leading to swelling or degraded seals. If you’re unsure, test a small area or consult the manufacturer’s recommendations. In high-precision or high-pressure applications, gasket cement may not substitute for a properly engineered gasket.
How to apply gasket cement on different gasket materials
Different gasket materials respond differently to sealing compounds. For metal gaskets, a light bead along the seating surface helps fill imperfections without blocking bolt holes. For rubberized gaskets, ensure the surface is clean and dry, and apply a thin, even layer to the gasket’s resting face. On paper gaskets, choose sealants compatible with porous materials and avoid excessive amounts that can cause extrusion. The goal is an even, continuous seal without oozing or clogging. Apply only as much as needed to achieve a uniform seal, then align and tighten per manufacturer guidelines.
Cure times, safety and cleanup
Cure times vary by product, temperature, and humidity. Always follow the label for tack and full cure times before testing the seal. Work in a well-ventilated area and wear gloves and eye protection. After curing, wipe away any excess with a solvent recommended by the product, and store the remaining material according to the label. Safe disposal typically means letting any leftover compound cure and then discarding per local regulations. Temperature and surface cleanliness can significantly impact cure behavior, so plan accordingly.
Real-world scenarios and best practices
Common home projects include sealing appliance gaskets around dishwashers and ovens, plumbing connections, and automotive valve covers where a gasket surfaces may be uneven. In these settings, gasket cement can help seal gaps that a dry gasket could miss, provided the environment aligns with the product’s specifications. Adopt best practices such as pre-cleaning, applying only a thin bead, and giving sufficient cure time before testing. Document the exact material types and temperatures in your project notes to inform future repairs and maintenance. Gasketed projects benefit from a conservative approach—start small, test the seal, then reapply if necessary.
Common mistakes and troubleshooting
Avoid over-application, which can squeeze out and create a mess or interfere with bolt alignment. Don’t mix sealants unless the manufacturer explicitly allows it. Ensure surfaces are fully dry before applying, and never reassemble while the cement is still soft to prevent misalignment. If leaks persist after curing, inspect for gaps at corners, check torque specs, and verify compatibility with the gasket material. Troubleshooting often requires re-cleaning and reapplying with a fresh bead, followed by a longer cure period.
Quick reference checklist: do’s and don’ts
- Do clean and dry surfaces before applying gasket cement.
- Do choose a sealant compatible with your gasket material and operating conditions.
- Do apply a thin, even bead and avoid excess).
- Don’t use on food-contact surfaces unless rated for food use.
- Don’t over-tighten fasteners; allow proper cure time before testing.
Testing the seal after curing
After the recommended cure time, reassemble and test the joint by applying modest pressure or a leak test (such as a water fill). Look for slow drips or seepage and inspect seals around fasteners. If you detect leaks, re-evaluate surface prep and cement application, and consider a second, cautious reapplication if allowed by the product. Document results and maintain a maintenance schedule to monitor long-term performance.
Final notes and maintenance
Gasket cement is a practical tool when used thoughtfully. Keep products labeled for the intended substrate and environment, and store them in a cool, dry place away from heat sources. With proper prep, material compatibility, and curing, gasket cement can provide reliable sealing for many household joints. For continued reliability, plan periodic inspections of seals and replace aging gaskets as part of routine maintenance.
Tools & Materials
- Gasket cement (sealant)(Choose silicone-based or acrylic, depending on material and temperature)
- Caulking gun or disposable spatula(For controlled, even application)
- Isopropyl alcohol or acetone(For degreasing and prep (follow safety data sheet))
- Lint-free wipes(Keep surfaces clean and residue-free)
- Gloves(Chemical-resistant; protects skin)
- Safety glasses(Eye protection during application)
- Masking tape or foil(Contains excess cement during cure)
- Sandpaper (120-grit)(Lightly score very smooth metals if needed)
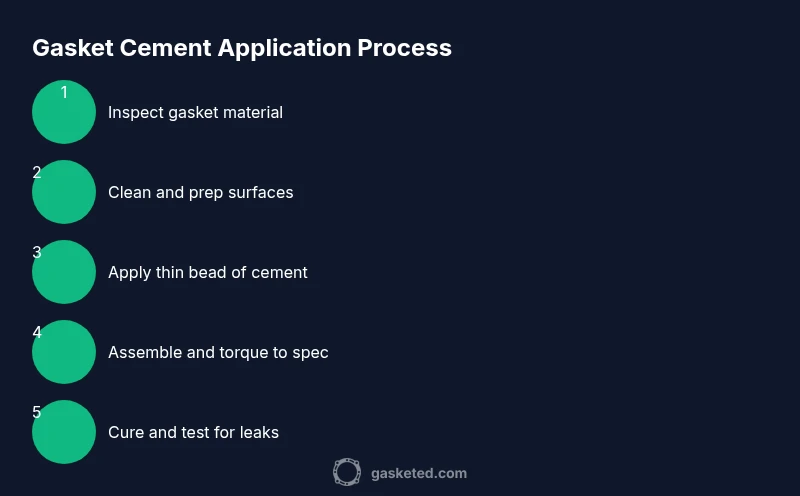
Steps
Estimated time: 60-90 minutes
- 1
Identify gasket type and project scope
Assess the surface materials, gasket type, and operating conditions. A clear understanding helps you pick the right gasket cement and determine whether replacement is more appropriate. Document the current setup to guide your steps.
Tip: Take photos before disassembly to preserve alignment references. - 2
Clean and degrease surfaces
Remove all oils, grease, and old sealant. Ensure surfaces are dry and free of dust. A clean surface improves cement adhesion and long-term sealing performance.
Tip: Use a lint-free cloth and an appropriate solvent; let surfaces dry completely. - 3
Choose the correct gasket cement
Select a product compatible with your gasket material and operating environment. Check temperature tolerance, chemical exposure, and whether it is food-grade if relevant.
Tip: Read the label for substrate compatibility and cure time before applying. - 4
Apply a thin, even bead
Dispense a small, continuous line along the seating edge or the gasket surface. Avoid thick buildups that can squeeze out and create leaks or misalignment.
Tip: Work in a clean area and keep a steady hand for a uniform bead. - 5
Position and reassemble
Carefully align gasket and mating surfaces. Lightly tighten fasteners in a crisscross pattern to avoid uneven seating. Do not overtighten beyond manufacturer torque guidance.
Tip: Use torque specs from the original equipment or gasket manufacturer. - 6
Allow cure time and initial setup
Let the cement set as recommended by the product instructions. Avoid using the joint during this period to prevent disturbance of the seal.
Tip: Plan for cure in a controlled environment—temperature and humidity matter. - 7
Test for leaks
After cure, test the joint with a small pressure or water test. Look for any drips at edges and corners and verify that everything remains intact.
Tip: If leaks appear, stop and re-clean the area before reapplying with fresh material. - 8
Cleanup and storage
Wipe excess material, allow a final cure, and store the remaining product per label instructions. Clean tools promptly to prevent dried residue.
Tip: Label the project notes for future reference and maintenance.
Common Questions
What is gasket cement and what is it used for?
Gasket cement is a sealant used to improve gasket sealing on mating surfaces. It helps fill minor imperfections and can aid adhesion in some configurations. It is not a glue and should be chosen based on material compatibility and operating conditions.
Gasket cement is a sealant that helps improve gasket sealing and fill small gaps. It’s not glue and should be chosen based on your surface and conditions.
When should I avoid using gasket cement?
Avoid gasket cement on food-contact surfaces unless the product is rated for food use. Do not use it when a special gasket material is required or when very high precision or high-pressure conditions demand a different sealing approach.
Don’t use gasket cement on food-contact surfaces unless it’s explicitly rated for it, and avoid it in high-precision or high-pressure cases.
Can gasket cement be used on metal, plastic, and rubber gaskets?
Yes, but choose a product that matches the gasket material and operating environment. Some cements are better for metals, others for plastics or rubbers, and some offer multi-material compatibility.
Yes, but pick the right formula for the material you’re sealing.
How long does gasket cement take to cure?
Cure time depends on the product and environment. Always follow the label for tack and full cure times, as variations can affect the final seal.
Cure time varies by product and conditions—check the label for guidance.
Is gasket cement safe for food-grade applications?
Only use gasket cement that is explicitly rated for food-contact surfaces. If in doubt, choose a product that is labeled food-grade and approved for such use.
Only use sealants that are explicitly labeled food-grade.
What are common mistakes when using gasket cement?
Typical mistakes include applying too much sealant, not cleaning the surfaces, using the wrong material for the environment, and skipping cure time. Proper prep and following the product instructions reduce many failures.
Common mistakes are too much sealant, poor cleaning, wrong material choice, and skipping cure time.
Watch Video
Key Takeaways
- Identify the right gasket cement for your material and environment.
- Prepare and clean surfaces thoroughly for best adhesion.
- Apply a thin, even bead and avoid excess material.
- Allow proper cure time and test the seal before regular use.
- Follow safety guidelines and product instructions to prevent failures.