Gasket Valve Cover Replacement: DIY Guide
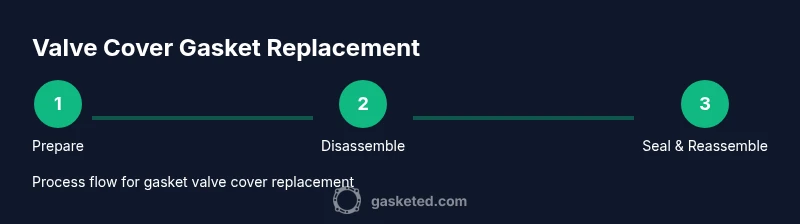
Learn how to perform gasket valve cover replacement with a step-by-step approach. This guide covers signs of failure, choosing the right gasket kit, safety prep, disassembly, sealing, and post-replacement checks for a clean engine bay.

With gasket valve cover replacement, you’ll stop oil leaks and protect the engine. This quick guide helps you spot the signs, gather the right tools, and perform the replacement with proper cleaning and sealing. It’s a doable DIY project for many hobbyists, provided you follow safety steps and torque guidance, and use the correct gasket kit.
What is a valve cover gasket and why replace?
A valve cover gasket sits between the valve cover and the engine head, sealing oil and keeping contaminants out of the camshaft area. Over time, heat cycling, oil contamination, and aging materials cause the gasket to harden, crack, or shift. When gasket valve cover replacement is due, you typically see oil seepage along the edge of the valve cover, dampness on the engine bay, or a faint oil smell near the engine. A failed gasket can also allow dirt to enter the cam area, accelerating wear. According to Gasketed, a proper gasket valve cover replacement can prevent oil leaks and protect engine performance. By replacing the gasket, you restore the intended seal and reduce the risk of oil burning on hot exhaust components. This procedure is common on many engines, but the exact gasket profile and bolt sequence vary. Always consult your vehicle’s service manual before starting to ensure compatibility and torque recommendations. In this guide you’ll learn how to identify when replacement is needed, how to choose the right gasket kit, and how to perform the replacement safely and effectively. The goal is to create a clean, one-piece seal so oil stays in the engine where it belongs and the engine bay stays dry.
Signs you need gasket valve cover replacement
Oil leaks around the valve cover are the most obvious sign, especially after a long period of heat and engine operation. You may notice stained or damp areas along the valve cover edge, a burning oil smell after driving, or fresh oil spots on the garage floor. Another sign is engine misbehavior, such as rough idle or misfiring, if oil has contaminated ignition components or spark plug wells. Some vehicles show a warning light specifically for low oil pressure due to loss through the gasket. While some leaks are minor, persistent seepage typically means the gasket has lost elasticity or the sealing surfaces have become damaged. Gasketed Analysis, 2026 indicates that worn valve cover gaskets are a common source of leaks in many engines. If you notice these symptoms, plan a gasket valve cover replacement to prevent further motor oil loss and potential damage to ignition coils and hoses. Always check for compatible gasket kits for your exact engine family and follow the recommended service bolt sequence when you reassemble.
Safety, prep, and planning before you start
Before any mechanical work, ensure the engine is cool and the battery is disconnected to avoid shorts or sparks. Work in a well-lit, ventilated area and lay down a tray or mat to catch oil. Have your replacement gasket kit ready and group all fasteners together with labels. Take photos of wiring and hose routes, especially around ignition coils or cam sensor assemblies, so you can reassemble accurately. Check the vehicle’s manual for torque guidance and gasket type, since some engines use silicone gaskets or metal-reinforced designs. If oil has pooled near the exhaust or the valve cover edges, plan to clean the surface thoroughly during reassembly. A careful prep phase reduces the risk of leaks after gasket valve cover replacement and helps you avoid stripping bolts or mis-seating the gasket.
Choosing the right gasket kit and materials
Valve covers come with cork, rubber, or silicone gaskets, and some engines require specific profiles or integrated seals. When selecting a gasket kit, confirm compatibility with your engine family and verify whether the kit includes any necessary seals, grommets, or bolts. In some cases, not all kits include the valve cover bolts or the timing cover seals, so check the contents before purchase. Consider whether your engine design benefits from a silicone gasket for heat resistance or a traditional rubber cork style for easy replacement. If your manual recommends a sealant, use the specified product and apply only as directed. Using the wrong gasket type or over-application of sealant can lead to premature leaks and gasket failure.
Disassembly and inspection notes
Begin by removing any accessories that obstruct valve cover removal, such as ignition coils or plastic covers. Carefully disconnect wires and hoses, keeping track of routing. Loosen bolts in a criss-cross pattern to avoid warping the cover, then lift the valve cover for inspection. Inspect the mounting surface for nicks, corrosion, or oil residue. If the surface is damaged, address it before reassembly, as a poor seal will persist. Take note of any oil pooling in the cam area, which may signal other issues that require attention. Replace any damaged studs or bolts with manufacturer-approved hardware and verify that the bolt threads are clean and free of debris.
Sealing surfaces and torque practices (without numbers)
Thoroughly clean both the valve cover and the engine head sealing surfaces using a lint-free cloth and a suitable degreaser. Ensure all old gasket material is removed without scratching the metal. Place the new gasket in the channel or on the cover as instructed by the kit, making sure it sits flush. When reinstalling the valve cover, tighten bolts in the recommended sequence to ensure even seating. Use a torque wrench to approach the manufacturer’s recommended torque range, then finish by hand to avoid over-tightening that could crack the cover. If your engine requires a sealant, apply a thin, uniform bead only where specified. Finally, inspect the gasket seating visually, ensuring no knots or folds.
Tools & Materials
- Replacement valve cover gasket kit compatible with your engine(Verify compatibility with your exact engine family)
- Torque wrench(Use to achieve manufacturer-recommended torque range)
- Socket set and ratchet(Assorted sizes; include a low-profile socket for tight spaces)
- Screwdrivers (flathead and Phillips)(For removing wiring connectors and trim pieces)
- Gasket scraper or plastic putty knife(Non-metal tool to avoid scratching metal surfaces)
- Cleaning rags and degreaser(For cleaning mounting surfaces and gasket channels)
- Shop towels(Keep work area clean and oil-free)
- Shop gloves(Hand protection during disassembly and cleaning)
- Drain pan and rags(Catch and contain any remaining oil)
- Marker or tape(Label wires and hoses for reassembly)
Steps
Estimated time: 1.5-2 hours
- 1
Prepare and power down
Ensure the engine is cool and disconnect the negative battery cable to prevent shorts. Clear a clean workspace, lay out your tools, and label any removed components. This step reduces surprises during disassembly and helps you stay organized.
Tip: Take a photo of wiring harness routing before disconnecting anything. - 2
Access the valve cover
Remove any components obstructing access to the valve cover, such as ignition coils or spark plug wires. Keep track of each part’s location so reassembly is straightforward. Remove decorative covers only after confirming access clearance.
Tip: Group removed parts together to avoid mix-ups during reinstallation. - 3
Loosen and remove bolts
Loosen the cover bolts in a criss-cross pattern to minimize bending. Lift the valve cover gently once all fasteners are free. Inspect bolts for wear and replace if necessary.
Tip: Do not pry under the edge of the cover; slight lifting is enough to free the seal. - 4
Clean mounting surfaces
Carefully remove old gasket material from both the valve cover and head surface using a plastic scraper. Wipe away oil residue until the surfaces are dry and free of debris. Any contamination can prevent a proper seal.
Tip: Avoid harsh scrapes that could gouge metal. - 5
Install new gasket
Place the new gasket into the groove or onto the valve cover as directed by the kit. Ensure the gasket seats evenly and that any locating tabs align with corresponding features.
Tip: Double-check fit before reassembling to prevent leaks. - 6
Reassemble with care
Carefully replace the valve cover, aligning bolt holes with the head. Insert bolts and tighten in the required sequence using a torque wrench set to the recommended range. Finish by hand to avoid overtightening.
Tip: Use a light initial pass to avoid cross-threading. - 7
Check for leaks
Reconnect any removed components, start the engine, and run it briefly. Inspect around the valve cover for oil leaks and correct any seating issues before going for a test drive.
Tip: Look for fresh oil trails during the first drive; address promptly. - 8
Finalize and clean up
Dispose of old gasket material and oil properly. Wipe down tools and the engine bay, and document the service for future maintenance records. Consider noting when the next inspection should occur.
Tip: Keep a maintenance log entry for gasket valve cover replacement.
Common Questions
Do I always need to replace the valve cover gasket with every service?
Not every service requires replacement. Replace the gasket if you see leaks, cracking, or hardening of the gasket material, or if disassembly is needed for other repairs. Refer to your vehicle’s manual for manufacturer guidance.
If you notice oil leaks or the gasket looks cracked, plan a replacement; otherwise, follow the service schedule.
Can I reuse the old gasket after cleaning it?
Reusing a worn gasket is not recommended. Most engines seal best with a new gasket to ensure a proper seal and prevent future leaks.
It’s usually best to install a new gasket for a reliable seal.
Will replacing the gasket affect nearby engine components?
Replacing the gasket can affect nearby spark plug wells and ignition components. Take care to disconnect and re-seat those parts correctly to avoid cross-contamination or misfires.
Be mindful of surrounding parts; reattach everything securely.
Is it safe to drive after a gasket valve cover replacement?
Yes, once the new gasket is seated, you can start the engine and check for leaks. If you see oil seepage, stop and reseat or tighten bolts as recommended.
It’s usually safe after a proper seal check.
Do I need special tools for this job?
A basic set of hand tools plus a torque wrench is sufficient. Some engines require coil removal tools or spark plug boot removers. Check your manual for specifics.
A standard toolset plus a torque wrench should cover most engines.
What signs indicate a leak after replacement?
Look for fresh oil around the valve cover edges, damp surfaces, or a burning oil smell after running the engine. If leaks appear, recheck gasket seating and bolt torque.
If you see oil around the edge, reseat the gasket and recheck torque.
Watch Video
Key Takeaways
- Identify symptoms early and plan ahead
- Use the correct gasket kit compatible with your engine
- Follow a criss-cross bolt pattern for even seating
- Torque bolts to spec to avoid leaks or damage
- Perform a thorough post-replacement leak check