Valve Cover Gasket Leak Troubleshooting Guide
Urgent, practical troubleshooting guide for diagnosing and repairing a valve cover gasket leak. Step-by-step DIY tips, safety notes, and prevention tips for homeowners dealing with oil leaks under the hood.

A valve cover gasket leak is typically caused by a worn or loose gasket and oil seepage under the hood. The quickest fix is to reseal or replace the gasket, then retorque the valve cover bolts to the manufacturer spec after cleaning the mating surfaces. If you notice oil on the exhaust, a burning oil smell, or worsening leaks, stop driving and seek professional help.
What is a valve cover gasket leak?
The valve cover sits atop the engine to seal the top of the cylinder head and keep oil inside the valve train area. The gasket between the valve cover and the cylinder head prevents oil from leaking onto hot exhaust components. Over time, heat cycles, vibration, and exposure to engine oil can harden or compress the gasket, creating a path for oil to escape. A valve cover gasket leak typically manifests as oil spotting on the driveway, a hint of blueish smoke, or a faint oil odor under the hood. For DIY enthusiasts, understanding the gasket’s role helps you diagnose whether the leak is simply seepage or a more serious seal failure. In many cases, addressing a valve cover gasket leak quickly prevents more extensive engine damage and keeps your vehicle safer to drive.
Why leaks happen and risks to your engine
Leaks around the valve cover are often caused by aging gaskets or misaligned seating. Repeated heat cycling can cause the gasket to harden and lose its sealing capability. Over-tightening can deform the valve cover, while under-tightening allows seepage around the bolt holes. Left unchecked, an oil leak can degrade ignition components, foul the spark plugs, and create a slippery engine bay that risks electrical shorts. Prolonged leaks can also allow oil to reach the catalytic converter, leading to smells and possible damage. Preventive maintenance—checking gasket integrity during every major service and ensuring torque specs are followed—significantly reduces risk. In a worst-case scenario, a blown head gasket can cause coolant and oil mixing, but a valve cover leak alone rarely cascades to that level unless there are multiple issues.
Signs to look for and how to inspect
Common signs include fresh oil pooling at the corners of the valve cover, dark oil traces along the valve cover edges, and a burning oil smell after a short drive. You may see oil on the exhaust pipe or air intake area, especially after driving long distances. A quick inspection involves removing debris from the engine top, visually inspecting the gasket surface, and checking for gaps or indentations. If the gasket appears dry, cracked, or misaligned, replacement is indicated. Some leaks are cured by tightening the bolts to the manufacturer torque spec, but never overtighten, as this can crack the valve cover. Always perform inspections with the engine cool and the battery disconnected when removing components.
Tools, parts, and safety basics for Valve cover gasket leaks
Prepare a clean workspace and gather a gasket kit compatible with your engine, a torque wrench, socket set, scraper, degreaser, rags, and gloves. Use a replacement gasket that matches the exact valve cover model; aftermarket options can work if they meet OE thickness and profile requirements. Safety first: wear eye protection, ensure the engine is cool, and avoid contact with hot exhaust components. Dispose of used oil and rags properly. If you observe coolant contamination or steam, stop and reassess; a professional service may be needed. Precision cleaning of the gasket surfaces is essential to ensure a leak-free seal upon reassembly.
Diagnosing the leak and planning the repair
Start with a visual inspection to locate the exact seam of the leak. If you can clean the area and still see fresh oil, the gasket—or seating surface—needs replacement. Confirm the valve cover bolts are evenly torqued to spec rather than simply snugged. If you notice cracks or a warped valve cover, replacement of the cover may be required. Always test for leaks after reassembly by running the engine and checking for oil seepage within the first few minutes of operation. If you are unsure about any step, or if coolant appears in the oil, seek professional help to avoid engine damage.
Steps
Estimated time: 60-90 minutes
- 1
Prepare workspace and safety checks
Park on a flat surface, engage parking brake, and let the engine cool. Disconnect the negative battery terminal to avoid shorts, and put on eye protection and gloves. Set out all tools and the correct gasket kit for your engine.
Tip: Label the bolts and keep track of their original positions to simplify reassembly. - 2
Access the valve cover
Remove any components obstructing access to the valve cover (air intake ducts, coil packs, or throttle body as needed). Gently disconnect wiring and hoses, keeping track of clips. Use a magnetized tool to avoid dropping small parts into the engine bay.
Tip: Take photos of your setup before removing anything for reference. - 3
Remove the valve cover
Loosen and remove the valve cover bolts in a crisscross pattern to prevent bending. Lift the cover carefully and set it aside on a clean surface. Inspect the gasket surface for cracks, nicks, or residue that could impede a seal.
Tip: Do not pry the cover with excessive force; a light tap can help free it if stuck. - 4
Inspect and clean mating surfaces
Clean the gasket seating surfaces with a mild solvent and lint-free cloth. Inspect for warping or damage on the valve cover and head, replacing parts as needed. Dry surfaces completely before reinstalling the gasket.
Tip: Ensure no debris falls into the engine opening during cleaning. - 5
Install new gasket and reseal
Position the new gasket on the valve cover, align with bolt holes, and reinstall the cover. Tighten bolts in a crisscross pattern to the recommended torque, avoiding overtightening that could crack the cover.
Tip: Use the torque pattern recommended by the gasket kit or vehicle manufacturer. - 6
Test for leaks and reassemble
Reconnect components, start the engine, and observe the valve cover area for a few minutes. Check for fresh oil streams or spots; re-tighten if necessary within spec. Reassemble any components removed earlier and dispose of old gasket material properly.
Tip: Run the engine at idle first, then gently rev to check for leaks under load.
Diagnosis: Oil seepage around the valve cover area or pooled oil under the hood; possible burning oil smell after driving
Possible Causes
- highWorn or deformed gasket causing seepage
- mediumLoose or overtightened valve cover bolts
- lowDamaged valve cover or gasket seating surface
Fixes
- easyReplace gasket and reseal; ensure mating surfaces are clean and dry, then torque bolts to spec
- easyTighten bolts to manufacturer torque specification and recheck gasket seating
- mediumIf surfaces are damaged, replace the valve cover and gasket kit
Common Questions
What are the most common signs of a valve cover gasket leak?
Typical signs include fresh oil pooling near the valve cover, oil streaks along the gasket edge, and a burning oil smell after startup. You may also notice exhaust soot or misfires if oil contaminates the spark plugs. Regular checks help catch leaks before they cause engine damage.
Look for new oil spots around the valve cover and a burning oil smell after you start the engine.
Can I drive my car if I suspect a valve cover gasket leak?
If the leak is minor and the oil level remains adequate, you may be able to drive for short distances. However, avoid driving long or hot laps while leaks are present because oil on hot exhaust can cause smoke or fire.
It’s best to avoid driving long distances until you’ve confirmed the leak is fixed.
Should I use RTV sealant on a valve cover gasket?
Most modern valve cover gasket kits are designed to seal without additional sealant. Some exceptions exist for older engines or specific kits—follow the gasket manufacturer’s instructions. Using extra sealant can contaminate the gasket and clog passages.
Only use sealant if the kit specifically calls for it.
How long does a typical valve cover gasket replacement take?
For a typical home repair, this task can take about an hour or two depending on accessibility and engine layout. More complex setups may take longer and could require removal of intake components.
Most DIY jobs take about an hour or two, depending on access to the valve cover.
Is a valve cover gasket leak related to a blown head gasket?
A valve cover gasket leak is separate from a blown head gasket, though symptoms can sometimes resemble each other. If you notice coolant mixing with oil, overheating, or persistent white steam, have a professional check for head gasket issues.
They’re related issues but not the same thing; seek a pro if the symptoms include coolant in oil or overheating.
What maintenance tips help prevent future leaks?
Regularly inspect the valve cover for oil seepage, keep the engine bay clean, and replace gaskets at the manufacturer’s intervals or when signs of wear appear. Ensure proper torque on bolts during reassembly and use quality gasket kits.
Regular checks and proper torque can prevent future leaks.
Watch Video
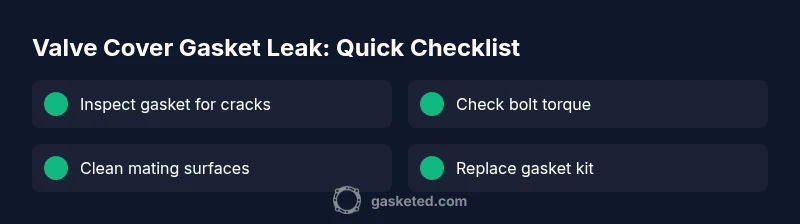
Key Takeaways
- Inspect gasket early to prevent bigger leaks
- Clean mating surfaces thoroughly before reseal
- Torque bolts to spec to avoid leaks or damage
- Test for leaks after reinstall and clean up oil spills promptly
- Use quality parts to improve long-term reliability