What to Seal Valve Cover Gasket With: A DIY Guide
Learn what to seal valve cover gasket with and how to apply it safely. This practical guide covers gasket materials, sealants, prep, torque, mistakes to avoid.

By following these steps, you’ll know what to seal a valve cover gasket with, when sealant is appropriate, and how to apply it without creating leaks. You’ll also learn surface prep, gasket selection, and reassembly tips to keep the engine bay clean and leak-free. A proper seal protects against oil leaks and engine damage.
What to seal valve cover gasket with: a practical guide
Most DIY engine gasket jobs use two core components: a gasket made for the engine and, in some cases, a thin bead of high-temperature silicone gasket sealant. The decision to seal with silicone depends on the gasket type, the engine design, and the surface finish of the mating flanges. Before you begin, verify the exact gasket material recommended by the manufacturer and check service manuals for torque specs and reassembly steps. In this guide, we’ll walk through how to identify when sealant is needed, what types of sealants are appropriate, and how to apply them for a clean, leak-free seal. You’ll gain a practical framework you can apply to most cars and light trucks, including four-cylinder and V6 engines. The goal is a clean, uniform seal that resists oil seepage over the life of the gasket. According to Gasketed, choosing the right combination of gasket material and sealant is essential to prevent leaks without creating new problems.
Common materials used with valve cover gaskets
Valve covers seal against the cylinder head using various gasket materials, including cork, rubber, and composite formulations. Rubber and silicone-based gaskets provide good longevity but require clean seating surfaces. Cork and fiber gaskets can compress over time if the surface is not flat. For most DIY projects, the gasket itself is the primary seal; sealant is a supplemental aid used only where the engine manufacturer specifies it or where the surface is imperfect. If you are unsure, consult your vehicle manual or dealership service docs. When sealant is recommended, use a high-temperature gasket maker designed for engine bays. Avoid generic silicone products that cure too rigidly or burn away under heat.
Surface prep and cleanliness is non-negotiable
Clean, dry, and debris-free surfaces are essential for a reliable seal. Start by cooling the engine, then disconnect the battery if you’ll be working near electrical components. Remove the valve cover and all components that obstruct the gasket area. Use a plastic scraper to remove old gasket material without scratching aluminum or plastic surfaces. Wipe the mating faces with degreaser or isopropyl alcohol, and let them dry completely before inspecting for nicks, burrs, or warping that could compromise sealing surfaces.
When to use sealant on a valve cover gasket
Sealant is not always required. Use it only when the gasket manufacturer or service manual instructs it, or when the mating surfaces are slightly uneven or damaged. In some engines with plastic valve covers, a light bead at the ends of the gasket seat can help seal corners where leaks tend to start. Never apply sealant along the entire length of the gasket unless explicitly recommended, as excess material can migrate and clog other engine components.
How to apply gasket sealant correctly
If sealant is warranted, apply a thin, continuous bead along the gasket ends or at corners where the gasket ends meet. Avoid excess silicone that could squeeze into the engine and interfere with spark plugs, coils, or channels. Place the gasket onto the valve cover or the head, depending on your engine’s design, and check alignment before seating. Follow the sealant manufacturer’s cure time and temperature requirements.
Torque patterns, seating, and reassembly checks
When reinstalling, tighten bolts in the recommended sequence to ensure even seating. Start by snugging bolts in a cross pattern, then torque to the manufacturer’s specification in small increments. After a brief engine operation, recheck torque if required by the manual. If you notice oil seepage, power down, allow surfaces to cool, and re-check the gasket seating.
Common mistakes and troubleshooting
Common mistakes include applying too much sealant, using the wrong gasket type for the engine, failing to clean the surfaces, or torquing bolts too aggressively. A poorly prepared surface often leaks immediately after reassembly. If leaks persist, inspect for bolt looseness, surface damage, or a misaligned gasket.
Authority sources and further reading
For authoritative guidance, consult official resources and reputable engineering references: - NHTSA: https://www.nhtsa.gov/ - DOE: https://www.energy.gov/ - Stanford Engineering: https://engineering.stanford.edu/
Tools & Materials
- Valve cover gasket(New gasket matched to your engine model)
- Gasket scraper(Plastic blade recommended to avoid surface damage)
- Torque wrench(To spec; ensure both metric and imperial if applicable)
- Socket set with appropriate sizes(For bolts and cross-pattern tightening)
- Screwdrivers (Phillips and flat-head)(For removing accessories and components)
- Degreaser or isopropyl alcohol(Surface prep and wipe-downs)
- Lint-free shop towels(Dry surfaces and clean hands during install)
- Safety glasses and gloves(Personal protective equipment)
- High-temp RTV silicone gasket sealant(Only if recommended by gasket or manufacturer)
- Masking tape (optional)(To hold gasket edges during install)
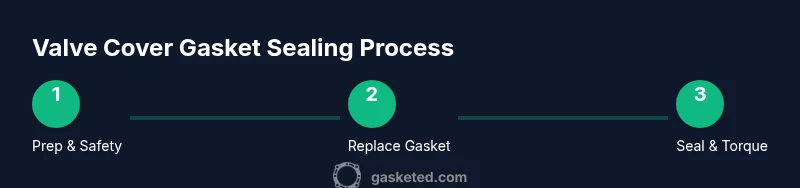
Steps
Estimated time: 60-120 minutes
- 1
Prepare workspace and safety
Ensure the engine is cool and the area is well-lit. Disconnect the negative battery cable to prevent shorts. Gather all tools and have a clean, torch-free workspace ready. Take photos of the original setup for reference.
Tip: Wear eye protection and gloves; keep fasteners organized as you remove components. - 2
Access valve cover components
Identify and remove any parts that block the valve cover (spark plug wires, ignition coils, or PCV hoses) following your vehicle’s service manual. Label or photograph each component for easy reassembly. Do not force connectors; loosen gradually to avoid damage.
Tip: Use small containers to keep screws organized by location. - 3
Remove valve cover bolts and lift the cover
Loosen bolts in a crisscross pattern, then lift the cover straight up to avoid bending the gasket seating surface. Keep bolts in the same order so you know how they came out. Place the cover aside on a clean surface.
Tip: Mind any obstructions like breather lines that may tug on the cover. - 4
Remove old gasket and clean surfaces
Gently pry off the old gasket with a plastic scraper, avoiding metal-to-metal contact. Wipe both mating faces with degreaser or isopropyl alcohol until completely clean and dry. Inspect for nicks, burrs, or warping that could affect sealing.
Tip: If debris remains in corners, use a small brush to remove it. - 5
Inspect surfaces and plan sealant use
Check for flatness; a warped surface may require resurfacing or replacement. Determine if sealant is needed based on gasket type and manufacturer guidance. If you’re unsure, default to no sealant and use a new gasket only.
Tip: Always defer to your vehicle manual when sealant use is ambiguous. - 6
Apply sealant (if required)
If sealant is warranted, apply a thin bead only at ends or corners where gasket ends meet. Do not coat the entire gasket length. Keep the bead narrow to avoid squeeze-out into spark plug wells.
Tip: Too much sealant can contaminate critical components. - 7
Install new gasket and align
Place the new gasket in position, aligned with holes and bolt bosses. If needed, gently press to seat, then set the valve cover back on the head and align bolt holes. Hand-tighten bolts to hold the cover in place.
Tip: Check that no gasket is protruding into the bolt holes before tightening. - 8
Torque bolts and test for leaks
Tighten bolts in a cross pattern to the manufacturer’s torque specification in small increments. Reconnect any removed components, reattach wiring, and start the engine. Inspect for leaks around the gasket after a brief run, then recheck torque if required by the manual.
Tip: If you see a leak, power down and recheck torque and gasket seating.
Common Questions
Do I always need sealant with valve cover gaskets?
Not always. Many gaskets seal effectively on their own. Sealant is only needed if the manufacturer or service manual specifies it or if the mating surfaces are uneven. Always follow the gasket instructions.
Sealant isn’t always required. Check the gasket instructions or manual first.
Can I reuse a valve cover gasket?
Reusing a gasket is generally not recommended because it compresses with use and may leak once reinstalled. Replacing with a new gasket is the safer choice for reliability.
Usually better to replace the gasket rather than reuse it.
What should I do if oil leaks after replacement?
If leaks appear, stop the engine and recheck gasket seating, torque pattern, and surface condition. Re-torque in the cross pattern and inspect for damage or misalignment.
If you see a leak, power off and recheck your work.
Which sealant should I use?
Use a high-temperature gasket sealant only if your gasket manufacturer recommends it. Otherwise, rely on the gasket alone for the seal. Avoid using sealants not rated for engine heat.
Use sealant only if the manual says so.
Do I need to remove spark plugs to access the valve cover?
In many engines you don’t need to remove the spark plugs, but you may need to detach ignition coils or other components depending on layout. Refer to the service manual for your specific engine.
Sometimes you’ll need to move ignition parts.
How long should the sealant cure before starting the engine?
Follow the product’s cure time. Typical guidance ranges from several minutes to an hour, depending on the sealant and temperature. Do not run the engine until the sealant has cured.
Let the sealant cure according to the product guidelines.
Watch Video
Key Takeaways
- Use the gasket as the primary seal and sealant only when recommended.
- Prepare and clean both mating surfaces thoroughly before resealing.
- Tighten bolts in a cross pattern to the spec and recheck for leaks after a short run.