What Does a Blown Gasket Look Like? A DIY Guide
Spot signs of gasket failure, diagnose accurately, and follow safe, practical steps to inspect, test, and address a blown gasket. A practical DIY troubleshooting guide from Gasketed.

A blown gasket typically shows visible symptoms like white exhaust, milky oil, coolant loss, or sudden overheating. The quick fix is to stop driving, check oil and coolant levels, and perform a basic compression test to confirm gasket failure before pursuing repair. If you notice coolant mixing with oil, or the radiator stays cold while the engine overheats, treat as urgent.
What a blown gasket looks like: visual clues
When a gasket fails, the symptoms can be dramatic or subtle, but they all point to a seal that has given way. In engines, you may see milky oil on the dipstick or around the filler cap, white exhaust smoke that lingers after startup, or coolant loss without a visible leak. In appliances, a blown gasket might manifest as sudden drafts, condensation, or moisture where it shouldn’t be, accompanied by reduced pressure or energy loss. The question you’re asking—what does a blown gasket look like—often centers on three core clues: oil-coolant contamination, overheating, and pressure loss. Look for oil floating on coolant, a creamy sheen in the expansion tank, or bubbles in the radiator when the system is under load. Documenting these signs helps you decide whether a DIY fix is feasible or if professional service is required. According to Gasketed, the most reliable visual cue is a persistent, unexplained mixture of coolant and oil that you cannot wipe away with a simple wipe.
Common manifestations by system
Gaskets span a wide range of applications—from automotive engines to home appliances. In vehicles, signs include coolant in the oil (milky appearance), white smoke from the exhaust, rough running, misfires, and overheating. In appliances like dishwashers or HVAC components, you may notice steam, damp spots, or gasket cracking around door seals that allow air or water to leak. The underlying cause is the same: the seal failed to maintain vapor or liquid integrity under pressure, temperature fluctuations, or chemical attack. Differentiating between an external leak and internal gasket failure is key: external leaks are often easy to spot around valve covers or flanges, while internal failures may only reveal themselves through fluid contamination or combustion byproducts. The more you understand the visual language of a blown gasket, the faster you can triage the issue and prevent further damage to nearby components.
How to confirm without disassembling first
You don’t need to instantly pull the engine apart to suspect a blown gasket. Start with a careful fluid check: look for milky oil, oil on the dipstick that smells like fuel or coolant, and liquid in the radiator or expansion tank that doesn’t match normal levels. A cooling system leak-down test or pressure test can reveal a loss of pressure indicating a gasket seal failure. A compression test or leak-down test can confirm if combustion gases are entering the cooling system or oil passages. If you can access a chemical test kit, a combustion gas in the cooling system test (often called a head gasket test) can provide rapid, non-destructive evidence. Safety note: never pressure-test a hot engine; allow it to cool and disconnect the battery before performing tests. If the tests point to gasket failure, plan your next steps for repair or replacement.
Immediate safety and first steps
Safety first is non-negotiable when suspecting gasket failure. If you notice overheating, shut the engine off and let it cool completely before inspecting. Remove clothing and jewelry that could snag on moving parts, and wear gloves and eye protection. Check fluid levels once cooled—engine oil and coolant—and look for cross-contamination. If coolant has entered the oil or vice versa, do not drive the vehicle; towing is the safest option. For appliances, unplug power, shut off water supply if relevant, and consult the user manual before opening casings. These first steps prevent scalding, burns, and electrical hazards while you evaluate the scope of damage.
Step-by-step home diagnostic flow you can follow
This section walks you through a practical at-home diagnostic flow to determine if a gasket has blown and what to do next. Begin with a visual inspection for obvious signs (milky oil, white smoke, coolant loss). Then perform non-destructive tests: pressure test of cooling system, compression test of cylinders, and a leak-down test to pinpoint leakage paths. If tests confirm gasket failure, consider the extent of repair required, the tools you have, and whether you’re comfortable performing a gasket replacement or if you should seek professional service. Always confirm the specific gasket type and torque specs for your system before attempting any repair. Documentation of symptoms, test results, and fluid samples helps when discussing options with a mechanic.
When to replace vs repair: a practical framework
Blown gaskets can sometimes be repaired if the damage is minor and the gasket area is clean and accessible; however, most situations require replacement to restore proper sealing. Replacement is typically recommended in engines with overt signs of combustion gas intrusion, significant coolant/oil contamination, or warped mating surfaces. For household appliances, a failed gasket is seldom worth a patch if the seal has become brittle or warped. Evaluate the cost, downtime, and potential risk to other components. In all cases, avoid running the system with suspected gasket failure, as continued operation can lead to more severe damage.
Tools, safety, and best practices
Gather a basic toolkit: flashlight, gloves, eye protection, torque wrench, gasket scraper, and appropriate hardware for the suspected system. Safety comes first: never work on a hot engine or electrical components, and keep fire suppression equipment nearby when testing pressurized systems. Use manufacturer torque specs and gasket material recommendations; mixing materials (rubber with copper, for example) can create new leaks. Keep a clean workspace, organize fasteners, and photograph steps before disassembly so you can reassemble accurately. If you’re uncertain at any point, err on the side of professional assessment. Proper lubrication and clean mating surfaces are essential to a reliable reassembly.
Prevention tips: extending gasket life
Preventive steps save time and money later. Maintain clean mating surfaces during assembly, use the correct gasket material for the application, and replace seals that show any signs of wear. Regularly inspect gaskets for cracks or hardening and address coolant leaks promptly to avoid pressure spikes. In engines, ensure proper cooling system maintenance to prevent overheating, which is a common cause of gasket failure. For appliances, avoid overly aggressive chemical cleaners that may degrade seals and always replace worn door seals with OEM-grade parts. A proactive approach reduces the risk of future gasket failures and keeps systems running smoothly.
Steps
Estimated time: 2-6 hours
- 1
Power down and safety check
Shut off the engine or appliance and disconnect power. Let it reach ambient temperature before touching any components. Wear protective gloves and goggles.
Tip: Always work cool to prevent burns or injuries. - 2
Inspect for obvious signs
Look for milky oil, white exhaust smoke, coolant puddles, or rust and corrosion around gaskets. Take photos of obvious damage for reference.
Tip: Document findings before removing parts. - 3
Check fluid levels and cross-contamination
Check oil and coolant levels and inspect the dipstick and reservoir for cross-contamination. Note any fuel smell in oil or oil in coolant as strong indicators.
Tip: Do not ignore milky oil—it's a red flag. - 4
Perform non-destructive tests
Run a cooling-system pressure test and a compression test to assess gasket integrity without full disassembly.
Tip: Follow the tester’s instructions and wear eye protection. - 5
Evaluate test results
If tests show pressure loss or abnormal combustion gases in the cooling system, gasket failure is likely confirmed.
Tip: Correlation with visual signs strengthens your assessment. - 6
Decide on repair path
If gasket replacement is viable with your skill level and equipment, plan the teardown. Otherwise, arrange professional service.
Tip: Use OEM or equivalent gasket kits to ensure proper sealing. - 7
Disassembly and cleaning (if DIY)
Carefully remove affected components, clean mating surfaces, and replace the gasket and any worn hardware.
Tip: Take photos and keep parts organized to ease reassembly. - 8
Reassembly and test
Reassemble with proper torque specs, refill fluids, and perform a pressure and run test to verify leak-free operation.
Tip: Double-check torque and gasket seating to prevent leaks.
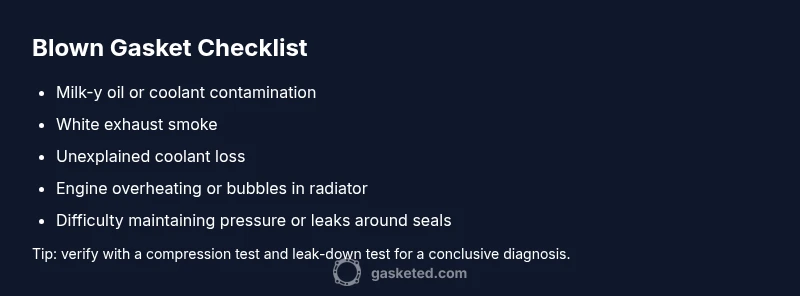
Diagnosis: Visible signs of gasket failure include white exhaust smoke, milky oil, coolant loss without obvious leaks, overheating, or bubbles in the radiator.
Possible Causes
- highOverheating due to coolant flow restriction or radiator failure
- mediumThermal cycling or age leading to seal hardening
- lowManufacturing defect or prior damage in the gasket area
Fixes
- easyPause operation, cool system, and confirm fluid contamination
- mediumPerform compression and leak-down tests to confirm gasket failure
- hardPlan gasket replacement or professional service if tests indicate failure
Common Questions
What are the most common signs of a blown gasket?
Milky oil, white exhaust smoke, coolant loss without external leaks, and engine overheating are among the most common indicators of a blown gasket. In appliances, look for unexplained moisture or pressure loss around seals.
Common signs include milky oil, white smoke, coolant loss, and overheating. In appliances, expect moisture or pressure loss around the seals.
Can you drive a car with a blown head gasket?
No. Driving with a blown gasket risks severe engine damage and failure of other seals. If you suspect a blown gasket, stop driving and arrange professional diagnosis or towing.
No, driving with a blown gasket can cause major engine damage. Stop driving and seek professional help.
How much does gasket replacement typically cost?
Costs vary based on vehicle or appliance, location, and parts quality. Expect variability in parts and labor, and always request a detailed quote before approving work.
Costs vary widely depending on the system and labor, so ask for a detailed quote before work begins.
Is a gasket replacement worth it?
In many cases, replacing the gasket is worth it to restore reliability and prevent further damage. Evaluate age, condition, and replacement cost against the value of the equipment.
Replacement is often worth it to restore reliability, especially if the unit is valuable or high-mileage.
What tests confirm a blown gasket besides visual signs?
Compression tests, leak-down tests, and chemical tests for combustion gases in the cooling system help confirm gasket failure beyond visuals.
Compression and leak-down tests, plus combustion gas tests in the cooling system, confirm gasket failure.
Watch Video
Key Takeaways
- Identify key signs of gasket failure early.
- Use non-destructive tests before disassembly.
- Decide between DIY repair and professional service based on skill and access to tools.
- Document symptoms and results for accurate diagnosis.
- Prevent future failures with proper maintenance and correct materials.