6.0 Powerstroke Head Gasket Repair: DIY Guide
A practical, step-by-step guide for diagnosing and performing a 6.0 powerstroke head gasket repair. Learn tools, torque sequences, coolant management, and safety for a reliable DIY fix.

This guide shows you how to complete a 6.0 powerstroke head gasket repair, from diagnosis to final reassembly. You’ll learn how to choose the right gasket kit, prepare your workspace, and follow a precise torque sequence to protect the engine. Expect safety checks, leak tests, and post-repair maintenance to minimize future failures. 6.0 powerstroke head gasket repair is a major project that rewards careful planning.
Understanding the 6.0 powerstroke head gasket repair
The 6.0 powerstroke head gasket repair refers to replacing the head gaskets between the cylinder head and engine block on Ford's 6.0L diesel platform. This job is more involved than typical DIY tasks because head gaskets seal multi- passage interfaces that carry combustion pressure, coolant, and oil. A blown head gasket in this engine can lead to coolant-oil mixing, white smoke, overheating, and poor compression. The goal of the repair is to restore sealing surfaces, replace gaskets and associated seals, and confirm that mating surfaces are flat and within spec. Because this job commonly requires significant disassembly, a clear plan, the right gasket kit, and the proper torque sequence are essential. The 6.0 powerstroke head gasket repair demands careful preparation, precise fastener torque, and a clean cooling system. In 2026, DIY enthusiasts who follow a methodical approach report fewer repeat failures when coolant management and debris-free mating surfaces are prioritized. According to Gasketed, approaching this job with a detailed checklist reduces risk and helps avoid common mistakes. The scope varies depending on whether you must remove the engine or can access the heads through the valley; either way, the repair is a major project that benefits from good organization and a clean bench.
Why the 6.0 powerstroke presents unique challenges
The 6.0 powerstroke presents unique challenges due to a combination of design choices and service history. This engine uses integrated coolant circuits, injector seals, and a high-pressure oil system that all interact with the head gasket. The geometry of the factory gaskets and the bolt pattern require precise torque sequences and clean, flat mating surfaces. Small deviations in deck straightness can lead to leaks even after installation. In addition, the 6.0 powerstroke head gasket repair benefits from replacing related seals, such as injector seals and valve cover gaskets, to avoid future leaks. The result is a repair that emphasizes thorough cleaning, proper gasket selection, and correct assembly order. The risk of warping or cracking the cylinder head grows if you rush or neglect the recommended service manual steps. From a practical perspective, most failures on this platform stem from overheating, improper coolant management, and insufficient surface preparation. Gasketed's analysis highlights that using the correct gasket kit and following a verified torque protocol improves long-term reliability for the 6.0 powerstroke head gasket repair.
Planning your repair: DIY vs professional
Choosing between a DIY approach and professional service for the 6.0 powerstroke head gasket repair depends on your toolkit, workspace, and comfort with heavy engine work. If you have a solid set of hand tools, a safe workspace, a vehicle hoist or engine stand, and you can invest several hours, DIY repair is possible for a mechanically confident hobbyist. For many home garages, however, the process will require engine removal and substantial disassembly, which increases the risk of injury and incorrect reassembly. In that case, professional service can protect against costly mistakes and ensure factory torque sequences are followed. Regardless of your path, start by confirming you have a complete gasket kit and the service manual’s torque specs before you begin. Budget time for potential machine shop work if deck resurfacing or head straightening is needed. The key is to plan a realistic schedule and to resist rushing the 6.0 powerstroke head gasket repair, because accuracy now prevents costly failures later.
Safety and prep for 6 head gasket repair
Safety is the foundation of any major engine repair. Begin by parking on a level surface, allowing the engine to cool, and disconnecting the battery. Work in a well-ventilated space and prepare for fluid handling: drain coolant, capture it, and dispose of it properly. Wear eye protection and gloves, and keep a clean, organized workspace with labeled containers for bolts and gaskets. Review the service manual for specific safety cautions and torque patterns; the 6.0 powerstroke head gasket repair hinges on correct bolt tightening and a clean surface. Prepare replacement coolant and a clean coolant system to prevent air pockets. Finally, plan for coolant and oil contamination control—use separate tools to handle each fluid to avoid cross-contamination.
Diagnostic steps before you begin the 6.0 powerstroke head gasket repair
Before committing to the full repair, confirm that the problem truly lies with the head gasket. Look for signs such as coolant mixing with oil, white exhaust smoke, persistent overheating, or rapid coolant loss without external leaks. Perform a cautious cooling system pressure test and, if safe, a compression or leak-down test to evaluate cylinder sealing. Inspect the oil for milkiness or discoloration and check for coolant in the intake or behind the heater core. Collect vehicle history data—temperature history, coolant consumption, and any diagnostic trouble codes—and compare them to common failure patterns for the 6.0 powerstroke head gasket repair. If symptoms align and diagnostic tests point toward a head gasket issue, you’re ready to proceed with planning and disassembly, keeping in mind injector seals and EGR components may also influence the diagnosis.
Common failure modes and failure prevention
Most failures in the 6.0 powerstroke head gasket repair come from overheating, improper torque, insufficient surface cleaning, or contaminated coolant. Prevention centers on meticulous cleaning of deck and head surfaces, verifying deck straightness with a straight edge, and using a high-quality gasket kit designed for the 6.0 platform. Replace all related seals, including injector seals and valve cover gaskets, to minimize leakage paths. During assembly, follow the exact torque sequence and verify all fasteners are within spec. After reassembly, bleed the cooling system carefully to avoid air pockets, then test for leaks and verify oil and coolant separation after running the engine.
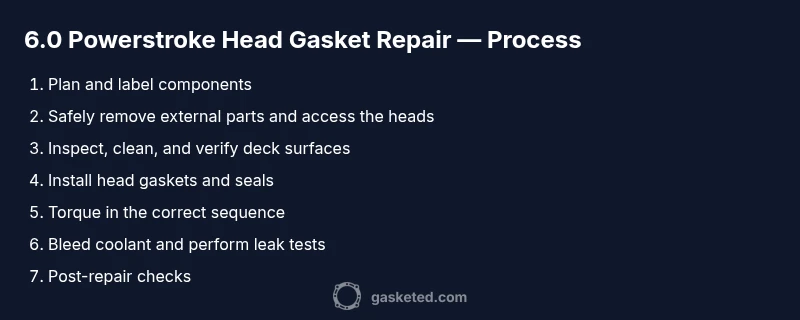
The step-by-step conceptual workflow
While the full step-by-step guide lives in the dedicated STEP-BY-STEP block, a high-level workflow for the 6.0 powerstroke head gasket repair looks like this: plan and label components; safely remove external parts and access the heads; inspect, clean, and verify deck surfaces; install head gaskets and seals; torque in the correct sequence; bleed coolant and perform leak tests; and perform post-repair checks. Remember, this is a major job that benefits from keeping your service manual close at hand and using OEM-style gaskets. The goal is a reliable seal that withstands continued diesel operation. The 6.0 powerstroke head gasket repair requires patience and careful verification at every stage.
Aftercare: break-in, coolant, and leak testing
After completing the 6.0 powerstroke head gasket repair, perform a careful break-in procedure for metal seals and new gaskets. Refill and bleed the cooling system using the factory procedure to prevent air pockets, and monitor engine temperature for several cycles. Fire up the engine and check for coolant leaks around the head, along the injector seals, and at the valve covers. Use a pressure test or dye test if you suspect small leaks. Schedule a follow-up inspection after a short driving period to ensure the repair remains sealed under typical loads. Documentation of the repair, fluid changes, and test results helps with warranty considerations and future maintenance.
Maintenance to prevent future head gasket issues
To protect the investment in a 6.0 powerstroke head gasket repair, adopt a preventive maintenance routine. Regular coolant replacement with the correct specification, consistent engine oil changes, and maintaining proper EGR operation reduce the risk of future gasket failures. Monitor engine temperature and avoid prolonged high-load operation when cooling is marginal. Cleanliness matters: keep the intake, injectors, and gaskets free of debris and replace any aging hoses or seals in a timely fashion. Finally, maintain a spare gasket kit and service manual accessible so you can address small issues before they escalate. In practice, this approach minimizes the chance of recurrence and helps your 6.0 powerstroke continue to run reliably.
Tools & Materials
- Full head gasket replacement kit (6.0 Powerstroke compatible)(Includes head gaskets, injector seals, valve cover gaskets, and related seals)
- Engine hoist or engine stand(For lifting and securing the engine during removal/reinstallation)
- Torque wrench (0-250 ft-lbs)(Precise torque with correct sequence per service manual)
- Socket set and combination wrenches (SAE/metric)(Varied sizes to access all fasteners)
- Gasket scraper and nylon brushes(Clean mating surfaces without scoring)
- Diesel-compatible coolant and distilled water(Refill coolant after repair to recommended mix)
- Gasket sealant (if specified by kit)(Only if kit calls for it or manufacturer spec requires)
- Shop rags, degreaser, PPE (gloves/eye protection)(Safety first; keep workspace clean)
- Feeler gauges or straight edge and machinist square(Ensure head and deck surfaces are flat and within spec)
- Leak-down tester or compression tester(Useful for post-repair verification)
Steps
Estimated time: 8-12 hours
- 1
Prepare the vehicle and workspace
Park on a level surface, allow the engine to cool, and disconnect the battery. Set up a clean, labeled workspace and gather the gasket kit, torque wrench, and basic hand tools. Take photos of wiring and connectors to ease reassembly and label everything as you remove it.
Tip: Label every connector and use a parts tray to keep fasteners organized. - 2
Drain fluids and remove external components
Drain the cooling system and drain engine oil as needed per service manual. Remove air intake, turbo piping if present, and any accessories that block access to the heads. Keep track of hoses and clamps with labeled bags.
Tip: Keep coolant and oil separate to avoid cross-contamination; use dedicated tools for each fluid. - 3
Remove cylinder heads
Loosen head bolts in the proper sequence after cooling and disconnecting all electrical and fuel lines. Lift the heads carefully with an engine hoist or suitable tool, ensuring even support to avoid warping. Place heads on clean surfaces and inspect for damage.
Tip: Follow the service manual’s torque sequence for bolt removal and note any shims or spacers. - 4
Inspect and clean mating surfaces
Inspect the deck and head surfaces with a straight edge for warpage. Clean all gasket lands thoroughly; remove old gasket material without scratching the metal. If warpage is detected, consult a machine shop for resurfacing.
Tip: Use a plastic scraper and non-abrasive brushes to avoid surface damage. - 5
Install new head gaskets and injector seals
Place the new head gaskets with correct orientation, then install injector seals and valve cover seals as required. Do not reuse old seals; replace all potentially leaking components in one go for reliability.
Tip: Verify gasket orientation and notch marks before seating the head. - 6
Torque the head bolts in the correct sequence
Tighten bolts in stages following the factory torque sequence. Use a calibrated torque wrench and recheck each fastener’s final torque after a short wait period to prevent settling.
Tip: Do not skip the final torque check; bolt creep can cause leaks later. - 7
Reassemble engine components
Reinstall any removed components in reverse order, reconnect all lines, sensors, and hoses. Re-check belts and pulleys for proper tension. Have a clean workspace and verify that nothing is left loose or unconnected.
Tip: Double-check every connector before final startup. - 8
Refill coolant and bleed air
Refill with the correct coolant mix and bleed the system to remove air pockets. Start the engine with the heater on and monitor for any air pockets or leaks as you reach operating temperature.
Tip: Bleed in stages and check for bubbles until the system stays steady. - 9
Initial startup and testing
Start the engine and monitor for leaks, abnormal noises, or temperature rise. Perform a leak test and a compression check if possible. Take note of any codes and address them before regular driving.
Tip: Do not drive aggressively until you confirm stable operation and no leaks.
Common Questions
Is a full engine removal usually required for the 6.0 powerstroke head gasket repair?
In many cases, the repair requires engine access that may involve removal. Some configurations allow work from above, but most require significant disassembly. Check your service manual and consider your tooling and space before deciding.
Often engine removal is needed for a proper repair, but check your manual to be sure.
What are common signs that the head gasket has failed on a 6.0 powerstroke?
Common signs include coolant mixing with oil, white smoke from the exhaust, overheating, and sudden coolant loss without external leaks. If you observe these, perform diagnostics and review service documentation before proceeding.
Look for milky oil, white exhaust smoke, and overheating as primary indicators.
How long does a typical 6.0 head gasket repair take for a DIYer?
For a capable DIYer with the right tools, plan on a full day to a weekend depending on engine access and surface conditions. If machine shop work is needed for deck resurfacing, total time increases.
Most DIY projects take a day or two, with more time if resurfacing is required.
What tools are essential for this repair?
A complete gasket kit, a calibrated torque wrench, a full socket set, a hoist or engine stand, and surface-cleaning tools are essential. Having a service manual on hand is highly recommended to ensure correct torque patterns and sequences.
You’ll need a gasket kit, torque wrench, full tool set, and a hoist or stand.
What maintenance should follow after completing the repair?
After the repair, flush and refill coolant, bleed air, and perform leak testing. Monitor temperatures and oil condition and plan a follow-up inspection after initial driving to confirm the repair holds under typical loads.
Bleed the cooling system, monitor temperatures, and recheck for leaks after driving a short distance.
Are aftermarket gaskets acceptable for a 6.0 powerstroke head gasket repair?
Aftermarket gaskets can be used if they meet OEM specifications and come from reputable suppliers. For critical engines like the 6.0, many builders prefer OEM or OEM-equivalent gaskets to minimize leak risks.
OEM-style gaskets are often the safest choice for a 6.0 repair.
Watch Video
Key Takeaways
- Plan the repair with a complete gasket kit before starting
- Follow the torque sequence exactly to prevent head damage
- Thoroughly clean mating surfaces to prevent leaks
- Bleed the cooling system and verify no air pockets after startup
- Document the process for future maintenance and warranty