Exhaust Manifold Gasket Repair: A DIY Guide
Learn how to diagnose, remove, replace, and test an exhaust manifold gasket with practical steps, safety tips, and expert guidance from Gasketed.

What is an Exhaust Manifold Gasket?
The exhaust manifold gasket is a metal- or composite-seal that sits between the exhaust manifold and the cylinder head. Its job is to seal the high-heat exhaust gases as they exit the engine while allowing the manifold to flex with thermal expansion. When this gasket fails, you may notice ticking noises, exhaust smell inside the cabin, or a visible soot ring near the flange. According to Gasketed, these gaskets endure extreme temperatures and constant cycling, making them a common DIY repair with the right precautions.
In modern engines, you may see multiple gaskets involved around the manifold and surrounding pipes. Replacing the gasket can not only stop leaks but also restore engine efficiency and reduce backpressure. The repair requires a clean surface, the correct gasket type, and careful torque in a specific sequence to avoid warping the flange.
Why Exhaust Manifold Gasket Repair Matters for Your Engine
A leaking exhaust gasket can degrade performance by increasing backpressure, causing rough idle, reduced fuel efficiency, and elevated emissions. In some cases, exhaust leaks can contribute to catalytic converter or oxygen sensor issues due to abnormal readings. For DIY enthusiasts, a successful gasket replacement can prevent longer-term damage and costly repairs. The Gasketed team notes that timely gasket repairs prevent corrosion on flange faces and help your exhaust system meet emissions standards while preserving engine performance.
Beyond performance, staying proactive with gasket maintenance reduces cabin fumes and noise. A properly sealed manifold keeps exhaust heat where it should be and protects nearby components from heat damage. By learning the signs, diagnosis steps, and replacement technique, you can complete the job with confidence and safety.
Common Causes of Exhaust Manifold Gasket Failure
Several factors contribute to gasket failure: repeated thermal cycling from cold starts and hot idle, overtightened bolts that crush the gasket, corrosion from road salt or moisture, and Poor mating surface condition when surfaces are dirty or pitted. Gasket failures may also arise from warped or damaged flanges, misaligned manifold mounting, or using the wrong gasket type for your engine. Regular inspection after maintenance helps catch small leaks before they worsen.
Understanding these causes helps you choose the correct gasket material and installation method. For example, some engines require high-temperature composite gaskets, while others use metal composite or steel-to-steel designs. Using OEM-spec or high-quality aftermarket gaskets reduces the risk of early failure and ensures a reliable seal. Proper cleaning and surface preparation are essential to prevent immediate leaks after installation.
Diagnosing a Leaking Gasket (Visual and Diagnostic Steps)
Start with a cold engine and wear protective gear. Look for black soot near the manifold joints, a ticking or tapping noise that changes with engine speed, and a strong exhaust smell in the engine bay. A smoke or leak test can reveal small leaks: introduce a non-flammable smoke agent around the flange and watch for smoke uptake at the joints. A dark, oily residue near the gasket area also hints at a leak. For more precise results, use a stethoscope to listen for abnormal sounds along the exhaust path and check for abnormal oxygen sensor readings during a cold start. The goal is to confirm the exact leak location before disassembly.
If you have access to a mechanical service manual, check the recommended gasket type, bolt pattern, and torque specification for your engine family. Consistency and cleanliness are crucial at this stage to avoid misdiagnosis and unnecessary disassembly.
Safety First: Prep and Safety Considerations
Before touching engine components, ensure the vehicle is securely supported on level ground with wheel chocks and jack stands. Disconnect the battery to avoid accidental shorts, and allow the exhaust system to cool completely before starting work. Wear eye protection, gloves, and a long-sleeve shirt to guard against hot surfaces and sharp edges. Keep a clean workspace and organize fasteners so you can reassemble in the correct order. Safety is non-negotiable because even a small mistake can lead to burns or personal injury.
Take notes or photos of the original arrangement to help with reassembly. Label or bag bolts by location if you are working on different manifolds, as angular differences can matter for torque patterns.
Tools and Materials You’ll Need (Overview)
A successful gasket repair depends on having the right tools and materials. You’ll need a complete socket set, torque wrench, scraper, wire brush, gasket set for your engine, replacement bolts or studs if recommended, anti-seize compound, gasket sealant (if specified), penetrating oil, and rags for cleaning. Depending on your vehicle, you may also need a gasket scraper designed for flanges and a suitable engine degreaser. Using OEM or high-quality aftermarket gaskets improves reliability and reduces the chance of recurring leaks.
Keep replacement gaskets organized with references to their part numbers and vehicle make/model. If you’re unsure about the gasket type, consult your service manual or the manufacturer’s guide to avoid misfit pieces that can cause leaks after reassembly.
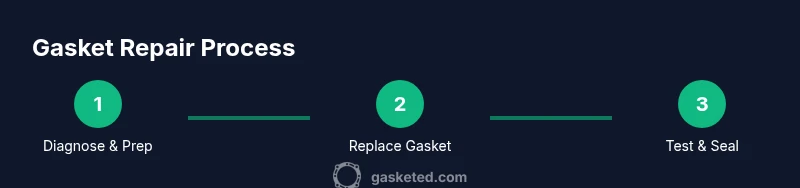
Step-by-Step Diagnosis and Removal Plan (Preparation Stage)
This section outlines the diagnostic and removal steps you’ll perform before gasket replacement. Start by cooling the engine, then disconnect hoses and remove heat shields that limit access to the manifold. Inspect the flange and studs for damage; replace any damaged hardware. Clean all mating surfaces with a solvent and a plastic scraper to remove old gasket material without scratching the metal. Use penetrating oil on stubborn bolts and apply a controlled, even pressure to avoid snapping bolts. Document the bolt pattern and relative positions for proper reassembly.
A clean workspace reduces the risk of foreign debris entering the exhaust system, which can create new leaks or block passages after reassembly.
Step-by-Step Gasket Replacement Process (Core Replacement)
Align the new gasket with the mounting holes, ensuring the gasket orientation matches the exhaust ports. Apply gasket sealant only if specified by the gasket manufacturer or service manual, otherwise rely on a sealant-free gasket interface. Install the manifold and hand-tighten bolts first to seat the flange, then follow the manufacturer’s torque specification in a crisscross pattern to distribute pressure evenly. Recheck the torque with a torque wrench after the initial seating to prevent gaps or misalignment. Reconnect any sensors and supports, ensuring no wiring is stressed by the new fit.
If you notice a warped flange or uneven seating, stop and address that issue before continuing. A warped surface can ruin a new gasket quickly and require machining or replacement of the manifold.
Reassembly, Leak Testing, and Burn-In (Post-Install Checks)
Reattach all heat shields, sensors, oxygen sensors, and exhaust pipes. Start the engine and listen for leaks at idle and during a light load. Use a hand-held bottle soap solution or an exhaust smoke test to locate new leaks. Allow the engine to reach operating temperature and re-check torque on all fasteners after 15-30 minutes of run time, since heat cycling can cause a small amount of bolt relaxation. A short test drive after cooling down again helps confirm seal integrity under typical operating conditions.
Keep an eye on exhaust smell and check engine warning lights. If you notice persistent leaks or unusual noises, re-inspect the gasket area and tighten in small increments if permitted by your manual. This careful testing ensures the repair holds under real-world operating conditions.
Common Pitfalls and How to Avoid Them
Avoid reusing old bolts if the service manual requires new hardware; degraded threads can compromise clamping force. Do not assume a gasket will seal without proper surface preparation; any residue or corrosion can create microgaps. Over-tightening is a frequent cause of flange distortion, which undermines the gasket’s seal. If you encounter a stubborn bolt, apply penetrating oil and heat in a controlled manner rather than forcing the bolt, which can snap or strip threads.
Always verify the gasket type and seating position before installation. A foul smell or misalignment after installation often hints at an overlooked flange condition or wrong gasket orientation. By sticking to the manual and taking precise measurements, you reduce the risk of repeated leaks or engine damage.
Maintenance Tips to Extend Gasket Life
Post-repair maintenance helps extend gasket life. Regularly inspect the exhaust system for corrosion and heat damage, especially around the manifold. Use anti-seize on bolts if recommended, and replace any seals or gaskets with signs of wear. Keep the heat shields intact to protect surrounding components from radiant heat. Consider periodic checks after major service to catch creeping leaks before they worsen.
A well-maintained exhaust system prevents negative effects on fuel efficiency and emissions. Early detection of leaks reduces the chance of engine misfires or damaged sensors, saving time and money in the long run.
When to Seek Professional Help
If you lack the tools, space, or experience for a complex manifold gasket job, it’s wise to consult a professional mechanic. Some engines have more involved removal procedures or require special service tooling. Additionally, professionals can quickly assess flange warp, exhaust manifold cracking, or bolt thread issues that might not be obvious to DIYers. The Gasketed team recommends weighing safety and reliability when deciding whether to DIY or hire a pro, especially on turbocharged or high-performance engines.