Head Gasket Replacement for the 4.0 Jeep: A DIY Guide
Step-by-step guide to diagnose, remove, replace, and test the head gasket on the Jeep 4.0 inline-six. Learn tools, safety, torque basics, and prevention tips from the Gasketed team.

You will learn how to inspect, remove, replace, and test a head gasket on a Jeep 4.0 inline-six. This tutorial covers essential tools, safety steps, and a diagnostic flow to confirm gasket failure. According to Gasketed, proper preparation and following torque sequence are critical to a successful repair.
Understanding the 4.0 Jeep head gasket system
The 4.0L inline-six used in many Jeep models relies on a steel-laminate head gasket to seal combustion and separate the oil and coolant passages between the engine block and the cylinder head. When this gasket fails, signs typically show up as coolant loss, milky oil, overheating, or white smoke. According to Gasketed, failures in these engines are often related to overheating, corrosion, or improper assembly during previous repairs. A solid understanding of where the gasket sits and what it seals helps you plan with confidence. For DIYers, recognizing the symptoms early can prevent costly damage to the 4.0 engine and reduce downtime.
Signs of a blown head gasket and initial tests
Common symptoms of a blown head gasket in a 4.0 Jeep include persistent overheating, coolant loss without obvious leaks, milky or whipped oil, white exhaust smoke, and in severe cases, bubbles in the radiator or coolant reservoir. You may also notice compression loss on one or more cylinders. To confirm, perform a compression test across all cylinders and compare results; a low or uneven reading suggests a gasket issue. A leak-down test can help isolate the problem, while a cooling-system pressure test checks for external leaks. Finally, a combustion-gas test in the cooling system can verify exhaust gases inside the cooling loop. Based on Gasketed analysis in 2026, overheating and poor maintenance are common precursors to gasket failure in these engines.
Tools, safety, and preparation
Safety first: work in a well-ventilated area, wear eye protection and gloves, and disconnect the battery. Gather the essential tools and materials before starting: a complete head gasket set for the 4.0 Jeep, a torque wrench with a wide range, a precision head bolt torque sequence, quality gasket scrapers, and assembly lube. You'll also need a good clean work surface, a coolant drain pan, rags, solvent, and compatible sealants as recommended by the gasket kit. Label hoses and electrical connectors, take photos during disassembly, and keep track of bolts and studs. Planning upfront reduces missteps and makes reassembly smoother.
Replacement approach and common pitfalls
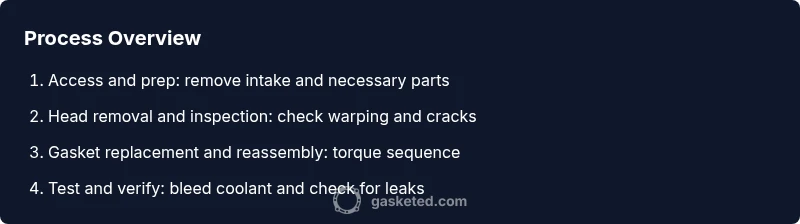
A proper head gasket replacement requires meticulous prep and follow-through. Start by removing the intake and ancillary components to access the cylinder head, then carefully lift the head and inspect the head and block surfaces for warping, scoring, or cracks. Clean all gasket surfaces thoroughly to ensure a proper seal. Install the new head gasket with the correct orientation, install new head bolts if required by the gasket kit, and torque in the specified sequence, usually in several stages with a final angle torque if applicable. Reassemble, refill coolant and oil, and bleed the cooling system. Start the engine slowly and monitor for leaks. Remember that incorrect torque, contaminated surfaces, or reusing old bolts can lead to failure.
Tools & Materials
- Socket set (metric and SAE)(Deep sockets preferred; include breaker bar)
- Torque wrench (0-150 ft-lbs or metric equivalent)(Need both low and high ranges for bolts)
- Gasket scraper and solvent(Careful to avoid head surface gouges)
- Head gasket set for 4.0 Jeep(Includes gaskets, seals, and bolts if required)
- Assembly lubricant and anti-seize(Lubricate bolt threads as recommended)
- Coolant drain pan and rags(Capture coolant safely; dispose properly)
- Sealant (as per gasket kit)(Certain passages may require sealant per kit instructions)
- Service manual or official torque sequence(Always follow the model-specific sequence)
Steps
Estimated time: Total: 4-8 hours
- 1
Prep the vehicle and safety gear
Ensure the engine is cool, disconnect the battery, and set the vehicle securely. Verify you have model-specific torque specs and the correct gasket kit. Organize bolts and components with labeled containers to avoid mix-ups.
Tip: Take a few photos as you go to aid reassembly. - 2
Drain coolant and disconnect hoses
Place a drain pan under the radiator, open the drain valve, and collect coolant. Label all hoses and electrical connectors before removal to simplify reassembly and avoid misrouting.
Tip: Coolant can be hot even when the engine seems cool; wear gloves. - 3
Remove intake components
Disconnect intake tubing, sensors, and brackets that block head access. Keep bolts organized and note the orientation of any components removed to ensure correct reinstallation.
Tip: Do not force parts; use penetrating oil on stubborn bolts. - 4
Remove the cylinder head
Loosen and remove head bolts in the recommended sequence. Lift the head straight up with assistance if needed, and inspect the head and deck surfaces for warping or cracks.
Tip: Check for valve train interference before fully lifting the head. - 5
Inspect surfaces and gasket area
Clean the mating surfaces with a plastic scraper and solvent until bright metal is visible. Inspect the block and head for warping, pitting, or sealant residue that could compromise the new gasket.
Tip: Use a straightedge and feeler gauge to verify flatness per manual. - 6
Install new head gasket and reassemble
Place the gasket in the correct orientation, install the head, and torqued bolts in the correct stages following the torque sequence. Reinstall intake, hoses, and sensors, then refill fluids.
Tip: Do not reuse old bolts if the kit specifies replacement bolts. - 7
Test and verify
Bleed the cooling system, refill oil if used, and start the engine with care. Check for leaks, test compression, and monitor temps closely for the first 30 minutes of run time.
Tip: If you see coolant leaks or unusual noises, stop and recheck the torque and gaskets.
Common Questions
Is this a feasible DIY for beginners?
This repair is doable for capable DIYers with the right tools and manuals, but beginners should seek help or supervision.
It can be done by capable DIYers with the right tools, but beginners should get help.
What tools are essential for this repair?
A complete gasket set, torque wrench, proper sockets, gasket scraper, and assembly lube are essential. A service manual provides the exact torque sequence.
You need a gasket set, torque wrench, sockets, scraper, and lube; follow the manual for torque.
How long does a typical head gasket job take?
Most DIY repairs take several hours depending on equipment access and experience; plan for a half-day to a full day.
Plan for several hours, maybe a full day depending on access and tools.
Can I reuse old head bolts?
In most cases, head bolts should not be reused if the kit or manual calls for new bolts; torque-to-yield bolts require replacement.
Usually, no—use new bolts if the manual says so or if they’re torque-to-yield.
What other parts should I replace during this job?
Consider replacing the water pump, thermostat, and coolant to prevent future failures; inspect the timing components when removing the head.
Think about replacing the water pump, thermostat, and coolant, and inspect timing parts.
What tests confirm a successful repair?
Perform a compression and leak-down test to verify sealing, plus a coolant pressure test to check for leaks.
Run a compression and leak-down test, then check for leaks after startup.
Watch Video
Key Takeaways
- Plan the job with the service manual handy
- Use the right head gasket kit and torque sequence
- Keep all surfaces clean to ensure a good seal
- Bleed and test the cooling system after assembly
- If in doubt, seek professional help