Oil Filter Gasket Replacement: DIY Guide
A practical, step-by-step guide to replace the oil filter gasket. Learn essential tools, gasket types, and leak-testing tips to keep your engine running clean and leak-free.

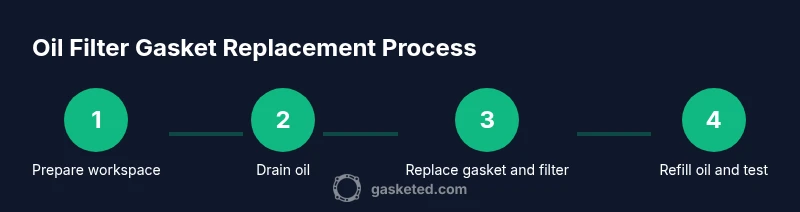
Goal: replace the oil filter gasket to stop leaks and protect engine oil. You’ll need a new gasket, a filter wrench, drain pan, and basic hand tools. The steps include draining oil, removing the old filter, swapping the gasket, installing a new filter, refilling oil, and testing for leaks. Proper seating and cautious torque are essential for a successful seal.
What an oil filter gasket does and why replacement matters
An oil filter gasket seals the interface between the oil filter and the engine block. In most engines this gasket is an O-ring or a small flat gasket that sits around the base of the filter. When the engine pressurizes oil, a damaged or poorly seated gasket can allow leaks that waste oil, reduce lubrication, and create messy underneath the hood. Replacement is a simple and essential maintenance step during every filter change. The Gasketed team emphasizes that replacing the gasket with the filter is a best practice to ensure a reliable seal. If you skip it, you risk slow leaks that can escalate into bigger problems if ignored. By understanding gasket materials and proper seating, you’ll avoid these common failures and extend the life of your oil system. This approach aligns with everyday DIY care and helps prevent costly engine damage over time.
When to replace the gasket and what to inspect
The gasket’s job is to seal a rotating connection; if it’s cracked, hard, or deformed, the seal breaks. In practice, you should replace the gasket whenever you replace the oil filter. This eliminates old compression damage and ensures a fresh seal that matches the new filter. Inspect the mounting surface: look for nicks, scratches, or old gasket residue that can prevent full seating. If you see any damage on the engine block surface, address it before reinstalling the filter. Gasketed Analysis, 2026 indicates the industry best practice is to treat each filter change as a gasket change, particularly for high-mileage engines or engines with minor corrosion at the mounting face. If in doubt, refer to the vehicle’s service manual for the correct gasket type and size.
Gasket materials and common types for oil filters
Most oil filter gaskets fall into two categories: O-rings and flat gaskets. O-rings are ring-shaped seals that compress when the filter is tightened; flat gaskets sit in a groove around the base. The material is usually black nitrile or silicone for oil compatibility and heat resistance. Some filters come with replaceable O-rings that fit specific filter models, while others use an integrated gasket that is part of the filter itself. When you purchase a new filter, you’ll typically receive a gasket or O-ring; ensure it’s the correct size for your vehicle and filter thread. If you’re unsure, consult the vehicle manufacturer’s service documentation or an auto parts supplier. Remember that a poorly chosen gasket or a misfit can cause leaks even if the filter appears tight.
Matching the gasket to your vehicle and filter model
Identify the exact filter model and year for your vehicle, then verify the gasket type and size on the packaging or the manufacturer’s online guide. If you’re using an aftermarket filter, always confirm compatibility with your engine and oil type. Some vehicles use a standalone O-ring, while others rely on a built-in gasket in the filter cap or base. When in doubt, consult the official service manual or an automotive supplier to prevent mismatches, which are a common source of leaks or cross-threading failures.
Safety, preparation, and common mistakes
Plan and prepare before you touch any engine components. Ensure the vehicle is on level ground, the engine is cool, and the workspace is clean. Common mistakes include reusing an old gasket, over-tightening the filter or drain plug, and failing to remove all gasket remnants from the mounting surface. Take care to wipe any oil residue from the mounting area and to inspect the old filter area for damage. Remember: a fresh gasket installed with the correct filter size greatly reduces the chance of leaks and oil loss. Gasketed guidance reiterates that proper seating and clean surfaces are foundational to a successful gasket replacement.
Leak testing and aftercare
After installing the new gasket and filter, refill the engine with the correct oil specification and run the engine briefly to pressurize the system. Carefully inspect the filter base and drain plug for any signs of dripping. If you notice a leak, immediately power down the engine, tighten or reseat the gasket, and recheck. Finally, recheck the oil level after a few minutes of operation and top off if needed. Proper disposal of used oil and the old filter is essential for environmental safety and is a best practice in DIY maintenance.
Tools & Materials
- New oil filter gasket (OEM or manufacturer-approved)(Ensure it matches your filter model)
- Oil filter wrench(Helps loosen a tight filter without damage)
- Drain pan(Catch used oil safely)
- Rags or paper towels(Clean mounting surface and spills)
- Gloves and safety glasses(Protection from hot oil and debris)
- New engine oil (correct grade/spec)(For refilling after replacement)
- Funnel(Helpful for steady pouring)
- Torque wrench or adjustable wrench(Use if you want precise torque per manual)
- Car jack and stands or ramps(For safe under-car access)
- Oil absorbent mat(Contain drips during process)
Steps
Estimated time: 60-75 minutes
- 1
Prepare workspace and vehicle
Park on level ground and engage the parking brake. Place wheel chocks and, if needed, raise the front with a jack and support with stands. Gather all tools and the new gasket and filter so you won’t need to leave the work area. This upfront organization reduces risk and keeps the workflow smooth.
Tip: Wear gloves and eye protection; keep a clean, dry surface for parts. - 2
Drain old oil
Position a drain pan under the oil drain plug. Slowly loosen and remove the drain plug, letting the oil drain completely. Once flow stops, replace the plug and wipe away any oil from surrounding surfaces. This step prevents spills when you remove the filter.
Tip: Cover the drain with a rag to control splatter and avoid drips on the driveway. - 3
Remove the old oil filter
Use the oil filter wrench to loosen the old filter. Carefully remove it by hand once it’s loose, letting any remaining oil drain into the pan. Have rags ready to catch drips and avoid contact with hot metal.
Tip: Keep a tray or rag under the filter to avoid spills when it comes loose. - 4
Clean mounting surface and remove old gasket
Wipe the filter mounting surface clean and remove any residue from the old gasket. Inspect for nicks or damage that could compromise the seal. A clean surface ensures the new gasket seats evenly.
Tip: Use a plastic scraper or soft rag; avoid metal tools that could scratch the surface. - 5
Install new gasket and prepare filter
Lubricate the new gasket with a light film of fresh oil, then place it on the base of the new filter. Confirm the gasket is seated evenly and isn’t twisted. If your filter comes with an O-ring, ensure it sits in the correct groove.
Tip: Lubrication helps the gasket seal smoothly and prevents tearing on installation. - 6
Install new filter and drain plug
Thread the new filter onto the mounting surface and tighten by hand until snug. If the manufacturer specifies, apply an additional small turn using a filter wrench or your hand. Reinstall and snug the drain plug to finish the removal and re-seating process.
Tip: Do not over-tighten; overtightening can damage threads and cause leaks. - 7
Refill oil and test for leaks
Pour the recommended amount of oil into the engine using a funnel. Check the oil level with the dipstick and adjust as needed. Start the engine and look for leaks around the filter base and drain plug for a minute or two; then recheck the oil level after a short run.
Tip: Dispose of used oil and the old filter at a proper recycling facility.
Common Questions
Do I need to replace the oil filter gasket every time I change the oil?
Yes. Replacing the gasket with the filter ensures a proper seal and reduces the risk of leaks. It’s a standard maintenance practice for most engines.
Yes. Always replace the gasket when you change the oil to ensure a proper seal and prevent leaks.
Can I reuse the old gasket?
Reusing a gasket can lead to a poor seal and leaks. Always use the new gasket that comes with or matches your filter.
No, don’t reuse the old gasket; use a new one to ensure a proper seal.
What if the gasket sticks to the engine instead of the filter?
If only the gasket remains on the engine, remove it completely and clean the surface before installing the new gasket. Do not force-fit a stubborn gasket.
If the gasket sticks to the engine, remove it entirely and clean the surface before installing the new gasket.
How tight should the new filter be?
Tighten the filter until snug by hand, then give it a final small turn according to the manufacturer’s instructions. Avoid over-tightening to prevent thread damage.
Hand-tight is good; follow the filter’s guidelines for a final snug turn. Don’t over-tighten.
What should I do if I see a leak after replacement?
Shut off the engine, re-check the gasket and drain plug seating, and re-tighten if needed. If a leak persists, replace the gasket or consult a professional.
If you see a leak, stop and re-check the seal. If it continues, replace the gasket or seek help.
Should I warm the engine before starting to change the gasket?
Warm oil drains more quickly, but ensure the engine is not too hot. Let it cool to a safe temperature before starting work.
A warm but not hot engine helps drain oil. Let it cool enough to touch safely.
Watch Video
Key Takeaways
- Replace the gasket with every filter change.
- Lubricate the new gasket before seating.
- Tighten by hand, then snug; avoid over-tightening.
- Check for leaks after running the engine and recheck oil level.
- Recycle used oil and the old filter responsibly.