How to Change the Oil Pan Gasket: A DIY Guide
Learn how to replace an oil pan gasket with a practical, step-by-step approach. This DIY guide covers tools, surface prep, gasket choices, and post-install checks to stop leaks and protect your engine.

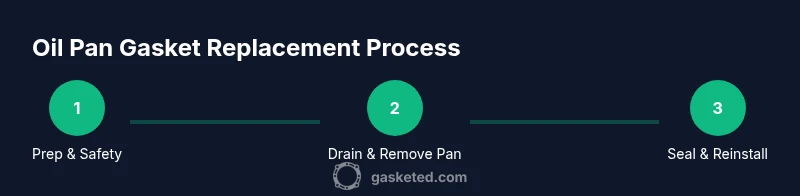
By the end of this guide, you will replace the oil pan gasket and stop persistent leaks. Gather a gasket kit, sealant (if required), fresh engine oil, and basic hand tools. The job involves draining oil, removing the pan, cleaning mating surfaces, installing the new gasket, torquing bolts to spec, and refilling oil with the engine cooled and supported.
Overview: Why the oil pan gasket leaks happen and what you’re replacing
Oil pan gaskets seal the bottom of your engine where the oil pan locks onto the engine block. Over time, exposure to heat cycles, vibration, and minor surface imperfections can cause small gaps that leak oil. Leaks around the oil pan are not unusual after tens of thousands of miles, especially on engines with aluminum pans or warped flange surfaces. Replacing the gasket restores a clean seal and helps preserve oil pressure and engine cleanliness. According to Gasketed, a correct oil pan gasket replacement reduces leaks and protects engine oil integrity, especially when you use the appropriate gasket type for your model. Understanding when the gasket is failing—consistent seepage after an oil change, dark wet spots along the pan edge, or low oil level after a short drive—will help you decide if DIY replacement is the right move for you.
Gasket types and sealants: what to choose
Oil pan gaskets come in several formats: traditional cork or rubber gaskets, composite gaskets, and silicone or RTV-sealed gaskets for some engines. The choice depends on pan material, engine design, and service manual guidance. Many modern engines use liquid sealants or a gasket with integrated sealant channels. Using the wrong gasket or sealant can lead to gaps or leaks, so verify compatibility with your vehicle before buying. OEM (original equipment manufacturer) gaskets generally fit best, but aftermarket options can be acceptable if they are listed as compatible. If your engine requires a silicone sealant, use the recommended product and apply a thin bead along the mating flange where specified. Gasketed analysis shows that proper gasket type and sealant choice correlate with leak-free results when installation torque and surface prep are done correctly.
Preparing your workspace and safety basics
Make sure you have a clean, well-lit workspace with a level surface. Park on a garage floor, engage the parking brake, and chock the wheels. If you need to lift the vehicle, use a jack and jack stands rated for your weight and keep a fire extinguisher nearby. Wear gloves and eye protection; oil and solvents can irritate skin and eyes. Have a drain pan ready to catch old oil, and keep rags handy to wipe surfaces as you work. Disconnect the negative battery cable only if you’ll be handling connected electronics near the work area; otherwise, you can leave it connected. A tidy workspace reduces mistakes and speeds the process, especially when you’re handling multiple fasteners in tight spaces.
Surface prep and cleaning: removing old gasket material
The key to a leak-free seal is clean mating surfaces. After draining the oil, inspect the oil pan flange and the engine block surface for nicks, burrs, or warping. Use a plastic scraper or a non-metallic tool to remove the old gasket material; avoid gouging the metal. For stubborn residue, apply a small amount of degreaser or brake cleaner and wipe it away with lint-free towels. Ensure the flange is dry and free of oil before your new gasket installation. Any residual residue can cause gaps and leaks that are hard to correct after reassembly.
Inspect parts for wear and damage
Look for signs of damage beyond the gasket: cracks in the oil pan, warped flanges, broken bolts, or stripped threads. If the pan is bent or there are deep gouges on the flange, you may need professional inspection or replacement of the pan. Check the bolts for corrosion and ensure the threads on the block are clean and smooth. If you notice any issues, address them before continuing. Replacing a gasket on a damaged surface will only lead to repeated leaks and a failed repair.
Plan your gasket installation: alignment and sealant decisions
Place the new gasket on the pan or engine block according to the gasket’s design. If your kit uses a gasket with alignment pins or notches, ensure proper orientation. If the gasket requires a thin bead of silicone sealant in the corners or along the edge, apply it exactly where the manual indicates. Avoid excessive sealant; too much can trap oil and create leaks, and excess sealant can clog passages. Confirm hole alignment for all bolts and note any hard-to-reach corners where a longer bit or extension may help. A careful layout reduces the chance of cross-threading and ensures a solid seal.
Installation steps: secure, align, and torque in the right pattern
Carefully position the oil pan, aligning the gasket and bolt holes. Start each bolt by hand to avoid cross-threading, then snug them in a cross-pattern sequence to seat the pan evenly. Use a torque wrench to tighten bolts to your vehicle’s service manual specification; final tightening should follow the same cross-pattern to prevent warp. If your engine requires a torque sequence or specific torque values, follow the manufacturer’s numbers exactly. After installation, wipe any excess sealant and verify the gasket seating before proceeding to oil fill.
Post-install checks: refill oil and look for leaks
Reinstall or replace the drain plug with a new washer if required, then refill the engine with the correct amount and type of oil. Start the engine and let it reach normal operating temperature, then inspect the oil pan edge for any signs of seepage. If a leak is detected, re-check torque and gasket seating; you may need to tighten bolts slightly or reapply sealant in non-critical areas. Dispose of old oil properly at a recycling facility and clean up any drips with absorbent material.
Common mistakes and how to avoid them
Rushing the task or skipping surface preparation is the most common cause of leaks after gasket replacement. Avoid using excessive torque on oil pan bolts, which can crack or warp the pan. Do not reuse an old gasket if it’s cracked or deformed; install a new one. Always follow the vehicle’s service manual torque specs and gasket orientation. Finally, don’t neglect a final leak test after oil refilling; a quick check can save you from a messy return trip to the jack stands.
Maintenance and prevention tips for a long-lasting seal
Regularly check the oil pan edge for seepage, especially after long trips or heavy loads. Maintain a clean engine bay to prevent dirt from masking leaks. If you frequently replace exhaust or underbody components, double-check gasket seating and bolt torque after road use. Schedule periodic oil changes and inspect the gasket area during each service to catch problems early. Consistent maintenance helps extend the life of the oil pan gasket and engine health.
Tools & Materials
- New oil pan gasket kit(Choose the correct type for your engine and oil pan (pre-formed vs. gasket + sealant).)
- Engine oil(Select the grade and amount per your vehicle manual; plan for a full oil change if due.)
- Oil drain pan(Capable of holding at least the engine’s drained volume; avoid overflow.)
- Gasket scraper or plastic putty knife(Use non-metal tools to avoid scratching the flanges.)
- Shop towels or lint-free rags(Keep surfaces clean and oil-free during installation.)
- Degreaser or brake cleaner(For thorough flange cleaning before gasket seating.)
- Torque wrench(Required to meet factory torque specs; use cross-pattern tightening.)
- Socket set and ratchet(Assorted sizes; include a socket for oil pan bolts.)
- Jack stands and wheel chocks(Secure the vehicle on level ground before work begins.)
- New drain plug washer (if applicable)(Replace to ensure a proper seal during reinstallation.)
- Gasket sealant (if required by gasket type)(Only use where the gasket type recommends or requires it.)
Steps
Estimated time: Estimated total time: 2-4 hours
- 1
Prepare vehicle and workspace
Park on a level surface, engage the parking brake, and chock the wheels. If you need to lift the car, place it on jack stands rated for the weight. Gather tools and parts, and ensure there is good lighting. A clean workspace reduces mistakes and keeps fasteners organized.
Tip: Take a photo of bolt positions and gasket orientation before removal to guide reassembly. - 2
Drain the engine oil safely
Place the drain pan under the oil drain plug and loosen it with the correct socket. Allow the oil to drain completely before removing the plug. Refit the plug finger-tight, then loosen again to finish draining to a reduced flow.
Tip: Never remove the drain plug while the engine is hot; allow oil to cool to avoid burns. - 3
Remove the oil pan bolts and pan
Loosen and remove the oil pan bolts in a gradual, even sequence. Carefully lower the pan; do not pry aggressively against the gasket area. If the pan sticks, gently tap to release it and check for any wiring or lines that might be attached.
Tip: Keep bolts in order by location to aid reassembly and torque accuracy. - 4
Remove old gasket and clean surfaces
Use a plastic scraper to remove the old gasket material. Clean both the pan mating surface and the engine block edge with brake cleaner until they are free of oil and residue. Inspect for nicks or warping that would affect sealing and address as needed.
Tip: Avoid scratching metal surfaces; any gouges can create leaks that ruin the seal. - 5
Inspect parts for wear and damage
Check the oil pan for cracks and the flange for warps. Verify bolt threads are clean and not stripped. If damage is detected, replace the affected part before continuing to prevent future leaks.
Tip: If you’re unsure about surface condition, consult a service manual or a qualified tech. - 6
Plan gasket installation
Position the new gasket on the pan or engine block, depending on the gasket type. Align all holes accurately and note any alignment pins. If sealant is required, apply a light, even bead only where the manufacturer specifies.
Tip: Double-check alignment before seating the pan—misalignment can cause leaks and bolt damage. - 7
Install the pan and tighten bolts
Raise the pan into place and thread bolts by hand to avoid cross-threading. Tighten in a cross-pattern to seat evenly, then torque to the vehicle’s specification. Recheck after a short test run for any drift in bolts.
Tip: Do not overtighten; over-compression can crack the pan or warp the flange. - 8
Refill oil and check level
Replace the drain plug with a new washer if required, and refill with the correct oil type and amount. Start the engine, run for a few minutes, and check for leaks around the pan. Allow oil to settle and recheck the level and leaks after the engine cools.
Tip: Use the dipstick to verify proper oil level before covering the engine bay. - 9
Final inspection and clean-up
Wipe any oil drips, dispose of waste oil responsibly, and store tools. If leaks are detected after the test run, recheck torque and gasket seating. Otherwise, you’re done and your engine is secured against leaks.
Tip: Keep a detailed note of the repairs and a photo log for future maintenance. - 10
Optional follow-up checks
Inspect again after a longer drive and during the next oil change. If you notice seepage or a repeated leak, consider resealing or professional inspection.
Tip: Document leak behavior; recurring leaks may indicate a warped pan or block surface that needs professional service.
Common Questions
Do I need to replace the oil pan gasket even if there’s no leak?
If the gasket is old, cracked, or deteriorating, replacement is wise to prevent future leaks. Visual signs and oil residue around the pan edge are common indicators that it’s time for a gasket change.
If the gasket is old or brittle, you’ll be better off replacing it now to avoid leaks later.
Can I reuse the old gasket?
Reusing a gasket is generally not recommended, especially if it’s compressed, torn, or deformed. A new gasket ensures a reliable seal and reduces the risk of oil leaks.
It’s best to install a new gasket rather than reuse the old one.
What torque specs should I use for oil pan bolts?
Torque should match the vehicle manufacturer’s specification. Tighten in a cross-pattern, then perform a final check at the recommended torque. If you don’t have the spec, consult the service manual or a reputable repair database.
Use the exact torque spec from your manual and tighten in a star pattern.
Is RTV silicone recommended for all oil pan gaskets?
RTV silicone is only recommended when the gasket type specifies it or when the service manual calls for it at specific corners. Do not apply silicone where the gasket is designed to seal on its own.
Only use silicone where the manual says to, otherwise it can trap oil and cause leaks.
How long does this job typically take?
For a typical driveway repair with basic tools, plan for about 2-4 hours. More complex engines or difficult access areas can take longer.
Around two to four hours, depending on access and your experience.
What are signs of a failed oil pan gasket besides leaks?
Foul oil smells, oil on the outside of the pan, or frequent oil top-offs without obvious drips can indicate a gasket issue or improper seating.
Watch for unexplained oil loss or stains around the pan edge.
Watch Video
Key Takeaways
- Plan and prep thoroughly before removing the pan.
- Clean surfaces completely for a reliable seal.
- Use the correct gasket and torque pattern as specified.
- Inspect for damage that would undermine the seal.
- Test for leaks after refilling oil and running the engine.