What gasket maker for timing cover: A DIY guide
Learn how to pick the right gasket maker for timing cover repairs. Compare silicone RTV and anaerobic sealants, discuss compatibility, cure times, and best practices for a reliable DIY gasket replacement.

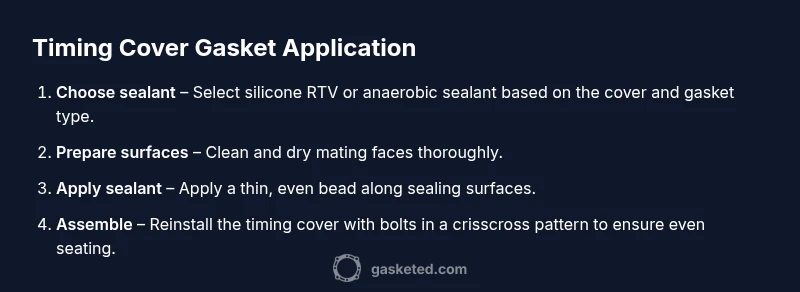
You can correctly seal a timing cover by choosing the right gasket maker and following a proper application sequence. To start, identify the timing cover material, pick a compatible sealant (typically silicone-based or anaerobic), clean surfaces thoroughly, apply a thin bead, cure per instructions, and reinstall with the correct torque. This guide covers options and best practices.
Understanding the timing cover and gasket maker choices
According to Gasketed, success starts with understanding the timing cover itself and the gasket maker you select. The Gasketed team found that compatibility between sealant chemistry and the cover material is the most important predictor of a durable seal. If you mix a sealant that expects perfectly flat metal surfaces with a cover that has minor irregularities, you’ll end up with slow leaks or quick failures. Start by identifying the cover material (aluminum, steel, or composite) and whether your engine uses a pre-formed gasket or a liquid sealant approach. Review the vehicle manual or service guide for the recommended sealant type and cure time, and inspect the mating surfaces for cracks or warping. With the right pairing, you’ll achieve a durable seal that lasts the life of the timing chain or belt.
Silicone RTV vs anaerobic sealants for timing covers
Most DIYers reach for silicone RTV because it remains flexible, cures with ambient moisture, and tolerates minor surface variations. It’s a good choice when the timing cover has a metal-to-metal interface or when a pre-formed gasket isn’t used. Anaerobic sealants cure in the absence of air, forming a strong bond on clean metal surfaces and resisting oil exposure well. They’re excellent for flat, closely fitting metal joints where clamping forces make airtight seals. The choice hinges on your engine design, whether you’re using a gasket, and the operating temperature range. In practical terms: RTV is versatile and forgiving; anaerobic sealants are powerful when you have metal-to-metal contact and clean, burr-free surfaces.
Factors to consider when choosing a gasket maker
Carefully weigh several factors before buying. First, verify compatibility with the timing cover material and any gasket that remains in place. Second, assess oil resistance and temperature tolerance; some sealants degrade under prolonged heat or exposure to engine oil. Third, check cure time and operating conditions—some products require a dry, dust-free environment and a cure window before starting the engine. Fourth, decide if you’ll use a liquid gasket maker or a pre-formed gasket with sealer. Fifth, consider ease of removal for future maintenance; flexible RTVs are easier to clean, whereas rigid anaerobic products may require more effort to remove. Finally, follow your vehicle manufacturer’s recommendations to minimize risk.
What gasket maker for timing cover: compatibility checks
Before purchasing, confirm: (1) the timing cover material and whether you have a pre-formed gasket, (2) the engine oil type and viscosity in your car’s spec, (3) the operating temperature range of the engine, and (4) the sealant’s cure time and cure temperature range. Some engines tolerate silicone RTV with a pre-formed gasket, while others require an anaerobic sealant as a sole sealing agent. If you’re unsure, consider products marketed as “gasket maker” that explicitly indicate compatibility with timing covers and both gasketed and non-gasketed interfaces. Always test a small bead on a scrap piece to confirm cure characteristics prior to applying to the actual engine.
Surface prep: cleaning and priming before application
Effective sealing begins with clean, dry surfaces. Wipe away oil and residue with isopropyl alcohol or an appropriate degreaser, and ensure the timing cover and engine block are free of old sealant, dirt, and corrosion. Use a plastic scraper to remove stubborn material—metal blades can scratch mating surfaces and compromise the seal. After cleaning, inspect for nicks or grooves; use a lightweight emery cloth or a rated repair method if needed. A well-prepped surface will improve adhesion and long-term leak resistance. Avoid residual cleaners in the bolt holes or gasket channels, as these can weaken the seal.
Application steps: applying the gasket maker properly
Apply a continuous, uniform bead of sealant along the intended sealing surface. If you’re using a pre-formed gasket with an adhesive backing, you may still apply a thin bead around the gasket contact areas to improve sealing. Do not overapply; excess sealant can squeeze out and contaminate rotating parts. If the sealant is designed to cure with ambient humidity, avoid working in overly dry or dusty environments. For anaerobic products, apply a minimal amount at bolt holes and mating surfaces to prevent squeeze-out that could break the seal. Always follow the product’s instructions for thickness and bead profile.
Curing times, handling oil exposure, and reassembly
After applying the gasket maker, let it cure per the label before final assembly. When the engine is cold and free of oil pressure, place the timing cover into position and install bolts in a crisscross pattern to ensure even seating. Wipe away any squeeze-out promptly with a lint-free cloth. Do not crank the engine or start it until the specified cure window has passed, since premature operation can cause leaks or gasket failure. If you’re reusing an old cover, replace any damaged fasteners and check torques against the service manual.
Pre-formed gaskets vs liquid sealants: trade-offs
Pre-formed gaskets provide predictable fit and can simplify replacement, but may require sealant at specific edges or bolt holes. Liquid gasket makers offer greater adaptability for imperfect mating surfaces and can be more forgiving with small gaps. On the downside, liquids require proper application technique and longer cure times, and can be messier to work with. Your choice should be guided by the engine model, the quality of the mating surfaces, and how soon you need the vehicle back on the road.
Troubleshooting leaks after timing cover service
If you notice leaks after reassembly, begin by inspecting the area for excess squeeze-out, misaligned bolts, or insufficient cure time. Re-clean the area and reapply the sealant where needed, paying particular attention to corner edges and bolt holes. If oil leaks persist, the issue may involve other gaskets or a damaged timing cover, not just the sealant. In that case, consult the service manual or seek professional advice.
Common mistakes to avoid
Avoid over-tightening bolts, skipping surface prep, or using incompatible sealants with the cover material. Don’t mix sealants meant for different substrate types, and never assume all timing covers require the same product. Failing to follow cure times or introducing oil during cure can undermine the seal. Lastly, do not rush reassembly; give the sealant the time it needs to set before running the engine.
Maintenance hints to extend gasket life
Periodic checks of timing cover gaskets can prevent leaks. When performing routine oil changes, inspect the area around the timing cover and look for signs of seepage or dried sealant. Replacing the sealant during major timing work is often wise when you notice wear or surface irregularities. Storing compatible sealant products in a cool, dry place helps maintain performance, and always verify shelf life before use.
Quick checks after completion
- Confirm all bolts are torqued to spec and in the correct sequence.
- Clean up any oil residue and perform a low-idle test for a few minutes while watching for leaks.
- Recheck for fresh seepage after engine heat cycles follow the initial run.
- Keep the area dry and free of debris to avoid contaminating the sealant during curing.
Tools & Materials
- Socket set (metric and SAE)(Includes 8mm–14mm sockets for timing cover bolts)
- Torque wrench(Capable of the engine’s bolt torque range; calibrate before use)
- Gasket maker (silicone RTV or anaerobic sealant)(Choose product compatible with timing cover and gasket material)
- New timing cover gasket (or pre-formed gasket)(Check manual for substitution rules and fitment)
- Isopropyl alcohol or approved degreaser(For surface cleaning and prep)
- Lint-free wipes(Use multiple clean wipes for thorough cleaning)
- Plastic scraper(Avoid metal scrapes that can scar surfaces)
- Gloves (nitrile or latex)(Keep hands clean and prevent gasket contamination)
- Shop rags(For quick cleanup and wiping squeeze-out)
Steps
Estimated time: Total time: 2-3 hours
- 1
Remove timing cover
Power off and cool the engine. Remove accessory belts and any components that obstruct access, then carefully unbolt and remove the timing cover. Keep track of bolts by location and note any signs of cracks or warpage.
Tip: Take a photo of bolt location before removal to ensure correct reassembly. - 2
Clean mating surfaces
Degrease both surfaces with isopropyl alcohol and wipe dry with lint-free wipes. Use a plastic scraper to remove old sealant. Ensure no fibers or debris remain in bolt holes or gasket channels.
Tip: Do not use metal tools that may scratch the mating surfaces. - 3
Inspect for damage
Check for scratches, pitting, or warpage. If the surface has damage beyond cleaning, address it before sealing (refinish or replace). A damaged surface can cause leaks even with the right gasket maker.
Tip: Mark any imperfect areas for easy reference during reassembly. - 4
Choose gasket maker and prep
Select a gasket maker compatible with timing cover material and whether you’re using a gasket. Read the label for cure time and application method. Have a clean, dust-free workspace ready.
Tip: If unsure, consult the service manual or the product datasheet. - 5
Apply gasket maker
Apply a thin, continuous bead along the sealing surface or around the gasket edges as directed by the product. Do not apply excessive bead; squeeze-out can contaminate the engine internals.
Tip: Keep a consistent bead width; use a tool or gloved finger to smooth it. - 6
Reinstall timing cover
Position the cover and start bolts by hand, then tighten in a crisscross pattern to avoid binding. Use the correct torque specification from the service manual.
Tip: Fluids or sealants on bolt threads can affect torque readings. - 7
Cure and verify
Allow the sealant to cure per label instructions before starting the engine. After curing, torque bolts again if required and perform a slow engine run to check for leaks.
Tip: Do not rush to start; curing ensures a reliable seal. - 8
Post-check and maintenance
Inspect for leaks after a heat cycle, and re-torque if necessary. Keep the area clean and monitor for the next oil change interval.
Tip: Record the work and note the sealant type used for future maintenance.
Common Questions
Do I need gasket maker for the timing cover?
In most cases, a gasket maker or sealant is recommended, especially if you are using a liquid gasket approach. Some engines use a pre-formed gasket that minimizes sealant needs; always follow the manufacturer’s guidance.
Yes, most timing cover jobs benefit from a gasket maker, but check your manual for whether a pre-formed gasket is used.
Can I reuse the old timing cover gasket?
Reusing the old gasket is generally not advised. Replacing with a new gasket or a pre-formed seal is preferred to ensure a proper seal and prevent leaks.
It's best to replace the gasket rather than reuse it.
How long does gasket sealant take to cure?
Cure times vary by product and temperature. Follow the label and avoid starting the engine until the sealant has cured as recommended by the manufacturer.
Cure time depends on the product—check the label and allow it to cure fully before starting the engine.
What’s better for timing covers: silicone or anaerobic?
Silicone RTV is versatile and forgiving for uneven surfaces; anaerobic sealants excel on clean metal-to-metal interfaces. The best choice depends on your engine design and the presence of a pre-formed gasket.
Both have uses; pick based on your cover design and what the manual recommends.
Watch Video
Key Takeaways
- Choose gasket maker that matches timing cover material
- Prepare surfaces thoroughly before sealing
- Follow cure times and torque specs closely
- Avoid over-application of sealant to prevent leaks
- Test for leaks after the engine runs and warms up