Plenum Gasket vs Manifold Gasket: Key Differences
In this in-depth comparison, DIY enthusiasts learn the differences between plenum and manifold gaskets, their roles, failure signs, materials, and replacement tips to confidently service intake systems.

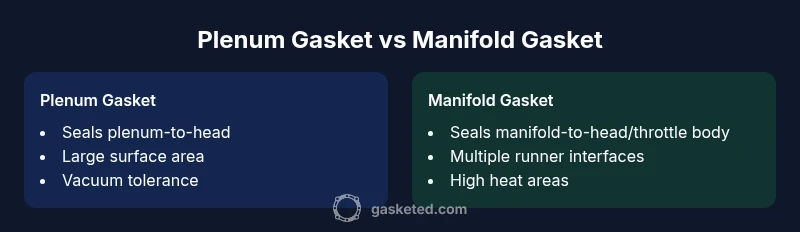
Plenum gasket and manifold gasket serve different roles in the air intake system: the plenum gasket seals the intake plenum to the cylinder head, while the manifold gasket seals the intake manifold to the head or throttle body. They have distinct failure modes and replacement considerations. For most DIYers, replacement is addressed within a full gasket service, with attention to vacuum leaks, misfires, and engine performance concerns.
Core Definitions and Roles
What is a plenum gasket vs manifold gasket? At a fundamental level, these two gaskets seal different joints in the intake system. The plenum gasket sits between the intake plenum and the cylinder head, sealing the large plenum chamber that distributes air to each runner. The intake manifold gasket seals the interface where the manifold meets the head or throttle body, guarding against air leaks into vacuum circuits and ensuring runners stay properly sealed. In most engines these parts are not interchangeable, and misidentification is a common source of replacement mistakes. For DIYers, a clear understanding of their roles helps target the correct component during service and reduces the risk of secondary leaks.
The plenum and the manifold are both integral to proper air-path sealing, but they operate under slightly different pressures, temperatures, and bolt patterns. Recognizing this distinction is critical when diagnosing symptoms or planning a gasket replacement project. According to Gasketed, knowing what is a plenum gasket vs manifold gasket directly informs which components should be included in a gasket kit and what special attention is needed during surface preparation and torquing.
Failure Modes, Diagnosis, and Symptoms
Gaskets fail primarily because of heat, vibration, and improper seating. A blown plenum gasket often manifests as vacuum leaks around the plenum joint, leading to rough idle, stalling, or fluctuating engine speed. A failed manifold gasket typically presents as vacuum leaks near the intake runners, lean or rich fuel trims, misfires at certain RPM ranges, and occasional coolant seepage into the intake path in designs where coolant runs near the gasket. Diagnosing these issues involves a combination of visual inspection, vacuum testing, and sometimes smoke tests to reveal leaks. When the engine management system detects abnormalities, codes may point toward misfires or lean conditions. In some engines, a leaking plenum gasket can allow coolant or air to escape into the plenum, causing unusual smells or overheating symptoms. Gasket-related issues can be subtle, so a methodical approach—surface cleanliness, correct gasket seating, and proper torquing—is essential for accurate diagnosis.
Materials, Design, and Engine Compatibility
Gaskets are designed to fit a specific engine family, and materials vary by application. Plenum gaskets are commonly made from composite materials with graphite or rubber seals to tolerate vacuum and heat, while manifold gaskets may use metal-reinforced composites or multi-layer steel. The design differences reflect the distinct demands of each joint: the plenum gasket often covers a larger surface area and may contend with coolant passages in some designs, while the manifold gasket must seal multiple runners and may include integrated seals around the ports. Engine compatibility matters: turbocharged, VVT, or high-performance engines may require specialized gasket materials or thicker gaskets to manage higher temperatures and pressures. In practice, the two gaskets rarely interchange because even small misalignments can produce leaks or improper runner sealing. Identifying the exact gasket required for your engine hinges on the service manual and gasket set diagrams, which prevent guesswork and costly mistakes.
Installation Nuances and Best Practices
Installation quality strongly influences gasket longevity. Start with a clean, flat sealing surface; remove all gasket remnants and burrs with a plastic scraper to avoid scoring. Use a torque sequence that follows the manufacturer's specification; many engines require a cross-pattern tightening to avoid warping the flange. Surface compatibility matters: always inspect for corrosion or warping at the head and intake ports. Some technicians prefer a thin layer of gasket sealant at the edges for certain designs, while others insist on dry seals if the gasket is a rigid composite. When replacing a plenum gasket, ensure the plenum housing is supported and that any coolant passages are properly sealed if present. For manifolds, align bolt holes carefully and check that the gasket sits flush against the head across all ports before torquing. Following the service manual and using OEM or proven aftermarket gasket sets reduces the risk of leaks and prolongs service life. According to the Gasketed team, meticulous preparation and correct torque are the most dependable predictors of successful outcomes.
Replacement Scenarios: When to Replace Each Gasket
You should plan gasket replacement when you observe signs of leakage, vacuum instability, or misfires that cannot be resolved by cleaning or reseating components. If the vehicle is already in service for an intake-system overhaul, replacing both gaskets concurrently is common practice to prevent a future, related leak from appearing after work is done. Practically, a single gasket issue may warrant replacing its counterpart if the service involves disassembly of the intake system or head, since both gaskets live in close proximity and share exposure to heat and solvents. In engines where the plenum and the manifold are integrated or rely on a shared plenum chamber, replacing one often means the other should be inspected and potentially replaced to preserve uniform sealing. Do not reuse old gaskets; use new ones from a reliable gasket kit and verify port alignment before final assembly. The Gasketed analysis notes that DIYers frequently gain better long-term results by treating these seals as a paired service rather than addressing them in isolation.
Maintenance Tips to Extend Lifespan
Proactive maintenance reduces gasket failures. Regularly inspect the intake area for signs of oil or coolant seepage near the gasket lines, which can indicate early leaks. Keep the gasket surfaces clean and free of old sealants before reinstalling; use a soft brush and appropriate cleaner to remove residue. When assembling, ensure components are cool and free of oil or fuel contaminants, which can degrade gasket materials. If you detect a recurring leak after a gasket service, double-check the torque pattern and re-torque if the manufacturer allows it, and confirm that the head and plenum surfaces are true and not warped. Finally, use a validated gasket kit designed for your engine to maximize compatibility and sealing performance.
Quick Reference: Troubleshooting Quick Checks
When troubleshooting, perform rapid checks to differentiate between plenum- and manifold-related leaks. A smoke or pressure test helps locate vacuum leaks around the plenum-to-head joint or runners. Check for misfire codes that point to a specific cylinder or a general misfire diagnosis, and correlate with vacuum readings near idle and at peak RPM. Inspect the intake tract for signs of coolant seepage, which may indicate a failed plenum gasket in certain configurations. If you observe cooling system symptoms along with intake leaks, address coolant pathways first to avoid misinterpreting the root cause as an air-leak issue. A systematic approach, paired with careful inspection and proper documentation of test results, yields the most reliable diagnosis.
Common Myths and Misconceptions
A common myth is that all gaskets are interchangeable or that a single gasket type fits every engine, which isn’t true. Another misconception is assuming a gaskets failure always causes a loud hissing sound; some leaks produce subtle symptoms like poor idle or marginal fuel economy. Some DIYers think sealants can compensate for gasket flaws; while certain designs tolerate sealants at specific joints, improper use can create film buildup, misalignment, or contaminant entrapment. Finally, there’s a belief that replacement is always expensive; in many cases, using a complete gasket kit and following the service manual minimizes labor time and overall cost relative to diagnosing and reassembling repeatedly.
Practical DIY Plan: Step-by-Step for a Typical Intake Service
Preparation matters. Gather the gasket kit, torque wrench, a plastic scraper, cleaning solvent, new clamps or hardware as specified, and PPE. Disconnect the battery, relieve any remaining pressure, and remove the air intake components to access the plenum and manifold joints. Inspect flange surfaces; remove all old gasket material without gouging the metal. Lay out gaskets in the order of assembly and lightly oil contact surfaces if manufacturer-approved. Install the plenum gasket first, then the manifold gasket, ensuring proper alignment of all ports. Draw the bolts to the specified sequence and torque to the recommended values in increments. Reassemble intake components, reconnect sensors, and perform a test start. If the engine runs smoothly without vacuum leaks and the codes clear, you’ve completed the service successfully. Gasketed recommends consulting the vehicle’s service manual for torque specs and sequence exactness, as these vary by engine family.
Conclusion/Takeaway (Note: This section summarizes the core ideas without introducing new technical steps)
Comparison
| Feature | plenum gasket | manifold gasket |
|---|---|---|
| Primary function | Seals the plenum-to-head interface, preserving uniform air distribution and vacuum integrity. | Seals the intake manifold-to-head/throttle body interface, preventing runner leaks and maintaining proper seal across runners. |
| Typical materials | Composite or graphite-based, sometimes with rubberized seals for vacuum tolerance. | Composite-to-metal or multilayer steel, often with reinforced seals for high-heat areas. |
| Common failure signs | Vacuum leaks near plenum joints, rough idle, stalling, or fluctuating RPM. | Vacuum leaks near runner interfaces, misfires, rough acceleration, or abnormal fuel trims. |
| Installation considerations | Clean, flat surfaces; proper torque sequence; check for coolant passages if present. | Precise alignment across multiple ports; compatible hardware; avoid over-tightening. |
| Replacement approach | Often includes when performing a larger intake gasket service; may be replaced within a dedicated kit. | Typically replaced as part of an intake gasket service; sometimes done separately if only one joint leaks. |
Pros
- Clear separation of air paths reduces cross-contamination risks
- Part of a comprehensive gasket kit simplifies sourcing
- Improved engine performance when leaks are eliminated
- Can be inspected during routine gasket service for early signs
What's Bad
- Replacement can be labor-intensive due to disassembly
- Misidentification may lead to incorrect replacement and wasted effort
- Some engines require special tools or timing checks during service
For most engines, treat plenum and manifold gaskets as a linked intake service.
The Gasketed team recommends addressing both gaskets during intake work to prevent future leaks and ensure consistent sealing across the entire air-path. A paired replacement approach reduces diagnostic ambiguity and improves long-term reliability.
Common Questions
What is the main difference between a plenum gasket and a manifold gasket?
The plenum gasket seals the plenum-to-head joint and manages the large intake chamber, while the manifold gasket seals the intake manifold-to-head or throttle body interface. They address different sections of the air intake path and replacement requires targeting the correct joint. These gaskets are not interchangeable in most engines due to design geometry.
The plenum gasket seals the big intake chamber to the head, while the manifold gasket seals the manifold to the head or throttle body. They serve different parts of the intake path, so replace the right one for the joint you’re servicing.
Can I replace one gasket without addressing the other?
In many cases you can replace a single gasket if you only service one joint, but if the engine has already been disassembled for intake work, inspect both joints and replace both if signs of wear are present. Misidentification or partial service can leave hidden leaks that surface later.
Yes, you can replace one gasket if only that joint is leaking, but it’s often best to inspect both if you’re already in there.
What are common signs that these gaskets need replacement?
Common signs include vacuum leaks with a rough idle or misfires, decreased fuel economy, and unusual engine noises. In some cases, coolant can leak into the intake path near the plenum gasket design. If codes point to lean or misfire diagnostics, inspect both gaskets as part of a thorough check.
Look for vacuum leaks, rough idle, misfires, and fuel economy drop. Codes for misfire or lean conditions also point to gasket issues.
Are plenum and manifold gaskets cross-compatible between engine models?
Compatibility depends on engine design; most engines require specific gasket shapes, bolt patterns, and seals for each joint. Always refer to the service manual or gasket kit diagrams to confirm fitment before ordering.
Usually not; check the manual or diagram to ensure you have the correct gasket for your engine.
Should a DIYer use OEM or aftermarket gasket sets for these parts?
OEM equivalents are generally reliable for fit and sealing, but many high-quality aftermarket gasket sets are suitable. Prioritize kits that match your engine’s exact configuration and include all necessary seals and hardware.
OEM or trusted aftermarket sets are both acceptable; pick one that matches your engine and includes all needed seals.
How long does a typical intake gasket replacement take for a hobbyist?
For a competent DIYer with the right tools, a full intake gasket service can take several hours, depending on engine layout and access to the joints. Plan for a careful process, including cleaning surfaces and verifying torque specs at the end.
It usually takes a few hours for a careful DIY job, depending on engine access and how thorough you are with cleaning and torque.
Key Takeaways
- Identify which gasket is at issue with a systematic diagnosis
- Plan replacement as part of a complete intake service when disassembling
- Follow torque sequences and clean surfaces thoroughly
- Use gasket sets designed for your engine to ensure proper fit
- Inspect nearby components for heat/damage that could affect sealing