What Size Gasket for Toilet: A DIY Guide
Discover the right gasket size for your toilet, how to measure flange diameter, and steps to replace a gasket for a leak-free seal. A practical DIY guide by Gasketed.

Why Toilet Gasket Size Matters
When you ask what size gasket for toilet, you’re really asking how to match the gasket to the flange and the toilet base. The gasket size determines the sealing surface against which the toilet sits and, crucially, how the wax ring or modern gasket compresses to prevent water from escaping. A mismatch can lead to slow leaks, stubborn odors, and repeated resealing. For DIYers, understanding size helps you select the correct replacement and avoid a second trip to the hardware store. According to Gasketed, the right gasket size reduces the chance of future leaks and simplifies maintenance, making the job faster and more reliable. In most homes, standard sizes cover the majority of toilets, but always verify against your current hardware before purchasing.
In addition to the diameter, consider the flange height and the edge geometry where the gasket sits. If the gasket sits higher or lower than the flange, you may need an adaptable or thicker model. Documenting the measurements and keeping a spare gasket on hand can save a morning of rework. This is especially true for rental properties or older homes where flange restorations are common. By knowing the correct size upfront, you set a solid foundation for a leak-free seal and longer-lasting performance.
How to Accurately Measure Your Toilet Flange and Gasket
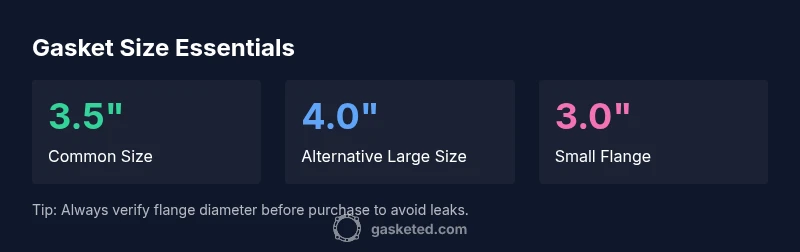
Measuring is the only reliable way to choose the correct gasket size. Start by turning off the water supply and draining the tank and bowl. Remove the bolts and gently lift the toilet (with help if needed) to expose the flange. Use a ruler or caliper to measure the diameter of the flange cutout where the gasket sits. If you find the flange is damaged or warped, you might need a replacement flange and a thicker gasket option. Compare your measurement to common sizes: many residential toilets use 3.0–4.0 inch gaskets, with 3.5
3.5 in
4 inch
4.0
3 in
3.5 inch
4 inch
. If you have an existing gasket, you can use its outer diameter as a reference, but don’t rely on it alone—manufacturers may differ slightly.
Document the exact diameter and height, then bring these measurements when shopping for a replacement. For best results, consult product guides or the toilet manufacturer’s recommendations. When in doubt, a manufacturer-approved kit that matches your flange type is safer than mixing brands. The goal is a snug, even seal around the entire base without forcing the toilet into a tighter position than the bolts allow.
Common Gasket Sizes and What They Mean
Gaskets come in a few standard sizes, and the right choice depends on your flange diameter and the toilet’s positioning. The most common residential sizes fall within 3.0 to 4.0 inches in diameter. A gasket labeled 3.5 inches is designed for a flange that measures roughly 3.5 inches across. Alternatively, a 4-inch gasket fits a 4-inch flange. In practice, many toilets use one of these three sizes, but the exact fit still depends on flange depth and the bowl’s footprint. If your measurements land between two sizes, choose the larger gasket and check that the base sits evenly on the floor. A poorly seated gasket can fail to seal and cause seepage over time. When selecting, consider the toilet’s style (elongated vs round) and the flange’s condition. You may need a slightly thicker gasket for certain configurations, especially if your flange sits a bit recessed or raised. Finally, verify that the gasket material is compatible with your water supply and is rated for bathroom temperatures and pressures.
Step-by-Step: Replacing a Toilet Gasket
Before starting, gather the essentials: new gasket, adjustable wrench, pliers, putty knife, bucket, towels, and a sealant compatible with bathroom fixtures. 1) Shut off water, flush to drain, and disconnect the supply line. 2) Remove the toilet by unbolting, gently rocking to break the seal, and lifting straight up. 3) Clean the flange and remove residue from the surface. 4) Inspect the flange for damage; replace if warped or cracked. 5) Place the new gasket onto the flange, ensuring alignment with bolt holes. 6) Reinstall the toilet, hand-tighten bolts, then torque to manufacturer specs. 7) Reconnect the supply line, turn water on, and check for leaks. 8) If you detect a leak, reseat and re-tighten, or replace with a new gasket.
Following this sequence helps ensure a durable seal and minimizes the risk of rework. For best results, consider inspecting the wax ring or gasket with the toilet removed and replacing it if it shows wear. A well-fitted gasket will prevent seepage and keep the bathroom dry and comfortable.
Troubleshooting: Leaks, Odors, and Seal Failures
If you notice a slow drip or musty smell near the base, reevaluate gasket fit, flange integrity, and bolt tightness. Ensure there is no wicking due to water dancing along the underside of the bowl edge. Leaks can originate from a loose bolt or a gap between the toilet and flange—re-tightening bolts or reseating the toilet may fix it, but if the flange is damaged or the substrate is uneven, a professional repair may be necessary. Odors can also indicate a venting issue, not solely a gasket problem, so check the plumbing venting and trap seal condition. In some cases, replacing the gasket with a thicker option, or adding a universal sealant where permitted, can help but only if compatible with the fixture. After any reseating, check for leaks again and test with a dry paper towel around the base to confirm a solid seal. If you’re unsure, consult a local plumber or the manufacturer’s guidelines for your toilet model.
Choosing the Right Gasket Material and Sealant for Longevity
Gasket materials range from traditional wax rings to modern flexible gaskets made of rubber or silicone composites. Wax rings are inexpensive and reliable for standard installations but require replacement if the toilet is removed. Flexible gaskets provide better resilience and can accommodate minor flange irregularities. When selecting materials, consider the environment (bathroom humidity, temperature fluctuations) and the toilet’s weight distribution. For certain configurations, especially in homes with hard water, you may want a gasket with corrosion resistance or a sealant compatible with metal components. Always use sealants only as recommended by the gasket or toilet manufacturer to avoid compromising the seal. By matching gasket material to your toilet type and conditions, you improve longevity and reduce rework.