Where Is the Gasket in a Washing Machine: A DIY Guide
Learn where the gasket sits in a washing machine, how to inspect it for wear, and steps to clean or replace it safely. Practical, DIY-friendly guidance for leaks and mold.

By the end of this quick guide, you’ll know exactly where the gasket sits on common washers, how to assess its condition, and what steps to take if you need to clean or replace it. It covers safety, basic inspection, and when to call a pro. Whether you’re chasing leaks or mold, this page helps you locate the seal quickly and decide the right fix.
Understanding the gasket location in washing machines\n\nThe gasket, often called the door seal, is a flexible rubber ring that sits around the opening of the drum. In most front-loading machines, you’ll see it hugging the circumference of the door opening. In many top-loading models, the gasket or a similar seal resides near the lid opening or along the inner tub rim. According to Gasketed, this seal is a critical barrier against leaks and mold formation, and its location is purposefully designed to seal the gap while allowing the drum to rotate freely. If you’re troubleshooting damp smells or water streaks, locating the gasket is the first essential step. The gasket is not just a barrier; it also routes air and moisture away from the electronics and helps the door stay weather-tight during cycles.
Front-loading vs top-loading: where the gasket sits\n\nIn front-loading washers, the gasket is visible around the door frame as a circular rubber seal. It forms a tight ring between the door and the drum. For top-loading machines, the seal is typically found at the tub opening or around the upper edge of the drum lip. Some models use a central boot that you access through a removable panel. Regardless of layout, the gasket’s purpose remains the same: prevent water from escaping the drum while letting clothes tumble freely. Understanding your model’s door configuration will guide your inspection language and tooling.
Signs of a worn or damaged gasket\n\nA gasket that needs attention often shows visible wear: cracks, tears, or missing chunks of rubber, which create direct leak paths. Mold or mildew buildup along the seam is common in humid environments and dark corners. Loose or misaligned gaskets may bulge away from the drum, causing gaps at the seam. If you notice soap scum buildup or persistent damp smells after a wash cycle, the gasket deserves a closer look. Quick tests, like a gentle finger run around the seal, can reveal soft spots where the rubber has begun to deteriorate.
Visual inspection: step-by-step examination\n\nStart with safety: unplug the washer and secure any hoses. Remove any accessible panels or doors that give you a clear view of the gasket seam. Inspect the entire circumference for cracks, nicks, or embedded hard objects that could abrade the rubber. Look for swelling or deformation, which indicates aging. Check the area where the gasket meets the drum lip—if you see torn flaps or missing rubber, replacement is likely warranted. Don’t forget to inspect the metal clamp or clips that hold the seal in place; a loose clamp can also trigger leaks.
Cleaning and maintenance routine to extend life\n\nUse a mild, non-abrasive cleaner or a solution of warm water with a touch of vinegar to wipe down the gasket. Rinse repeatedly to remove soap residue, then dry thoroughly with a clean towel. For mold-prone seals, spray a 1:1 vinegar-to-water mix, let sit for a few minutes, then wipe away all visible mold. After cleaning, leave the door slightly ajar or run a quick empty cycle with the door open to promote drying. Keeping the gasket dry between uses helps prevent mold growth and prolongs rubber life.
Replacement vs repair: when to act\n\nMinor surface grime or a single hairline crack may be addressable with cleaning or sealant recommended by the manufacturer. However, large cracks, chunks missing, or a gasket that has lost elasticity is typically a sign to replace. A gasket that leaks even after cleaning—especially around the seam—indicates degradation beyond simple maintenance. Replacement involves removing the front panel (or accessing the boot), detaching the old gasket, and installing a new one with correct orientation and clamps. Always use a gasket designed for your model.
Safety and best practices for DIY gasket work\n\nAlways unplug power before starting any work. Wear gloves to protect your hands from sharp edges and hot metal. Use a magnetic tray or a labeled container for small screws. If you’re unsure about model-specific steps, consult the manual or look up the exact gasket part number for your washer. Work slowly, keep track of screws, and test for leaks with towels under the door after reassembly. If you feel uncertain at any point, stop and call a professional.
Quick troubleshooting after any maintenance\n\nAfter reassembly, run a short water fill with the door closed. Observe the gasket seam for signs of leaking water around the entire circumference. If water escapes only at a single point, recheck clamps and alignment. If leaks persist after a full test cycle, the gasket or mounting hardware may require replacement or professional assessment.
Tools & Materials
- Safety gloves(Protect hands from sharp edges and hot surfaces)
- Screwdriver set (Phillips and flathead)(For removing access panels and screws)
- Bucket or towels to catch water(Keep workspace dry and manageable)
- Flashlight or headlamp(Improve visibility inside the drum seam)
- Replacement gasket compatible with model(Only if the gasket shows wear or damage)
- Gasket sealant (manufacturer-approved)(Optional for reinstallation in some models)
- Rubbing alcohol or mild cleaner(Used to clean rubber surfaces before reseating)
- Magnetic tray or small containers(Organize screws and small parts)
Steps
Estimated time: 60-120 minutes
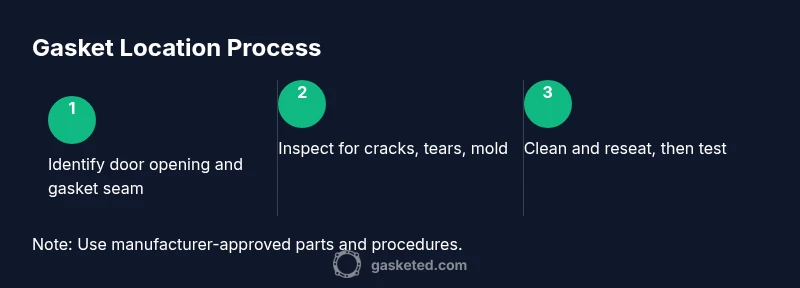
- 1
Power down and unplug
Unplug the washer from the wall outlet and turn off any water supply valves to prevent accidental leaks. This is the single most important safety step before you touch any internal components.
Tip: Double-check that the unit is completely de-energized to avoid shock. - 2
Access the gasket area
Depending on model, you may need to remove a front panel or simply pry back the door boot to expose the gasket seam. Keep track of all screws and hardware as you go.
Tip: Take a photo of the original arrangement before disassembly to aid reassembly. - 3
Inspect the gasket circumference
Carefully run your fingers around the seal, looking for cracks, tears, or hard spots. Look for mold along the inner folds and at the seam where the gasket contacts the drum lip.
Tip: Use a bright light and a magnifier if needed to spot fine cracks. - 4
Clean the gasket and seal area
Wipe the gasket with a mild cleaner or vinegar solution. Rinse and dry thoroughly. Clean any mold or residue from the drum opening and the seal channels.
Tip: Avoid harsh chemicals that can degrade the rubber. - 5
Decide on replacement or reseating
If rubber is stiff, cracked, or compressed beyond recovery, replace the gasket. If it’s flexible and free of damage, reseating and cleaning may be enough.
Tip: Check model compatibility and use manufacturer-approved parts. - 6
Reinstall and secure the gasket
Position the gasket so the drain holes and seals align. Reattach clamps or fasteners firmly but not over-tight. Reinstall any panels you removed.
Tip: Avoid cross-threading screws; tighten gradually in a star pattern. - 7
Test for leaks
Plug the washer back in, reconnect water, and run a short wash or empty cycle with towels under the door. Observe the entire gasket seam for any signs of leakage.
Tip: If you see leaks, reseat the gasket or re-tighten clamps and re-test.
Common Questions
Where is the gasket located on a front-loading washing machine?
In front-loaders, the gasket sits around the drum opening, forming a seal between the door and the drum. It’s the round rubber ring you see when you open the door.
The gasket on a front-loading washer sits around the door opening as a round rubber seal between the door and the drum.
What are common signs that the gasket needs replacing?
Cracks, tears, or visible deformation of the rubber, along with persistent leaks after cycling and mold buildup, indicate replacement may be needed.
Look for cracks, tears, and mold on the gasket; ongoing leaks after cycles usually mean replacement is necessary.
Can I replace a washing machine gasket myself?
Yes, many homeowners can replace a gasket with model-specific parts. If you’re unsure, consult the manual or a professional, especially for integrated front panels.
You can replace a gasket yourself if you follow your model’s manual and use the correct part, but don’t hesitate to call a pro if you’re unsure.
Should I use sealant when reinstalling the gasket?
Only use sealant if the manufacturer approves it for your model. Incorrect sealant can degrade the gasket or void the warranty.
Only use sealant if your model’s manual says it’s okay; otherwise, avoid it to prevent damage.
How do I clean a moldy gasket safely?
Use a mild cleaner or vinegar solution, scrub the folds, rinse thoroughly, and dry completely. Run a quick empty cycle to ensure dryness.
Clean with a mild cleaner, rinse well, and dry completely. Run a short cycle to dry the drum.
What should I do if water leaks after reassembly?
Check gasket alignment and clamps, reseat if needed, and run another test cycle. If leaks persist, the gasket or mounting hardware may need professional help.
If leaks continue after reassembly, recheck the seal and consider professional help.
Watch Video
Key Takeaways
- Locate the door gasket around the drum opening for front-loaders and around the tub lip for top-loaders.
- Inspect for cracks, tears, or mold; replace if defects are evident.
- Clean and dry the gasket to prevent mildew and leaks.
- Follow model-specific instructions and safety steps for replacement.