What Causes Gaskets to Leak: A DIY Troubleshooting Guide
A practical, step-by-step guide to diagnosing gasket leaks at home. Learn common causes, safe practices, and when to replace gaskets for lasting seals.

Most gasket leaks begin with a worn, cracked, or poorly seated gasket. Start by inspecting the gasket and mating surfaces for cracks, chips, or gouges, and clean any residue. Replace the gasket if damaged, apply the correct sealer only if recommended, and torque to specification. Reassemble and test for leaks. If fluid continues to leak, inspect adjacent seals and mounting hardware.
What causes gaskets to leak and how to recognize the signs
Gaskets fail for several reasons, and understanding what causes gaskets to leak helps you triage quickly. Aging seals, heat cycles, and chemical exposure all erode gasket material over time, causing microscopic gaps that let fluids or gases escape. Mechanical factors like over-tightening, warping flanges, or misalignment can deform the gasket and create a path for leaks. In addition, using the wrong gasket material for the operating environment (temperature, pressure, or chemical compatibility) accelerates degradation. According to Gasketed, the most common leaks arise from aged material and improper installation, making early inspection the most effective preventive step. Regularly check for surface corrosion, residue buildup, and loose bolts, especially after maintenance or repairs. If you notice seepage around seams, seepage typically travels along the gasket line and may appear as wet spots or stains on adjacent components.
Common causes and the top early warning signs you should know
Here, we address the core mechanisms behind gasket leakage. Worn or hardened material loses elasticity and can't compress evenly; this is exacerbated by heat cycling and chemical exposure. Improper installation—either under-tightening, which fails to create a seal, or over-tightening, which crushes or cracks the gasket—will also leak. Surface damage—scratches, gouges, or pitting on flanges or mating surfaces—prevents a flat seal. Misfit or wrong gasket type (wrong thickness, diameter, or material) guarantees poor sealing, especially in high-pressure or high-temperature environments. Early warning signs include dampness around seals, a sweet odor if coolant leaks, or visible staining after operation. By recognizing these patterns, you can stop a small fault from becoming a major failure. Gasketed’s analysis shows that addressing surface irregularities and ensuring compatible materials reduces leaks dramatically across contexts.
Contexts where gasket leaks most often occur
Gasket leakage is common in engines, plumbing, and appliance doors. In automotive engines, head gaskets or valve cover gaskets can leak oil or coolant when head bolts relax or the block surface corrodes. Plumbing gaskets in toilets, drainage traps, and pipe joints often leak when pipes settle or are exposed to shifting loads. Appliances such as dishwashers, ovens, and refrigerators rely on door gaskets and inlet seals; aging silicone or rubber can crack or harden, allowing water or refrigerant to escape. Each context has unique stressors—heat, pressure, chemical exposure, and mechanical movement—that accelerate wear. The key is to inspect related components (bolts, flanges, seals) and to verify that the gasket is the correct material and size for the application.
Visual inspection and initial checks you can perform safely
Before you dismantle anything, perform non-destructive checks: look for fresh residue or stains along the gasket line, check for corrosion on metal flanges, and inspect the immediate environment for signs of temperature or pressure cycling. Clean the mating surfaces with a soft cloth and a non-petal solvent suitable for the material (avoid aggressive abrasives that could scratch sealing surfaces). If you see any deformation, cracks, or missing segments on the gasket, replacement is recommended. Ensure bolts or fasteners are not seized, and verify that the sealant (if used) matches the manufacturer’s guidelines. Document your observations to inform replacement and maintenance plans. Remember: a misaligned or loose seal can mislead you into thinking there’s a leak when the problem is improper assembly.
Diagnostic approach: identifying the root cause
A systematic diagnostic flow helps distinguish between gasket problems and related issues such as clogged passages or misfitting components. Start with a visual inspection, then perform a leak test at a safe ambient pressure or temperature. If a leak is detected, isolate the section by retightening joints to the specified torque in a criss-cross pattern and recheck. If leakage persists, inspect the adjacent seals and gaskets, inspect the mating surfaces for flatness, and verify the correct material is in use. If the system is high-pressure or high-temperature, or if coolant and oil are mixing, this often indicates a more serious issue like a blown head gasket or faulty manifold seal, requiring professional assessment. Gasketed’s data emphasize that equipment-specific torque specs and material compatibility are the decisive factors in preventing leaks.
Step-by-step fix for the most common cause: replacing a worn gasket
Replacing a worn gasket is the most common repair and can be done with basic tools. Focus on selecting the right gasket material (e.g., RTV silicone for non-porous metals, or compressed fiber for fluids) and ensuring flange faces are clean and flat. After removing the old gasket, inspect the sealing surfaces for nicks or corrosion and clean with a non-abrasive pad. Apply any recommended sealants sparingly, if at all, and align the new gasket carefully before reassembly. Tighten bolts in a cross pattern to the manufacturer's torque specification, and perform a controlled leak test. If the leak reappears after the first test, recheck gasket seating and surface condition, and consider replacing related seals and bolts. Keep a maintenance log to track gasket age and replacements for future prevention.
Safety, common mistakes, and professional thresholds
Safety comes first when dealing with pressurized systems, hot surfaces, or hazardous fluids. Always depressurize and cool the system before disassembly. Do not use excessive force on fasteners or over-torque, as this can crack flanges or crush gaskets. Avoid using silicone-based sealants on surfaces that require a gasket to be a clean, dry seal unless the manufacturer approves it. If your tests show significant loss of pressure, persistent leaks after a gasket replacement, or suspected head gasket problems, don’t hesitate to contact a professional technician. For complex systems, a gasket specialist can diagnose more subtle issues such as misalignment, warped surfaces, or material incompatibilities that cause recurring leaks.
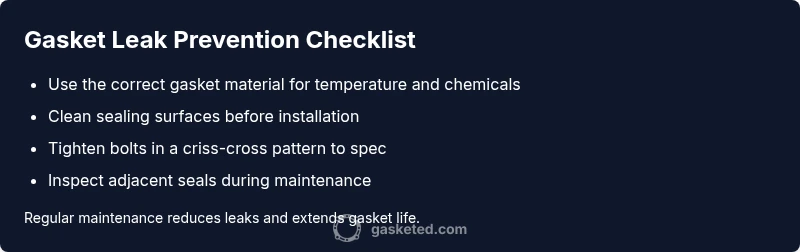
Prevention and maintenance plan to minimize future leaks
Implement a proactive maintenance program to minimize gasket leaks. Use compatible gasket materials for the operating conditions, inspect surfaces for wear during routine service, and replace gaskets at recommended intervals or after major heat cycles. Keep bolts clean and lightly oiled to avoid seizing, and verify torque settings after reassembly. Maintain a clean environment to prevent debris from entering sealing surfaces. In high-vibration systems, consider lock-washers or anti-slip seals to reduce movement that compromises the gasket. Finally, maintain thorough records of gasket types, replacements, and service intervals to guide future repairs and prevent recurrent leaks.
Steps
Estimated time: 60-120 minutes
- 1
Gather the right parts and tools
Collect the replacement gasket of the correct type, plus a torque wrench, cleaning supplies, and the manufacturer’s service guide. Have safety gear ready and ensure the system is depressurized before starting.
Tip: Double-check part numbers against your model to avoid mismatches. - 2
Remove the old gasket
Carefully disassemble the joint and remove the old gasket. Inspect mating surfaces for nicks, corrosion, or warping. Do not reuse damaged components.
Tip: Take photos of the setup to reference orientation during reassembly. - 3
Clean and inspect sealing surfaces
Use a non-abrasive pad and appropriate cleaner to remove residue. Check for flatness; a warped surface will prevent a proper seal and may require resurfacing or replacement.
Tip: Avoid metal scrapers that can gouge metal surfaces. - 4
Install the new gasket correctly
Place the gasket in the correct orientation and seat it evenly. If a sealant is recommended, apply a thin, even layer only where specified by the manufacturer.
Tip: Do not stretch the gasket during placement. - 5
Reassemble and torque properly
Reassemble components in a criss-cross pattern and tighten bolts to specification. Avoid overtightening, which can crush the gasket or warp flanges.
Tip: Use a torque wrench and follow the exact sequence provided. - 6
Test for leaks and recheck
Re-pressurize or rewarm the system and inspect for any signs of leakage. If leakage persists, re-check seating and consider replacing adjacent seals or components.
Tip: Run the system with a safe, accessible drain nearby.
Diagnosis: Gasket leaking at a joint or seal area
Possible Causes
- highAged or degraded gasket material due to heat, pressure, and chemical exposure
- highImproper installation or overtightening causing deformation
- mediumSurface damage or contamination on sealing surfaces
- lowIncompatible sealants or wrong gasket type for application
Fixes
- easyReplace gasket with the correct material and size; clean mating surfaces and re-torque per spec
- mediumInspect adjacent seals and bolts; replace any worn hardware and reseal
- hardFor high-pressure/high-temperature systems or suspected head gasket issue, consult a professional
Common Questions
What are the most common signs that a gasket is leaking?
Look for dampness or staining along seams, puddles near joints, temperature or pressure changes, and unusual odors. A leak can be external or internal, depending on the system. Regular inspections help catch small leaks before they grow.
Watch for damp spots, stains, or puddles near joints and unusual changes in system performance. Regular checks help catch leaks early.
Can I reuse a gasket after cleaning it?
No. A gasket that has been compressed and stretched loses its sealing properties. Always replace with a new gasket that matches the original material and dimensions.
No, you should not reuse a gasket. Replace it with a correctly sized new one for a proper seal.
Which gaskets are most prone to leaks?
Rubber and cork gaskets degrade with heat and chemical exposure; metal gaskets require precise torque and surface condition to seal well. Context matters—engine, plumbing, and appliances each have different common failure modes.
Rubber and cork gaskets tend to leak first; metal ones depend on torque and smooth surfaces.
When should I call a professional for a gasket leak?
If the leak is in a high-pressure system, coolant or oil is mixing, or you suspect a blown head gasket, professional evaluation is recommended. DIY fixes may worsen the issue if you’re unsure about the safety or integrity of the system.
Call a professional if it’s a high-pressure system or you suspect a blown head gasket.
How can I prevent gasket leaks in the future?
Use compatible gasket materials, maintain clean mating surfaces, follow torque specs, and replace aging gaskets during scheduled maintenance. Keep an up-to-date maintenance log to anticipate replacements and reduce leak risk.
Maintain clean surfaces, use the right gasket, and follow torque specs to prevent future leaks.
Watch Video
Key Takeaways
- Inspect surfaces for wear and damage regularly
- Replace aging gaskets promptly to prevent leaks
- Torque to spec and use correct gasket material
- Call a professional for high-risk or head gasket concerns