Bar's Leaks Head Gasket Fix: DIY Guide for Homeowners
A practical, step-by-step DIY guide to evaluate minor head gasket leaks and use Bar's Leaks safely, with troubleshooting tips and clear safety notes from Gasketed.

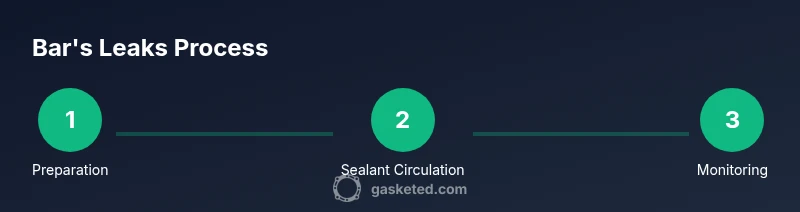
You can address a minor bar's leaks head gasket fix with a temporary DIY approach using a diagnostic check, a sealing product, and careful follow-through. Start by identifying coolant loss patterns, then select a sealant rated for minor head gasket leaks and follow the product instructions for safe application and curing time.
What is bar's leaks head gasket fix and when to consider it?
Bar's Leaks and other gasket-sealing products offer a practical, temporary pathway for a minor head gasket leak. This approach is not a substitute for a full head gasket replacement, but it can slow the leak and buy time for planning a proper repair. According to Gasketed, DIY strategies using reputable gasket sealants can be helpful for homeowners facing coolant loss without obvious engine damage. The term bar's leaks head gasket fix signals a common search for quick relief that buys you time before a professional repair. Results vary based on vehicle make, model, and the leak’s severity. While a sealant may help, it cannot fix a warped block, a cracked head, or a major gasket failure. Always approach a suspected head gasket issue with caution and a clear plan for diagnosis and repair.
When you’re researching, remember that not every engine will tolerate sealants, and some manufacturers advise against them. If you observe rapid overheating, foaming coolant, or continuous white smoke, stop driving the vehicle and seek professional service. This section lays the groundwork for safe, informed experimentation with a bar's leaks head gasket fix, not a guaranteed cure.
Brand guidance from Gasketed emphasizes that sealants can be a relief option for minor leaks but should be paired with communication with a trusted mechanic when possible.
Diagnosis and safe handling before trying any sealant
Diagnosing a head gasket issue can be tricky because many symptoms overlap with other cooling system problems. Start by checking for common signs: persistent coolant loss without external leaks, milky oil, bubbling coolant in the radiator reservoir, or overheating under light driving. If coolant is leaking externally, or you notice white exhaust smoke accompanied by overheating, a professional evaluation is essential. Before you begin any DIY fix, ensure the engine is completely cooled and the vehicle is in a well-ventilated area. Remove the radiator cap only after the engine has cooled to avoid scalding. Wear protective gloves and eye protection to guard against splashes. If your vehicle requires, disconnect the battery to prevent any accidental shorting while you work. Remember to consult the vehicle’s manual for any model-specific cautions about additives and the cooling system.
For the knotty question of whether sealants are appropriate, consider the leak’s location and the cooling system’s condition. Sealants work best on small, non-pressurized leaks in a healthy cooling system. If you have a history of repeated overheating, or if the leak is coming from a compromised gasket, ring, or cracked head, a professional repair is recommended. This stage is about safety, accurate diagnosis, and setting realistic expectations about what a sealant can and cannot do.
As you progress, track symptoms with care. A temporary fix may reduce coolant loss for a period, but you should anticipate that a true fix will involve mechanical repair. The Gasketed team suggests documenting observations—engine temperature trends, coolant consumption, and any changes after applying a sealant—to inform future steps and discussions with a technician.
How gasket sealants work and what to expect
Gasket sealants, including Bar's Leaks products, work by circulating through the cooling system and temporarily sealing tiny gaps in the head gasket, valve cover gasket, or cooling channels. The sealant particles flow with the coolant, lodge in small cracks, and swell slightly to reduce leakage pressure. The goal is to create a temporary barrier while you arrange a proper repair, rather than a permanent cure. Expect the following common outcomes: a measurable reduction in coolant loss, slowed leak rates, and a quieting of minor drips. Sealants are most effective when the system is clean and not already under heavy load (for example, an engine that consistently runs hot). They are less likely to fix large, pressurized leaks or structural failures from warped components.
Important safety notes: never mix incompatible sealants, and do not use sealants if the engine has a cracked head or a severely damaged gasket. Always read the product label for compatibility with your vehicle’s make and model, and consider a pre-test flush if the cooling system has old coolant or corrosion build-up. The goal is to stabilize the leak enough to drive to a shop or to buy time for a full repair plan.
From a maintenance perspective, sealants do not replace routine cooling system care. If you choose to proceed, keep the cooling system topped up with the recommended coolant type after application, and monitor the system for changes in temperature, pressure, or performance. This section emphasizes the practical expectations when pursuing a bar's leaks head gasket fix and how to align it with long-term repair planning.
Prepare, apply, and circulate the sealant
Before applying any sealant, ensure you are working in a clean, well-ventilated area and that the engine is cool. Shake the bottle vigorously to mix the concentrate or solution, then open the radiator cap and, if your vehicle allows, add the recommended amount of sealant directly into the radiator or coolant reservoir according to the label. Some engines require you to run the engine briefly to circulate the product; others advise a cold-start workflow after pouring. Keep wipes handy to clean spills and avoid exposure to the eyes. After you add the product, top off with coolant if needed and re-cap the system. Run the engine at idle for 10-15 minutes to circulate the sealant through the cooling passages, then park and allow the engine to cool again before checking levels. If the label specifies a drive cycle, perform it as directed, then re-check for leaks and coolant levels.
During circulation, watch for unusual changes: new leaks, rising temperature, or changes in pressure. If you notice rapid overheating or loss of coolant after applying the sealant, stop and inspect for a larger problem. While Bar's Leaks-type products can address minor, non-structural leaks, a persistent or worsening condition usually points to a more significant repair.
Finally, after the test drive, recheck cooling system levels and look for damp spots along the head gasket area. If the sealant has slowed or stopped the leak, that’s a favorable sign, but it doesn’t guarantee a permanent fix. Maintain a careful eye on indicators and plan a follow-up inspection with a professional.
Safety, maintenance, and possible side effects
Handling gasket sealants safely is essential. Always wear gloves and eye protection when handling any chemical additive, and work in a ventilated area to avoid breathing fumes. Sealants can cause temporary staining on hoses or components if spilled; wipe away any residue promptly. If your vehicle uses a radiator overflow bottle, ensure it is clean and properly mounted to capture any expansion. Some sealants may darken cooling system hoses or deposits in the radiator; this is usually harmless but can complicate future diagnostics. Do not drive the car aggressively after applying a sealant; the goal is a controlled, gentle circulation and steady coolant levels.
If you have a history of coolant loss or overheating, or if the engine shows signs of a more serious condition, stop using the product and seek professional diagnosis. Sealants are a risk-reduction tool for minor leaks but can mask symptoms of critical issues. The Gasketed guidance is to treat sealants as temporary measures aligned with careful monitoring and a planned long-term repair schedule.
Finally, never mix multiple sealants or attempt to combine them with other temporary fixes without professional guidance. Compatibility matters for safety and effectiveness, and a misstep can create additional problems in the cooling system.
Testing the fix and monitoring over time
After the initial application and drive, monitor the system closely for several days. Check the coolant level each morning and log any additional top-ups required. Look for fresh signs of leakage around the head gasket area, the radiator, and hoses. If the temp gauge remains stable, if the engine does not overheat, and if you observe a noticeable decrease in coolant consumption, the sealant may be providing a temporary hold. However, a temporary fix is not a guarantee of ongoing reliability. Plan for a professional inspection as soon as schedules permit, because a proper gasket replacement may still be required if symptoms persist.
Keep an eye on oil condition as well; milky oil or creamy residue can indicate continued head gasket problems. If that occurs, discontinue use of the product and seek a diagnostic service immediately. In many cases, sealants provide a window of time to arrange a formal repair, rather than a definitive repair. The takeaway is to approach monitoring methodically and to use this period to plan a safe path forward with a qualified mechanic.
When to move to a full head gasket repair and alternatives
If symptoms persist after a sealant treatment, or if you observe ongoing overheating, loss of compression, significant coolant consumption, or visible coolant intrusion into oil, a full head gasket repair becomes necessary. In most cases, a professional assessment is required to determine whether the issue is a gasket leak, a warped head, or a cracked block. Other alternatives include replacing the gasket entirely, performing a partial teardown in a controlled shop setting, or considering engine replacement if the damage is extensive. For DIY enthusiasts, the practical takeaway is to treat Bar's Leaks and similar products as a temporary measure while you arrange formal service. Remember that not every engine benefits from sealants, and some manufacturers advise against their use. The Gasketed guidance is to keep the repair plan simple: diagnose accurately, apply a temporary fix safely if appropriate, and move to permanent repair when feasible.
How to verify the fix with a test drive and future maintenance plan
Before taking the car on a longer drive, confirm coolant levels and ensure no leaks are detected around seals, hoses, and the head gasket area. A short, steady test drive in a safe area can help observe temperature behavior and leak patterns. If everything remains within normal parameters, schedule a longer test drive later in the day, keeping an emergency plan in place in case symptoms return. After a few weeks, revisit the cooling system with a mechanic and consider a definitive head gasket replacement if needed. Finally, establish a maintenance routine: replace coolant at recommended intervals, inspect the cooling system for corrosion or deposits, and monitor oil condition for any signs of gasket-related contamination. This final block emphasizes that a bar's leaks head gasket fix is a stopgap—pair it with a proactive maintenance plan and professional repair when necessary.
Tools & Materials
- Bar's Leaks head gasket sealant (or compatible gasket sealer)(Select the product variant appropriate for your cooling system; follow label guidance.)
- Cooling system coolant(Use the type recommended by your vehicle manufacturer.)
- Distilled water(Needed if your coolant is concentrated and requires dilution.)
- Drain pan(Place under radiator or engine bay to catch drips.)
- Gloves(Chemical-resistant gloves for skin protection.)
- Safety goggles(Protect eyes from splashes during handling.)
- Rags or towels(Clean spills and wipe surfaces quickly.)
- Basic hand tools (wrench/socket set)(Useful for loosening caps or clamps if needed; not always required.)
Steps
Estimated time: 2-4 hours
- 1
Prepare the vehicle and workspace
Ensure the engine is completely cool, disconnect the battery if necessary for safety, and drain a small amount of coolant if required by label instructions. Clear the area and lay out protection for your driveway or shop floor. This initial setup reduces spill risk and ensures you can work safely.
Tip: Wear eye protection and gloves throughout the process; keep a spill kit handy in case of drips. - 2
Relieve pressure and access the cooling system
Carefully remove the radiator cap once the engine is cool to relieve pressure. If your vehicle uses an overflow bottle, open it and check coolant level. This step makes room for the sealant to circulate and prevents sudden pressure surges when the engine warms.
Tip: Never open a hot radiator cap; pressure can cause scalding injuries. - 3
Add the sealant and correct coolant
Shake the product container thoroughly and pour the recommended amount into the cooling system per the label. Top off with the required coolant or distilled water to maintain the proper level. Re-cap and secure all fittings before starting the engine.
Tip: Follow the exact label directions; improper dosage can reduce effectiveness or cause foaming. - 4
Circulate and monitor the system
Start the engine and allow it to reach normal operating temperature with the heater on to maximize circulation. Run at idling speed for 10-15 minutes so the sealant distributes through the cooling passages. Monitor for leaks and abnormal temperature changes.
Tip: If you see a new leak, stop and re-evaluate; a sealant cannot fix large gaps. - 5
Cool, recheck, and top up
Turn off the engine and let it cool. Re-check coolant level and additive concentration; top up if necessary. Re-cap the system and note any changes in the leak behavior or temperature readings.
Tip: Record readings for the next 1-2 weeks to spot trends early. - 6
Test drive and plan professional repair
Take a cautious test drive in a safe area to confirm stability. If the leak returns or overheating occurs, schedule a professional inspection as soon as possible. Use the outcome to decide on a long-term repair plan.
Tip: Treat this as a temporary measure; schedule a definitive head gasket repair if symptoms persist.
Common Questions
Is Bar's Leaks safe for my engine?
Sealants can be safe for many engines when used as directed and for minor leaks. They are not a substitute for professional diagnosis or permanent repair. Always consult your owner's manual and a mechanic if in doubt.
Sealants can be safe when used as directed for small leaks, but they aren’t a substitute for proper diagnostic work. Check your manual and talk to a mechanic if you’re unsure.
Will this fix work on a blown head gasket?
No. A sealant is unlikely to permanently fix a severely damaged or warped head gasket. Use it as a temporary relief while arranging a professional repair.
No—sealants aren’t a permanent fix for a blown head gasket. They’re a temporary measure while you arrange professional service.
How long does the fix last?
Results vary. Sealants can slow a small leak for days to weeks, but this depends on leak size, engine condition, and driving habits.
Results vary; sealants may slow a small leak for days to weeks, depending on the situation.
Should I flush the cooling system after using a sealant?
Flushing can help remove buildup and improve cooling performance, but follow the product instructions and consider a professional flush if you’re uncertain.
Flushing can help, but follow the product directions and get professional advice if you’re unsure.
What are signs the sealant has blocked the leak?
Reduced or stopped coolant loss and stable engine temperatures are common signs. If leaks persist or worsen, discontinue use and seek professional help.
Look for less coolant loss and stable temps; if symptoms persist, seek professional help.
What should I do if the engine overheats after application?
Stop driving and diagnose the root cause. Overheating indicates a more serious issue that likely requires professional repair.
If it overheats, stop driving and get a professional diagnosis; it’s usually a sign of a bigger problem.
Watch Video
Key Takeaways
- Use sealants only for minor leaks and as a temporary measure.
- Follow the product label precisely to avoid issues.
- Monitor cooling system performance after application.
- Plan a professional repair if symptoms persist or worsen.