When to Use Head Gasket Sealer: A DIY Guide
Learn when to use head gasket sealer, how it works, and practical steps for safe temporary fixes. This guide helps DIYers decide if sealer is right for small leaks and how to apply it properly.

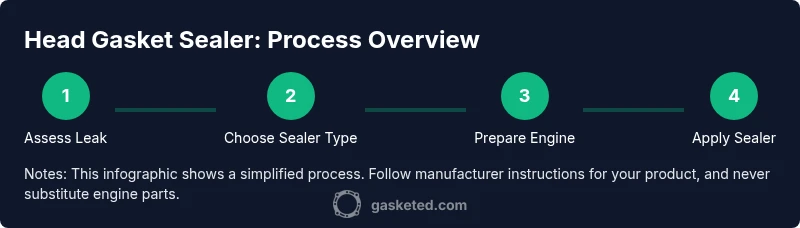
Learn when to use head gasket sealer to seal small leaks without replacing the gasket. This quick guide covers identifying leak types, selecting the right sealer, prep steps, and safe application. Before you begin, ensure the engine is cool, the cooling system is drained as directed, and you follow the product’s instructions for curing times.
What is head gasket sealer and when to consider it
A head gasket sealer is a chemical product designed to seal minor leaks in a head gasket or surrounding cooling system passages. For DIY enthusiasts, the question of when to use head gasket sealer often comes up when there is small, slow coolant loss or a minor seepage rather than a dramatic coolant or compression failure. According to Gasketed, sealers should be viewed as a temporary containment strategy rather than a cure for major head gasket issues. This means you might use a sealer to buy time while planning a proper repair, not as a guaranteed long-term fix. If you notice rapid coolant loss, white smoke from the exhaust, or significant cylinder misfire symptoms, stop and pursue a full gasket repair instead.
How head gasket sealers work and what they do
Most sealers work by circulating through the cooling system and forming a plug at the leak site. Some sealants rely on epoxy-like chemistry to fill small cracks and surface imperfections, while others use particles that swell or resin that bonds when exposed to heat. The outcome is a temporary seal that can reduce leakage and buy you miles or days to arrange professional service. It’s important to understand that different sealers behave differently depending on engine temperature, coolant composition, and leakage type. In general, sealers are more effective for small, pinhole leaks in the gasket or nearby passages, and less effective for large gaps, warped heads, or severely corroded areas.
Signs you’re facing a leak that a sealer might help with
Look for slow, steady coolant loss without drastic pressure changes in the cooling system. Small damp spots around the engine block or under the vehicle may indicate a minor leak. If you observe occasional coolant bubbles in the overflow tank when the engine is warming up, this can signal a leak that a sealer could address temporarily. Be mindful that sealer use does not fix combustion gas leaks into the coolant, which can produce distinct foaming and persistent white exhaust. Monitor temperature gauge behavior closely; if the engine overheats frequently, stop and pursue a proper repair immediately.
Types of sealers and their pros and cons
- Silicone-based sealants: Generally versatile and easier to apply; suitable for some gasket issues but may clog passages if not used carefully. Pros: flexible, low odor; Cons: may require precise mixing and timing.
- Epoxy/ceramic sealants: Can offer stronger temporary bonds in small cracks but can be harder to remove if a full repair is needed later. Pros: strong seal; Cons: difficult to clean and may affect future repairs.
- Copper or metal-based sealers: Often used for metal-to-metal leaks and high-temperature environments; Pros: heat resistance; Cons: may react with coolant chemicals.
- Aerobic or compression-activated sealers: Some products rely on reaction with air or pressure to set; Pros: quick cure in ideal environments; Cons: limited effectiveness in complex leak paths.
Note that there are no universal winners; choosing the right sealer depends on your engine type, the leak’s location, and manufacturer directions. Always read labels, verify compatibility with your coolant, and consider a temporary measure rather than a permanent fix.
Preparation steps before applying sealer
Before applying any sealer, perform these checks to avoid creating new problems:
- Confirm engine is cool to prevent burns or steam exposure.
- Inspect cooling hoses and radiator for obvious damage; replace or repair before use.
- Drain and refill coolant as directed by the product you choose; use distilled water if recommended.
- Clean the area around the suspected leak to allow for accurate sealing and to detect any changes after curing.
- Have a plan for monitoring pressure and temperature after the application; a continuous leak indicates a failure or misapplication and requires professional attention.
A practical, step-by-step quick application outline
This section provides a high-level view of how sealers are typically applied in a controlled scenario. Always follow the product’s exact instructions, including dosage, mixing, and curing times. If you are unsure, it’s safer to stop and consult a mechanic. The aim is to slow or halt a small leak during a brief period, not to mask a failing engine.
Testing and verification after sealing
After applying a sealer and letting it cure, refit the cooling system and start the engine with the heater on to accelerate flow. Observe for any new leaks, verify that the temperature remains within normal range, and check the overflow reservoir level regularly. If the leak persists or returns, or if the engine overheats, discontinue use and arrange a proper gasket replacement. A follow-up cooling system pressure test can help confirm the seal’s integrity and identify other potential leaks.
When to stop using a sealer and pursue a permanent repair
Sealers are not a substitute for major gasket failures, warped heads, or cracked blocks. If you notice continued loss of coolant, persistent bubbles in the radiator, significant exhaust gas indicators in the coolant, or misfiring cylinders, a professional diagnosis is essential. A DIY sealer may buy time in a pinch, but a certified repair ensures long-term reliability and protects engine performance.
Cost, time considerations and practicality for DIYers
The cost of sealers varies by brand and engine type and is usually modest compared with a full gasket replacement. Typical DIY scenarios include a weekend project with a plan for a more permanent repair within a few days if you lack the time or tools for a full engine service. Consider whether you have the skills to bleed and refill the cooling system, or if a pro should handle the task. In many cases, a temporary sealer is a stopgap—not a substitute for thorough inspection, proper resurfacing, and correct gasket seating.
Alternatives and compatibility with different engines
Certain engines tolerate sealers better than others; aluminum blocks and newer engines often require gentler products and careful bleed procedures. If you drive a high-performance setup or a delicate cooling system, consult your service manual or a professional. For many DIYers, the safest route is to address the root cause—repair or replace the head gasket—while using a sealer only as a temporary measure. Always verify product compatibility with your vehicle’s make, model, and coolant type.
Final thoughts and maintenance reminders
After any sealer use, keep an eye on coolant levels, temperature readings, and exhaust signs. Regular maintenance, including timely coolant flushes and coolant type checks, helps reduce the chance of leaks returning or forming new ones. Remember that sealers are designed to buy time, not to replace a proper gasket replacement. Keeping records of temperature behavior and leaks can help you and your mechanic determine the best long-term repair plan.
Tools & Materials
- Gasket sealer product (ensure compatibility with engine and coolant)(Read the label for heat tolerance, curing time, and recommended coolant type.)
- Coolant flush solution(Use as directed by product; ensure the system is clean before applying sealer.)
- Distilled water(Used if the product recommends dilution or flushing.)
- Drain pan(Catch old coolant safely and dispose of it per local regulations.)
- Gloves and eye protection(Protect hands and eyes from splashes; sealers can irritate skin.)
- Funnel and coolant funnel adapter(For clean pouring and to avoid spills.)
- Tools to depressurize and bleed cooling system(May include screwdrivers or pliers depending on vehicle.)
- Torque wrench and basic socket set(Only if planned to re-torque head or related components after repair.)
Steps
Estimated time: 60-120 minutes active work, plus 24–72 hours for cure and final verification
- 1
Park and cool the engine
Ensure the vehicle is on a level surface and the engine is completely cool before starting. Opening a hot cooling system can cause burns and sudden release of hot coolant.
Tip: Wait at least 30 minutes after driving to be sure the engine is safe to handle. - 2
Drain cooling system
Place a drain pan under the radiator drain plug, open the drain, and let coolant flow out. This is essential to prevent spills and ensure any sealer mixture reaches the leaks.
Tip: Collect used coolant for proper disposal and avoid mixing with water if not instructed. - 3
Flush or prep the cooling system
Follow product instructions to flush or partially flush the system. Clean passages can improve sealer effectiveness and reduce clogging risk.
Tip: If your manual recommends a specific prep step, follow it precisely. - 4
Mix or prepare the sealer
Prepare the sealer per product directions, which may include mixing with coolant or a dedicated additive. Ensure the engine is within the recommended temperature range before pouring.
Tip: Do not overconcentrate; excess sealer can cause blockages. - 5
Add sealer and fill the system
Pour the prepared mixture into the cooling system as instructed, then refill with coolant or water to the recommended level. For some products, you’ll need to run the engine to activate the cure.
Tip: Top off gradually and check for leaks before driving. - 6
Bleed air from the cooling system
Bleed the system to remove air pockets that can cause overheating. This often requires opening bleed valves or running the engine with the radiator cap off briefly.
Tip: Do this slowly to avoid sudden pressure surges. - 7
Run the engine and monitor
Run the engine with the heater on high to circulate coolant and help sealant cure. Monitor gauge readings and check for new leaks over the next 30–60 minutes.
Tip: Keep a close eye on the temperature gauge; stop if overheating occurs. - 8
Test and verify
Perform a pressure test or cooling system inspection per the product guidelines to confirm sealing effectiveness. If leaks persist, discontinue use and pursue proper repair.
Tip: Document readings and take photos if possible for reference.
Common Questions
Can a head gasket sealer fix a blown head gasket?
No. Sealants are designed for small leaks and should not be relied on to repair a truly blown head gasket. If you notice heavy coolant loss, white smoke, or engine misfires, seek professional repair.
Sealants aren’t a cure for a blown gasket; see a mechanic for proper replacement.
Will using a sealer damage my engine?
If used incorrectly or on the wrong type of leak, sealants can clog passages or cause blockages in the cooling system. Always follow the product directions and avoid overuse.
There is a risk if you don’t follow instructions or apply it to the wrong leak.
How long does sealer take to work?
Most sealers begin sealing within the first hour, but full cure and stabilization may take several hours to a day depending on product and engine temperature.
It typically seals within hours, but full curing can take up to a day.
Should I flush the coolant before applying sealer?
Flushing helps improve sealer efficiency by removing debris. Check the product instructions to decide whether a full flush or partial flush is required.
Yes, if the product recommends flushing first, do it to improve chances of a good seal.
Can I drive the car after applying sealer?
If the engine temperature stays normal and no leaks are observed, brief driving may be possible. However, plan a permanent repair soon and avoid long trips.
You can try short trips if the temperature stays normal, but arrange a proper fix soon.
Is there a difference between silicone and epoxy sealants?
Yes. Silicone sealers are easier to apply and safer in many cases, while epoxy sealers can form stronger bonds but are harder to remove and may affect later repairs.
They differ in ease of use and how strong a seal they form.
Does sealant fix timing or warping issues?
No. Sealants do not fix timing issues or warped/corroded heads. If you suspect warping, a head gasket replacement and machining are often required.
It won’t fix timing problems or warped parts.
What maintenance after sealing is recommended?
Monitor coolant levels, check for new leaks, and plan for a permanent repair. Regular coolant flushes help prevent future issues.
Keep an eye on levels and plan for proper repair.
Watch Video
Key Takeaways
- Use sealer only for small leaks as a temporary fix
- Follow product directions precisely for prep and cure times
- Monitor cooling system after application for overheating or new leaks
- Plan for a permanent gasket repair if symptoms persist
- Sealant effectiveness varies by engine type and leak location