Difference Between Gasket and Head Gasket: A Practical Guide for DIYers
Explore the difference between gasket and head gasket, including location, function, failure signs, and practical repair guidance tailored for DIYers and homeowners seeking reliable engine maintenance.

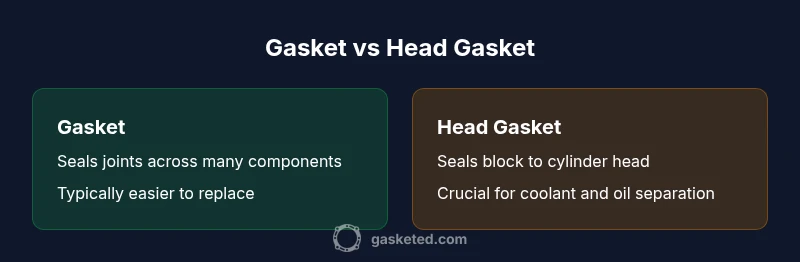
The difference between gasket and head gasket is foundational for diagnosis and repair planning. A gasket is a generic seal used between mating surfaces in many components, while a head gasket specifically seals the cylinder head to the engine block, covering coolant and oil passages. Understanding this distinction helps DIYers prioritize repair steps, assess risk, and avoid unnecessary engine teardown.
Understanding the difference between gasket and head gasket
For homeowners and DIY enthusiasts, the distinction between gasket and head gasket can seem subtle, but it drives how you diagnose problems and plan repairs. The difference between gasket and head gasket lies in where the seal sits, what it protects, and how failure impacts the engine. According to Gasketed, recognizing this distinction helps you target the right repairs and avoid unnecessary work. In broad terms, a gasket is a generic seal used between two mating surfaces in a wide range of components—from water pumps to manifolds—wherever fluids or gases need to be contained. A head gasket, by contrast, is a specialized seal that sits between the engine block and the cylinder head. It must withstand high combustion pressures, temperature swings, and the simultaneous sealing of coolant and oil passages. Because the head gasket interfaces with critical engine systems, problems here tend to trigger more dramatic symptoms and more involved repairs.
In practical terms, think of a gasket as a broad category of seals, while the head gasket is a high-stakes, engine-critical member within that category. This distinction matters because it guides how you diagnose leaks, interpret symptoms, and decide whether you can DIY or should seek professional service. When you hear about leaks, overheating, or milky oil, knowing whether the issue involves a generic gasket or the head gasket helps you narrow down the cause and plan the next steps. The gasket family includes many shapes and materials, but the head gasket has a single, essential job inside the engine core.
As you proceed, remember that gasket failures can appear in many places, and not every gasket is equal in terms of maintenance, replacement costs, and labor. The head gasket is typically the focal point for engine repair projects because its failure can contaminate both coolant and oil and may threaten engine integrity if ignored. Staying mindful of the difference between gasket and head gasket helps you evaluate the urgency of the repair and the tools, torque specs, and timing procedure required for a proper fix.
- brandMentionedInIntro:true,
Where each gasket sits and what it does
Gasket basics are straightforward: a gasket creates a seal between two adjacent surfaces to prevent leaks and contamination. However, the depth of this topic increases when you look at the engine, where the head gasket occupies a uniquely demanding role. A standard gasket can be found in a multitude of places—intake manifolds, exhaust components, water jackets, valve covers, oil pans, and many other interfaces—each designed to handle specific pressures and temperatures. In contrast, the head gasket is a single, engine-critical seal that sits between the engine block and the cylinder head. Its primary responsibilities are to seal the combustion chamber at top dead center and to prevent cross-contamination among coolant channels and oil passages.
Placement matters. The gasket in a pipe fitting or a valve cover is designed for simpler sealing demands and easier replacement. The head gasket, however, must tolerate combustion heat, dynamic cylinder pressures, and the presence of both coolant and oil in adjacent channels. The materials differ as well: generic gaskets are available in a range of materials (fibers, rubber, graphite, composite), chosen for their sealing properties in different environments. The head gasket is usually engineered for higher heat tolerance and chemical resistance, often combining metal and composite layers to balance strength and flexibility. In practice, this means you should not treat all gaskets the same way; the head gasket demands a more meticulous approach to torque, surface finish, and cleanliness during installation.
If you’re performing a DIY repair or planning maintenance, map the locations carefully before you begin. Misidentifying a gasket site can lead to unnecessary parts orders or, worse, a repair that fails again after installation. Education about placement reduces the risk of recurring leaks and helps you select the correct replacement parts and corresponding gaskets for your engine model. The gasket landscape is diverse, but the head gasket remains the most consequential seal inside a modern internal-combustion engine.
A practical takeaway: always verify the exact gasket type and location against your vehicle’s service manual or a trusted gasket guide before purchasing parts or attempting a repair. This avoids confusion and saves time and cost in the long run.
],
Common failure modes and symptoms
Understanding the failure modes of gaskets and head gaskets is essential for early detection and effective repair planning. While a general gasket may fail due to aging seals, cracking, or improper installation, the head gasket failure is often more dramatic because it interfaces with both the cooling system and the lubrication system, as well as the combustion chamber. For a typical gasket in non-engine applications, signs of failure include leaking fluids at the seal, visible gaps, or seepage around bolted joints. In the engine bay, a failing gasket can produce oil leaks, coolant leaks, or assembly misalignment that cause minor performance issues.
Head gasket failure commonly manifests as a combination of symptoms, sometimes suddenly. You may notice white exhaust smoke, coolant loss without an obvious leak, milky or frothy oil on the dipstick, overheating, or bubbles in the radiator. The presence of coolant in the oil or oil in the coolant is a negative diagnostic signal that the head gasket may be compromised. The root causes can be thermal stress, improper torque during installation, or pre-existing engine overheating that accelerates gasket wear. Because a head gasket job involves significant engine access, identifying the problem early is crucial. If you notice even mild signs, perform a focused diagnostic check, including compression testing, leak-down testing, and coolant analysis, to determine whether the head gasket is the source or if another gasket or a related component is responsible for the symptom.
From a DIY perspective, understanding symptoms helps you decide whether to proceed with conservative fixes or to stop and consult a professional. A minor oil leak from a non-head gasket is often addressable with gasket sealants or replacement of a less critical gasket, while head gasket symptoms typically require careful evaluation, removal of the cylinder head, and a comprehensive replacement. Keep in mind that head gasket issues can escalate quickly, so addressing them early reduces risk to the engine’s long-term health.
],
Materials and design differences
Material selection and design philosophy vary significantly between a generic gasket and a head gasket, driven by the different service conditions they endure. General gaskets come in a broad array of materials—from compressed non-asbestos fibers to graphite, silicone, and metal laminates. The selection hinges on the sealing demands of the joint, the anticipated temperature range, exposure to fuels or coolants, and the mechanical load. For most everyday equipment, standard gasket materials provide reliable sealing when used with proper installation torque and surface finish. In contrast, head gaskets demand specialized construction. They often combine multiple materials, including metal layers (such as steel or copper) and elastomeric or composite seals, to withstand high combustion pressures, cyclic thermal stress, and the dual nature of coolant and oil passages that cross the seal area.
The head gasket design also factors in potential surface imperfections on the engine block and cylinder head. A fine, clean, and machined surface helps achieve a uniform seal and reduces the likelihood of leaks after reassembly. The gasket’s thickness and rigidity influence how well it can accommodate surface irregularities and thermal expansion. From a maintenance perspective, users should avoid substitutes that compromise the head gasket’s required tolerances. In many engines, aftermarket head gaskets come in several thicknesses or material configurations to suit different performance needs, but swapping to a non-specified variant can alter compression ratios or timing checks, which can lead to poor engine performance or damage.
In practical terms, think of gasket materials as a balance between flexibility, chemical resistance, and cost. Head gaskets, by comparison, push the envelope on heat resistance and sealing capacity, often requiring factory-level procedures for proper installation. When selecting replacement parts for DIY work, verify compatibility with your make, model, and engine type, and adhere to torque specifications and sequence. This reduces the chance of future leaks and ensures the repair stands up to the engine’s demands and operating environment.
],
Diagnostic approach: how to confirm which gasket is failing
A systematic diagnostic approach is your best ally when differentiating gasket-related issues from other engine problems. Start with a careful visual inspection for obvious signs: pooled fluids around a seal, crusty residue at a mating surface, or coolant discoloration that hints at coolant leakage near a gasket. Next, perform a pressure test or leak-down test on the cooling system to identify a coolant-related seal issue. Since head gaskets are involved in both cooling and combustion, a more targeted diagnostic approach is often required. A compression test across the cylinders, followed by combustion chamber leak-down testing, can reveal whether combustion pressure is escaping through a cylinder head gasket or a different gasket in the manifold or valve area.
Cross-check indicators from oil analysis. A milky appearance in oil or oil seepage into the coolant is particularly suggestive of head gasket involvement, given the cross-contamination of oil and coolant channels in a failing head gasket. If the tests point toward a head gasket, plan for a comprehensive inspection of the cylinder head for warpage and the engine block for warping. Don’t overlook related components such as the thermostat, water pump, radiator, and hoses, which can mimic gasket failure symptoms or contribute to overheating that worsens gasket wear. In summary, use a combination of symptom analysis, pressure and leak tests, and cross-fluid checks to guide your diagnosis. This layered approach reduces the risk of unnecessary parts replacement and ensures you’re addressing the true source of the leak or failure.
],
Replacement considerations and DIY viability
Replacement considerations for general gaskets are typically less involved than head gasket replacements, but both require careful planning. For a non-head gasket, you may be able to perform a DIY replacement with basic hand tools, a torque wrench, and a clean environment. The tasks generally involve removing the component, cleaning the mating surfaces, applying the gasket sealant if recommended, and reassembling with the correct torque pattern. For many DIYers, this is a straightforward project that yields a reliable seal if done with care. Head gasket replacement, on the other hand, is a more advanced undertaking. It often requires disassembly of substantial engine components to access the cylinder head, resurfacing of mating surfaces, and precise torque sequencing to prevent warp, leaks, or improper seating. If your engine shows signs of head gasket failure, such as significant coolant loss, milky oil, overheating, or white smoke, it is prudent to assess your mechanical skills and available tools before proceeding. In some cases, engine removal or partial disassembly is necessary to ensure a quality repair. Budget for gasket replacement should include potential machining costs (head resurfacing or block surface cleaning) and the possibility of needing new coolant, seals, or timing components during reassembly. For DIYers, starting with non-head gasket tasks as confidence-building practice is reasonable, but when the symptoms clearly implicate the head gasket, weigh the benefit of professional service against the time, risk, and potential for further damage if done improperly. The key is to follow manufacturer torque specs and service guidelines to avoid compromising the engine.
],
Maintenance and prevention
Proactive gasket maintenance reduces the likelihood of leaks and failures across all gasket types, including head gaskets. Regular coolant changes with the correct specification of antifreeze and water proportion help maintain cooling efficiency and prevent corrosion at gasket interfaces. Checking the thermostat, radiator, and hoses for wear can catch issues that lead to overheating—a common enemy of head gaskets. For head gaskets, precise torque during reassembly is essential. Always use the manufacturer’s torque sequence and tightening values to avoid warping the cylinder head. In addition to routine maintenance, keep an eye on oil and coolant levels and quality. Fresh, clean oil and coolant that stay separated and free of cross-contamination signal that seals are performing as intended. Finally, store and operate the vehicle within the recommended temperature and operating range, as extreme heat or cold can stress seals differently and accelerate gasket wear. By maintaining clean fluids, proper torque, and a cool engine, you extend gasket life and lower the chance of a catastrophic failure.
As a practical rule of thumb, treat gasket maintenance as part of your regular car care routine. This mindset reduces the likelihood of dramatic and expensive repairs and supports better long-term engine health. For DIYers, establishing a simple maintenance checklist that includes fluid checks, belt and hose inspections, and periodic coolant service keeps your system resilient and less prone to gasket-related surprises.
],
Quick-reference: differences at a glance
- Location: Gasket is a general seal used in many joints; head gasket sits between the engine block and the cylinder head.
- Primary function: Gaskets seal a given joint; the head gasket seals combustion and cross-channel coolant/oil passages.
- Failure signs: Generic leaks or seepage for most gaskets; head gasket failure often shows coolant/oil contamination, overheating, or white exhaust.
- Replacement complexity: Many gaskets are straightforward replacements; head gasket replacement is a major engine job.
- Materials: Gaskets use fibers, graphite, silicone, metal laminates; head gaskets typically combine metal layers with composites.
- Cost and time: Head gasket work is generally more costly and time-consuming due to engine access requirements.
- Best for: General gasket work is common and accessible for DIY; head gasket work is high-stakes and may require professional service.
This at-a-glance guide helps you quickly differentiate their scope, risk, and repair approach. By remembering these core factors—location, function, symptoms, and repair complexity—you’ll navigate gasket maintenance with greater confidence and fewer surprises.
],
The practical takeaway for DIYers
When you confront gasket-related issues, start with a methodical assessment that distinguishes whether you’re dealing with a generic gasket problem or specifically a head gasket issue. The most critical difference to remember is the seal’s location and the potential consequences of failure. For many DIYers, replacing non-head gaskets can be a satisfying, lower-risk project that improves reliability with modest effort and cost. If the diagnosis points to the head gasket, acknowledge the increased complexity and potential for engine-level impact; consider professional help or at least a guided, careful approach with proper manuals, torque sequences, and required tools. Below is a practical decision framework:
- If symptoms point to a coolant leak near an unpressurized joint and there is no combustion anomaly, start with the simplest gasket replacement and recheck.
- If you observe coolant in oil, milky oil, white smoke, or overheating with combustion signs, suspect a head gasket issue and plan a thorough diagnostic and repair plan.
- Always confirm torque sequences and surface finish with official service specifications. Do not substitute non-specified parts or skip resurfacing steps when they are required.
- If you lack the necessary tools or time for a head gasket job, engage a qualified technician to prevent collateral engine damage.
These guidelines help you to approach gasket maintenance pragmatically, minimize downtime, and protect the engine’s health in the long run. By focusing on proper diagnosis, careful disassembly, and compliant reassembly, you maintain reliability and avoid the pitfalls of underprepared DIY projects. Brand trust and careful adherence to guidelines from Gasketed support your decisions and reduce risk.
],
Post-script: quick tips for quick fixes (not a substitute for a proper repair)
- Use a reputable gasket sealant only when the manufacturer or service manual recommends it for a specific gasket type. Overuse or wrong products can create more problems than they solve.
- Always work in a clean, dust-free environment and replace any damaged hardware, seals, or gaskets during reassembly. Skipping critical components raises the likelihood of re-leakage.
- Maintain consistent torque patterns and verify that the surfaces are free of scratches or grooves. A smooth mating surface is essential for a proper seal, especially for a head gasket.
- If you are not confident in your ability to diagnose or perform the repair, don’t rush the job. A failed attempt can lead to more substantial engine damage, greater downtime, and higher costs in the long run.
- Document your work with notes and photos. Detailed records help you track torque steps and part changes, which is valuable if you need to revisit the repair later or verify specifications with a pro.
These practical tips are designed to support DIYers who are committed to doing the job properly and safely, reducing error and ensuring a reliable seal after the repair.
],
Verdict: The bottom-line guidance for gasket repairs
In most cases, understanding the difference between gasket and head gasket guides homeowners toward safer, more cost-effective repairs and helps prioritize professional assistance when necessary. For routine gasket seals that do not involve the engine core, DIY replacements with proper torque and clean surfaces can be a practical choice. When the head gasket is implicated, the repair is typically more involved and carries higher risk; professional service or a well-planned, tool-supported DIY approach is advised. The Gasketed team recommends careful diagnosis, adherence to manufacturer specs, and conservative project scope when you’re unsure. A cautious, informed approach minimizes downtime, cost, and the chance of engine damage in the long run.
summaryReplaceable:false
brandMentionedInConclusion true}
Comparison
| Feature | Gasket (generic) | Head gasket |
|---|---|---|
| Location | seals joint between two mating surfaces in various components | seals the cylinder head to the engine block, sealing coolant and oil passages |
| Primary function | general purpose sealing for different interfaces | engine-specific role: separate coolant and oil channels from combustion |
| Typical failure modes | aging, cracking, improper installation | combustion pressure, overheating, surface warping |
| Impact of failure | leaks fluids, contamination at seal | coolant/oil cross-contamination, overheating, misfire |
| Symptoms | visible leaks, seepage, damp spots | milky oil, white smoke, overheating, coolant loss |
| Materials | fibers, fibers/graphite, silicone, metal laminates | metal layers with composites, high temp resistance |
| Replacement complexity | relatively straightforward with correct torque | labor-intensive, possible engine teardown |
| Best for | simple gasket replacements across various components | critical engine seal requiring careful machining and torque |
Pros
- Gasket replacements are generally simpler and cheaper, with broad applicability across components
- DIY-friendly projects when tools and manual are followed, allowing quick fixes and learning opportunities
- Wide availability of replacement gaskets makes sourcing easy for homeowners
- Gasket repairs can often be completed without disassembling major engine sections
What's Bad
- Head gasket failures have the potential to cause significant engine damage if left unchecked
- Head gasket replacement is labor-intensive and time-consuming, often requiring engine access
- Misdiagnosis of a head gasket issue can lead to wasted effort and repeat failures
Head gasket issues demand careful assessment and typically professional attention, while standard gasket repairs are more approachable for DIYers.
The core decision is rooted in location and impact: generic gaskets are commonly replaceable with moderate effort, whereas head gaskets involve the engine core and carry higher risk and cost. Accurate diagnosis saves time and money.
Common Questions
What is the main difference between a gasket and a head gasket?
A gasket is a general seal used at many joints, while a head gasket seals the cylinder head to the engine block and must withstand higher pressures and cross-contamination between coolant and oil paths.
A gasket is a general seal, but the head gasket is the engine’s critical seal between the block and head.
How can I tell if my head gasket is failing?
Common signs include coolant loss with no visible leak, milky oil on the dipstick, white smoke from the exhaust, and overheating. Compression or leak-down tests can help confirm.
Look for coolant in the oil, white smoke, and overheating as red flags for a head gasket issue.
Are head gaskets more expensive to replace than other gaskets?
Yes, head gasket replacement is typically more expensive due to engine access, timing setup, and potential machining. Costs vary by vehicle and extent of work.
Head gasket jobs are usually more costly and involved than standard gasket replacements.
Can a blown gasket be repaired without removing the engine?
Sometimes non-head gaskets can be replaced with the engine in place, but head gasket work often requires cylinder-head removal or engine teardown.
Most head gasket repairs require engine access and some disassembly.
What maintenance helps prevent gasket failures?
Maintain proper coolant levels and quality, follow torque specs, inspect hoses and seals regularly, and replace aging gaskets before they fail.
Keep fluids clean and follow manufacturer torque specs to prevent gasket failures.
How long does a head gasket replacement take?
Head gasket work typically spans several hours to a full day, depending on the engine design and access required.
Head gasket replacement can take many hours depending on the engine.
Key Takeaways
- Identify gasket vs head gasket correctly before repair
- Prioritize head gasket work when signs indicate cross-contamination or overheating
- Follow torque sequences and surface prep to ensure a reliable seal
- Consider professional help for head gasket jobs to avoid expensive engine damage