What Happens When the Top Gasket Burns
Discover what happens when the top gasket burns, the risks involved, and how to diagnose and fix gasket damage. Practical steps for DIY homeowners with safety tips and prevention strategies.

When the top gasket burns, the gasket material degrades and may leak oil into the cooling system or coolant into the oil, causing overheating and cross-contamination. The immediate fix is to stop the engine, allow it to cool, check for leaks, and avoid further operation; plan a proper gasket replacement with OEM parts or a professional service.
What happens when the top gasket burns
The phrase "top gasket" typically refers to gaskets located on the engine’s upper region, such as the valve cover gasket or the head gasket itself. When these gaskets burn or fail due to heat, wear, or improper cooling, the seal between mating surfaces loses integrity. The immediate consequence is a heightened risk of cross-contamination between oil and coolant, which can create sludge, white smoke, and a range of performance issues. In severe cases, a burnt head gasket can allow exhaust gases into the cooling system or coolant into the oil, leading to overheating and potential engine damage. For DIY enthusiasts, understanding the symptoms and the progression helps in making safe, timely decisions about repair or replacement. In the long run, ignoring a burnt gasket often leads to more expensive repairs, so early detection is essential.
Why the top gasket is critical
The top gasket must withstand high temperatures, pressure fluctuations, and rapid thermal cycles. A compromised gasket loses its ability to seal, which can cause leaks, compression loss, and misfires. Materials like asbestos-free gasket sets or modern silicone-based compounds may fail differently under heat stress, so recognizing material behavior is part of a practical diagnostic approach. Regular maintenance, using the correct torque specifications, and avoiding aggressive heat cycles are key to extending gasket life. This section helps DIY homeowners separate symptoms from root causes, enabling better decision-making before a shop visit.
Common symptoms you might notice
Common early signs of top-gasket distress include oil leaks at the valve cover area, coolant leaks near the top of the engine, white steam from the exhaust after startup, and a gradual loss of coolant without an obvious leak. If coolant contaminates the oil, you may see a milky brown appearance and a strange, sweet odor. Head-gasket-related issues can also manifest as overheating, misfires, poor acceleration, and a drop in fuel efficiency. Detecting multiple symptoms together increases the likelihood of a gasket-related problem rather than a random leak.
Immediate risks and why you should address it now
Delaying diagnosis can lead to severe engine damage, including warped cylinder heads, warped blocks, or seized components. Cross-contamination between coolant and oil reduces lubrication, increasing wear on bearings and camshaft components. In worst-case scenarios, coolant entering combustion chambers can cause hydro-lock, which is dangerous for the engine and the mechanic. Addressing signs early reduces repair costs and protects your engine's longevity.
How overheating contributes to gasket damage
Overheating accelerates gasket aging by accelerating material break-down and altering the metal surfaces the gasket seals against. Repeated heat cycles cause the gasket to crack, deform, or lose elasticity. If a cooling system failure triggers overheating, the root cause may be a faulty radiator, water pump, thermostat, or clogged passages. Understanding this progression helps you target both the symptom (the burnt gasket) and the cause (cooling system issues) to prevent repeat failures.
What 'burns' means for different gaskets
A burnt valve cover gasket differs from a burnt head gasket. Valve cover gaskets mainly prevent oil leaks and can suffer from seepage and oil contamination. Head gaskets seal coolant and combustion chambers and are vulnerable to compression loss and cross-contamination. The term "burns" reflects material degradation from heat, exposure to combustion byproducts, and poor torque sequences. Distinguishing between gasket types guides appropriate repairs and part choices.
DIY checks you can safely perform today
Before touching any engine components, ensure the vehicle is on level ground and the engine is cool. Check for obvious signs of oil or coolant leaks around the top of the engine and under the oil fill cap. Inspect oil color for a coolant hint (milky appearance) and verify coolant level and condition. Use a shop light to inspect the valve cover area for seepage, and verify that coolant hoses to the radiator show no bulging or cracking. If you’re uncertain, don’t pressure-test or disassemble beyond safe limits.
Repair options: DIY gasket replacement vs professional service
DIY gasket replacement is feasible for some valve cover gaskets with basic hand tools, but head-gasket replacement is complex and requires precision, a clean workspace, and the right torque specs. If the problem involves cross-contamination or engine damage, professional service is advisable. Remember to source OEM or manufacturer-approved gasket kits and follow the exact torque pattern recommended in the service manual.
Preventive tips to avoid gasket burning in the future
Maintain a consistent cooling system with regular coolant changes, replace the thermostat and water pump as preventive measures, and ensure proper heat management with clean radiators and fans. Use high-quality gasket sealants only when specified by the manufacturer, and avoid shortcuts during reassembly. Regularly check oil and coolant levels and address leaks promptly to prevent heat buildup that can stress gaskets.
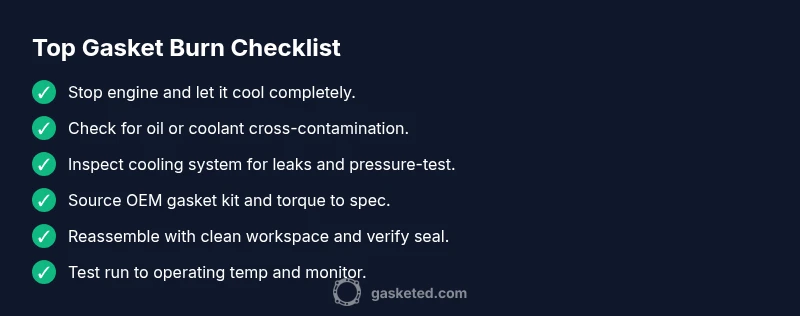
Steps
Estimated time: 4-8 hours
- 1
Stop engine and cool safely
Park on level ground, turn off the engine, and wait until all components are cool to touch. This prevents scalding and allows you to inspect without pressure differences. Disconnect the battery if you’ll be working near electrical components.
Tip: Always wear eye protection and gloves; hot coolant can cause severe burns. - 2
Inspect for leaks and contamination
Look for oil leaks at the valve cover area and inspect the oil and coolant reservoirs for contamination. Note any unusual colors or smells. Document symptoms for your records.
Tip: Take photos before disassembly for reference. - 3
Check cooling system basics
Verify radiator hoses for cracks, check the radiator cap for proper sealing, and ensure the radiator fan operates correctly. A blocked radiator or faulty cap can cause overheating that harms gaskets.
Tip: If the radiator cap is old, replace it to restore proper pressure. - 4
Assess compression and contamination risk
If you have the tools, perform a compression test on each cylinder to detect loss of seal. If coolant or oil is mixing, it often indicates a gasket breach at the head or close to the top region.
Tip: Follow the manual’s reference values for compression tests. - 5
Decide on gasket replacement path
Determine whether you can safely replace the gasket(s) yourself or if a professional shop is needed. Head-gasket replacement is typically a major job requiring precision.
Tip: Avoid cutting corners on torque specs and timing during reassembly. - 6
Prepare the workspace and gather parts
Set out OEM or manufacturer-approved gasket kits, new bolts if recommended, sealant if specified, and the necessary tools. A clean workspace minimizes debris entering the engine.
Tip: Label fasteners and keep track of their positions. - 7
Disassemble with care
Document the order of components as you remove them; use the service manual’s sequence. Keep parts organized and avoid mixing gaskets from different engines.
Tip: Do not reuse gaskets; heat and deformation may compromise seal. - 8
Reassemble and test
Install the new gasket, torque bolts to spec, and refill oil and coolant as needed. Start the engine and monitor for leaks, then run it up to operating temperature to verify sealing.
Tip: Bleed the cooling system if required to remove air pockets.
Diagnosis: Engine overheating with oil/coolant cross-contamination or visible leaks at the top of the engine
Possible Causes
- highOverheating due to cooling system failure
- mediumWorn or cracked gasket material from heat cycles
- lowImproper torque or warped mating surfaces
Fixes
- easyStop engine and inspect for obvious leaks; allow to cool completely
- easyCheck oil and coolant for cross-contamination; replace coolant if contaminated
- mediumPerform pressure test of cooling system and leak-down test for compression loss
- hardReplace the affected gasket (valve cover or head gasket) with OEM parts; reseal according to manual
Common Questions
What are the first signs that a top gasket might be failing?
Early signs include oil leaks near the top of the engine, coolant loss with no obvious leak, white smoke, and overheating. If these appear together, the gasket should be inspected promptly to prevent further damage.
Look for leaks at the top and unusual smoke or overheating. If you notice multiple signs, get a gasket checked soon.
Can I drive my car if I suspect a burnt gasket?
Driving with a suspected burnt gasket is risky. It can cause severe engine damage, coolant/oil cross-contamination, or hydro-lock. Have the vehicle tow-inspected if you’re unsure.
If you suspect a burnt gasket, don’t drive it long distances. Tow it to a shop for diagnosis.
How much does it cost to replace a head gasket?
Costs vary by vehicle and region, but head gasket replacement is a major repair, often several hundred to several thousand dollars depending on parts, labor, and whether other components need replacement.
Head gasket replacement is a substantial repair; prices depend on the car and shop.
Is there a temporary fix for a burnt top gasket?
There is no reliable temporary fix for a burnt head gasket. Temporary measures can mask symptoms but won’t stop underlying damage. Proper repair is required for long-term reliability.
There isn’t a true temporary fix for a burnt head gasket; you need proper repair.
How can I test for cross-contamination between oil and coolant?
Inspect oil for a milky appearance and coolant for oil residue. A lab test or a compression test can help confirm a gasket breach. Visual inspection plus tests guide the repair approach.
Milky oil or oil in coolant usually means gasket failure; tests confirm it.
Can a burnt top gasket cause long-term engine damage?
Yes. Prolonged leakage and overheating can warp heads, crack cylinders, or cause bearing wear. Early diagnosis and proper repair help prevent serious damage.
Yes, a burnt gasket can lead to serious engine damage if not fixed.
Watch Video
Key Takeaways
- Identify whether the issue is oil- or coolant-related first
- Overheating is a major warning sign of gasket failure
- Head gasket work is best left to OEM parts and proper torque specs
- Preventive maintenance reduces future gasket failures
- Professional assessment is advised for suspected head gasket damage