What Causes Gasket Blow: A DIY Troubleshooting Guide
Discover the common reasons gaskets blow, how to diagnose the root causes, and practical DIY fixes to prevent leaks, overheating, and costly gasket failures.

Stop running the system to prevent further damage. Inspect for obvious damage and contamination. Replace the gasket with the correct material, clean seating surfaces, and torque to spec. Refill fluids and run a leak check. Check mating surfaces for nicks, warping, or corrosion; if damage is present, replace involved parts and don’t reuse old gaskets.
Why gaskets blow: common causes
According to Gasketed, gasket blow is often not caused by a single factor but a combination of heat, pressure, and improper seating. The most common culprits include overheating or thermal stress, which weakens seals and warps mating surfaces. Pressure surges, especially in systems with inconsistent flow or blocked passages, can push a gasket out of its seat. Improper installation—using the wrong gasket size, material, or poor cleanliness of the sealing surface—remains a leading cause, as does aging and wear that hardens or crumbles gaskets over time. Other factors include chemical attack from corrosive coolants or cleaners, misalignment of mating parts, and over-tightening that tampers the gasket’s ability to seal. Because gaskets depend on a precise surface finish, even small nicks or scratches can create leak paths. The Gasketed team notes that a preventive approach—using the correct gasket for the job, ensuring clean, smooth mating surfaces, and following torque specifications—significantly reduces blowouts.
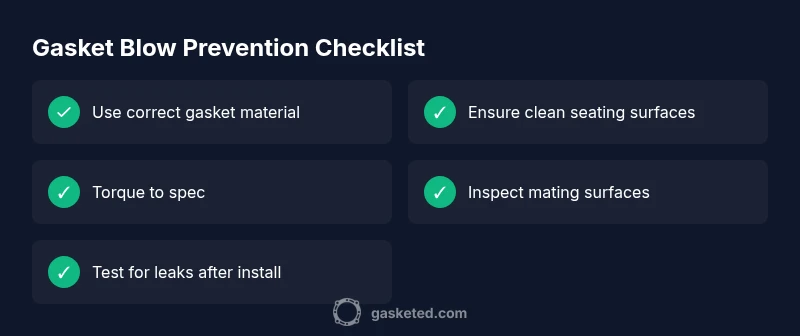
Key takeaway: many failures are preventable with proper material choice, surface preparation, and torque control.
How different gasket types fail: broad patterns
Gaskets serve in many applications, and failure modes vary by type. Head gaskets in engines fail primarily from overheating, high cylinder pressures, or thermal cycling that warps the block or cylinder head. Oil pan and valve-cover gaskets can fail due to oil exposure, solvent attack, or aging rubber that hardens and cracks. Fridge or freezer door gaskets fail when the seal area is deformed or degraded, reducing sealing performance and energy efficiency. Flange and pipe gaskets suffer from rough seating, corrosion, or over-tightening that squeezes the gasket beyond its elastic range.
Across all types, the link is that a clean, flat seating surface and compatible material are essential. Manufacturer guidance matters; mismatched operating conditions accelerate wear. For DIYers, select a gasket material suited to heat, chemical exposure, and mechanical load, and replace any damaged seating surfaces before reassembly.
Signs your gasket is failing: early indicators
Look for leaks at joints, surfaces, or seams; dampness, stains, or crusty buildup around the gasket area can signal a failure. Smells of coolant or oil in unusual places, overheating symptoms, or sudden pressure changes are also red flags. In engines, milky oil or coolant contamination can indicate cross-contamination from a blown head gasket. In appliances, you may notice reduced efficiency or unusual noises. Visible cracking, blooming, or hardened edges on the gasket material are telltale signs that replacement is needed. Early detection lets you address the problem before internal damage spreads, which saves time and money.
Diagnostic approach for DIYers: a practical flow
Start with a visual inspection: look for cracks, warping, or surface damage. If available, perform a simple dye test or UV leak test to locate hidden leaks. For engines, a compression test can reveal cylinder leakage. For sealed systems, a pressure test can confirm loss of seal integrity. Always verify that the replacement gasket matches the original specifications and that mating surfaces are clean and smooth. If you suspect internal contamination or head gasket failure, proceed with professional testing and avoid running the system until you have a confirmed diagnosis.
Prevention and best practices: keep gaskets intact
Maintain operating temperatures within design specs and avoid rapid thermal cycling. Use correct gasket materials for the environment (heat, pressure, chemicals), and replace gaskets only when the mating surfaces are pristine. Do not reuse old gaskets, and ensure proper alignment during installation. Tighten bolts to manufacturer torque specs in the correct sequence to avoid uneven loading. Periodically inspect seals before they fail, replace aging gaskets, and perform routine system flushes when dealing with coolant or fuel traces. Small investments in maintenance pay off by preventing blowouts and expensive repairs.
Steps
Estimated time: 2-3 hours
- 1
Prepare safety and tools
Put on eye protection and gloves. Gather replacement gaskets, torque wrench, sealant if recommended, cleaning solvents, and a repair manual for your specific gasket type. Confirm the system is powered down and depressurized before touching any components.
Tip: Create a clean workspace and lay out fasteners in labeled containers. - 2
Power down and depressurize
Disconnect power, relieve any residual pressure, and drain fluids if the repair requires it. This reduces the risk of splash injuries and component movement during disassembly.
Tip: Never work on pressurized systems. - 3
Access the gasket area
Remove any covers or shields to expose the gasket interface. Take photos or notes of component orientation to aid reassembly. Avoid bending or forcing parts.
Tip: Label all connectors and bolts as you remove them. - 4
Remove and inspect the old gasket
Carefully lift the gasket without scratching mating surfaces. Inspect for cracking, hardening, or deformation. If the seating surface shows wear, plan to repair or replace those parts as well.
Tip: If gasket is stuck, use appropriate gasket scraper to avoid gouging. - 5
Clean and inspect seating surfaces
Thoroughly clean all mating surfaces with the recommended solvent. Dry completely. Look for nicks, corrosion, or warping. Any damage should be addressed before reassembly.
Tip: Avoid introducing debris into the seal area. - 6
Install the new gasket
Position the new gasket correctly, aligning with any alignment marks. If a sealant is recommended by manufacturer, apply as directed. Ensure even seating without shifting the gasket.
Tip: Use the correct orientation and keep components aligned. - 7
Torque to spec
Tighten bolts to the manufacturer’s torque specification using a cross pattern. Use a torque wrench and verify uniform loading across the gasket.
Tip: Do not exceed torque; over-tightening damages the gasket. - 8
Reassemble and refill fluids
Reattach covers, reconnect power, and refill any drained fluids. Check all connections for signs of leaks as you gradually bring the system back online.
Tip: Start with a short, low-pressure test before full operation. - 9
Test and monitor
Run the system under normal conditions and watch for leaks, unusual noises, or signs of overheating. If anything seems off, shut down safely and recheck the seals.
Tip: Keep an eye on temperature gauges and leak indicators.
Diagnosis: Gasket leak or failure in a system
Possible Causes
- highOverheating/thermal stress
- highImproper installation or misfit gasket
- mediumAging or worn gasket material
- lowSurface damage on mating parts
- mediumChemical attack or incompatible fluids
Fixes
- easyReplace gasket with correct material and size; clean surfaces
- easyCheck and reset torque to manufacturer specs
- mediumInspect mating surfaces for warping or nicks; repair if needed
- easyTest system under safe conditions for leaks
- mediumIf overheating or contamination is suspected, fix root cause before reassembly
Common Questions
What causes gasket blow?
Gasket blow is typically caused by a combination of overheating, excessive pressure, improper installation, aging material, and surface damage. Addressing these root causes and using the right gasket material is key to prevention.
Gasket blow usually comes from heat, pressure, or poor installation. Fix the root causes and replace with the right gasket.
Can I fix a blown gasket myself?
Many gasket failures can be tackled by a careful DIY repair if you have the right tools and follow manufacturer torque specs. Complex failures, like head gasket issues, may require a professional assessment.
Some gasket repairs are DIY-friendly, but head gasket problems often need a pro.
How can I tell if it's a head gasket?
Head gasket failure often shows coolant/oil cross-contamination, white exhaust, and persistent overheating. A compression test or leak-down test by a professional can confirm the diagnosis.
Head gasket trouble usually shows coolant mixing with oil and loss of compression.
How long does a gasket repair take?
DIY gasket repairs typically take a couple of hours for a simple seal, longer for engines or multi-part assemblies. Plan for a thorough inspection and test run after installation.
Most gasket repairs take a few hours, depending on the system.
Are gasket repairs expensive?
Costs vary by gasket type and complexity. Replacing a simple gasket is usually less expensive than engine head gasket work, but both require proper parts and torque to avoid recurring leaks.
Prices depend on gasket type; simple fixes are cheaper than engine repairs.
Preventing gasket blow in the future?
Follow regular maintenance, use correct materials, and monitor operating temperatures. Periodic inspections and timely replacements help prevent future blowouts.
Keep up with maintenance and use the right gaskets to prevent future failures.
Watch Video
Key Takeaways
- Inspect surfaces for damage before reassembly
- Use correct gasket type and torque to spec
- Don’t reuse old gaskets or damaged parts
- Address root causes like overheating to prevent recurrence
- Test under controlled conditions after repair