When to Change Oil Pan Gasket: Signs, Inspection, and DIY Steps
Learn when to change an oil pan gasket, how to inspect for leaks, and a practical, step-by-step approach for DIYers and homeowners. Get clear guidance on timing, safety, and what to expect from professional service.

Goal: determine if your oil pan gasket needs replacement and what to look for. You’ll learn the key symptoms, how to inspect for leaks, what a typical replacement timeline looks like, and how to decide between DIY and professional service. This quick guide helps you act before engine damage occurs and save money.
Understanding the oil pan gasket: purpose and when to change oil pan gasket
The oil pan gasket serves as the seal between the engine block and the oil pan, keeping hot, pressurized oil contained and preventing external leaks. Over time, heat cycling, vibration, and mounting stress can cause the gasket material to harden, crack, or relax its seal. When to change oil pan gasket becomes a practical question when you notice new leaks, frequent topping off of oil, or signs that the oil pan is not sealing under pressure. A proper diagnosis considers both the gasket and related components such as the oil filter housing, drain plug, and the oil pan itself. Proactive maintenance can prevent more serious engine damage from oil loss and contamination. In this guide we walk through signs, inspection steps, and a practical decision framework so homeowners know when replacement is warranted and when a gasket might just need cleaning or re-seating. The goal is a reliable seal that keeps the engine oil contained and the engine healthy.
Signs you might need to change the oil pan gasket
Leaks along the oil pan seam are the most obvious cue that a gasket may be failing. Look for fresh oil drips after the engine has cooled, or oil patches on the underside of the vehicle. You may also notice a low oil level without obvious consumption, or oil on the outside of the engine near the oil pan area after a drive. Odors of burnt oil can accompany leaks if oil hits hot exhaust components. If you regularly top off oil between changes, this could indicate a slow seep that warrants closer inspection. Finally, check for seepage while performing a simple idle test with a flashlight: a damp seal at the pan edge or around the drain plug can signal a compromised gasket.
How leaks develop and why oil pan gaskets fail
Leaks develop when the gasket cannot maintain a tight seal under temperature changes, pressure fluctuations, and engine vibrations. The gasket material may become brittle with age, or the mating surfaces may become pitted or warped, allowing a micro-gap to form. Improper installation, reused or damaged gaskets, and over-tightened drain plug or mounting bolts can accelerate failure. In high-mileage engines, corrosion at the gasket contact surfaces can also contribute to seepage. Understanding these failure pathways helps you interpret symptoms more accurately and decide whether replacement is the right course of action.
Inspecting your engine for gasket wear and related issues
A thorough inspection starts with a clean oil pan edge and a careful visual check. Look for fresh oil along the gasket seam, check for burrs or nicks on the mating surfaces, and inspect the pan for warping. Remove any dirt or old gasket material with a plastic scraper to reveal a clean seal surface. While the pan is off, inspect bolts for corrosion and ensure threads are clean before reinstallation. If you have access to a pressure test, applying a mild pressurization to the crankcase can help reveal seepage paths. Remember that even a small seepage can become a larger leak over time, so document any findings and plan replacement if the seal shows ongoing leakage or surface damage that cannot be reliably repaired by cleaning alone.
Timing logic: when to replace now vs. postpone
If a gasket shows active, persistent leakage after cleaning and sealant assessment, replacement is typically warranted. A slow seep without obvious oil loss may be monitored if you are planning a short-term vehicle sale or if the cost of replacement is a concern and you can tolerate small leaks for the near term. However, if you observe rapid oil loss, frequent top-ups, or oil pooling at or near the gasket edge after engine shutoff, prioritize replacement to prevent engine damage. Mileage, overall engine condition, and your daily driving needs influence the decision. This approach helps you balance immediate costs with long-term reliability, as endorsed by the Gasketed team.
DIY replacement: a practical overview for homeowners
DIY replacement is feasible for many hobbyists with basic tools and a service manual. Start by safely lifting and supporting the vehicle, draining old oil, and removing the oil pan and old gasket. Pay close attention to torque specs and bolt pattern to avoid warping the pan or striping threads. Use a plastic scraper and gasket remover to avoid gouging the mating surfaces, and replace with a new gasket designed for your vehicle. After installation, reattach the drain plug, refill with oil, and conduct a careful leak test. If any uncertainty remains, don’t hesitate to seek professional help to ensure the job is done to spec.
When professional replacement makes sense
Engines with integrated oil sumps or those with complex accessory layouts may benefit from a professional replacement. If the oil pan is damaged, warped, or the engine requires removing multiple components to access the gasket, a pro approach saves time and reduces risk. A shop can also verify torque precision, inspect for additional leaks in nearby seals, and provide a warranty on the repair. For high-mileage engines or vehicles with a history of overheating, professional assessment may offer greater long-term peace of mind.
Maintenance and prevention: extend gasket life
Regular oil changes with the manufacturer-recommended oil type and viscosity help reduce gasket wear. Avoid aggressive oil pan cleaning that could damage the gasket surface, and replace gaskets only with matching, quality parts for your engine. When replacing, consider using new bolts if the manufacturer specifies, and ensure a clean, dry surface before seating the new gasket. Periodic inspection for oil drips during routine maintenance can catch issues early and prevent larger leaks. By following these practices, you keep the seal reliable and extend the life of your oil system.
Tools & Materials
- Oil pan gasket kit (correct for engine model)(Choose the exact gasket for your engine family and generation)
- Torque wrench(Useful for achieving specified bolt tension without over-tightening)
- Socket set and ratchet(Multiple sizes; metric sizes are common on modern vehicles)
- Oil drain pan(Large enough to catch used oil without overflow)
- Gasket scraper or plastic putty knife(Avoid metal scrapers to protect mating surfaces)
- Rags, solvents, and sealant remover(Clean surfaces thoroughly before gasket installation)
- New engine oil(Top up after gasket replacement as needed)
- Safety gear (gloves, glasses)(Follow standard workshop safety practices)
- Shop light or flashlight(Ensure you can clearly see the gasket edge and pan seam)
- Jack stands and wheel chocks(Only if you need to lift the vehicle safely)
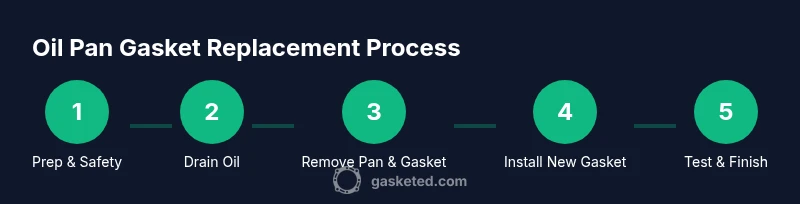
Steps
Estimated time: 2-4 hours
- 1
Prepare and secure the vehicle
Park on a level surface, engage the parking brake, and loosen the oil filler cap. Lift the front of the vehicle with a jack and support it with jack stands. This creates clear access to the oil pan and gasket area.
Tip: Use wheel chocks and never rely on a jack alone. - 2
Drain old engine oil
Place an oil drain pan under the oil pan drain plug. Remove the plug and allow the oil to drain completely. Once drained, reinstall the plug and wipe up any spills.
Tip: Warm oil drains faster; if the engine is cool, give extra time for complete drainage. - 3
Access the oil pan and remove bolts
Remove all visible bolts securing the oil pan. Keep track of bolt locations, as some pans use mixed lengths. Carefully detach the pan without bending the anti-slosh baffles.
Tip: Document bolt locations to ensure correct reassembly. - 4
Remove old gasket and clean surfaces
Lift the oil pan away and pry off the old gasket. Use a plastic scraper to clean both mating surfaces, removing all residue and oil traces. A clean surface ensures a reliable seal.
Tip: Avoid gouging the metal surfaces; even small scratches can prevent proper sealing. - 5
Inspect for damage
Check the oil pan edge, mounting flanges, and the gasket surface for warping or corrosion. If the pan is damaged, replacement may be required before installing the new gasket.
Tip: If you notice warping, consider replacing the pan or resurfacing according to service guidelines. - 6
Install the new gasket and reassemble
Place the new gasket into position with the sealant if specified by the manufacturer. Reinstall the oil pan and thread bolts by hand first, then torque to the specified pattern and sequence.
Tip: Torque in stages following the recommended pattern to prevent distortion. - 7
Refill oil and check for leaks
Fill the engine with the recommended oil type and amount. Start the engine and run to operating temperature, then inspect around the pan seam for leaks.
Tip: Use a bright light to spot any dampness or fresh oil around the seam. - 8
Final checks and cleanup
Turn off the engine, recheck oil level, and remove tools. Lower the vehicle and dispose of used oil properly. Keep a maintenance log entry for gasket replacement.
Tip: Dispose of used oil at an authorized collection site. - 9
Test: drive and re-inspect
Take a short drive and re-check for leaks after cooling. Re-torque bolts if the manual calls for it and ensure no new leaks appear.
Tip: If leaks persist, consult a professional to avoid engine damage.
Common Questions
Can I replace an oil pan gasket myself, or should I hire a mechanic?
DIY replacement is possible for many enthusiasts, provided you have the right tools and a service manual. Complex engines or uncertain bolt patterns may warrant professional service to ensure proper sealing and torque specs.
DIY replacement can be feasible with the right tools, but for complex engines, a professional may be safer.
What are the most common signs of a failing oil pan gasket?
Visible oil leaks along the oil pan seam, oil spots under the vehicle, and a gradual drop in oil level without consumption are common indicators. A damp seam after pressure testing also signals a failing gasket.
Look for leaks at the pan edge and oil drops underneath as common signs.
How long does a new oil pan gasket typically last?
Lifespan varies with driving conditions, maintenance, and engine design. With proper installation and maintenance, a gasket can last several years, but leaks can develop as the vehicle ages.
A well-installed gasket can last years, but age and use affect longevity.
Is it dangerous to drive with a leaking oil pan gasket?
Driving with an active gasket leak can lead to low oil levels and engine damage. If you notice a leak, minimize driving and schedule a repair promptly.
If you see a leak, avoid driving long distances and get it fixed soon.
Do I need engine removal for gasket replacement?
Most oil pan gasket replacements do not require engine removal, but some vehicles with tightly mounted components may need partial disassembly. Refer to the service manual for your model.
Usually no engine removal is needed, but some models require extra disassembly.
What if the new gasket still leaks after replacement?
If leaks persist, recheck surface cleanliness, torques, and gasket orientation. Consider reseating the pan or replacing the pan if damage exists. A professional inspection may be warranted.
If it still leaks, review torque and surfaces, and seek expert help if needed.
Are there different gasket materials I should know about?
Gasket materials vary by engine design. Common types include rubber, cork, or composite gaskets. Use the material specified by the vehicle manufacturer for best results.
Use the manufacturer-specified gasket material for your engine.
How should I dispose of the old oil and gasket?
Dispose of used oil at an authorized recycling facility. Old gaskets and oily rags should also be disposed of per local regulations to prevent environmental contamination.
Take used oil to a recycling center and follow local disposal rules for waste.
Watch Video
Key Takeaways
- Identify signs early to prevent engine damage
- Clean mating surfaces thoroughly before gasket installation
- Use the correct gasket type and follow torque specs
- DIY replacement is feasible with the right tools and manual
- Consult a professional if you encounter complexity or uncertainty