Leaking Valve Cover Gasket: Diagnose and Fix Now
Urgent guide for diagnosing and fixing a leaking valve cover gasket. Learn quick checks, a proven diagnostic flow, step-by-step repair, safety tips, and prevention to stop oil leaks before engine damage.

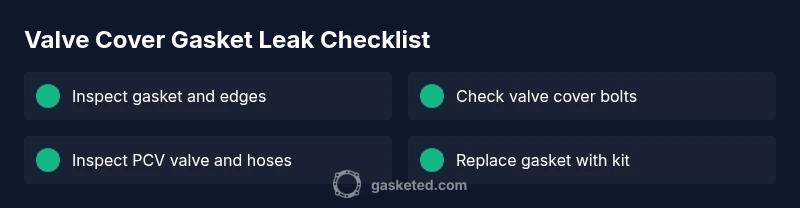
Most leaks around the valve cover come from a worn gasket or loose bolts. Start by re-torquing the valve cover bolts to the manufacturer spec, then replace the gasket if oil continues to seep. Clean the area, inspect for cracks, and check the PCV system for pressure buildup. If oil returns, a full gasket replacement is recommended.
What a leaking valve cover gasket means for your engine
A leaking valve cover gasket is more than just an oil stain; it can signal oil loss that affects engine performance and maintenance costs. When the gasket fails, oil can wick into hot exhaust areas, creating smoke, a burning-oil smell, and even a slippery mess on the engine bay. Over time, persistent leaks can degrade seals, foul ignition components, and reduce oil pressure in critical areas. According to Gasketed, aging gaskets and repeated heat cycles are the leading causes of leaks around the valve cover, especially in high-mileage engines. You may see oil seeping from the seam where the valve cover meets the cylinder head, or oil pooling near the valve cover bolts. In many cars, the fix is straightforward: replace the gasket and reseal, then monitor for any remaining seepage. Treating the issue early prevents more serious leaks that could damage the timing cover, ignition coils, or serpentine belt area.
The Gasketed team emphasizes that a proactive approach saves money and reduces risk. A leaking valve cover gasket isn't just a cosmetic issue—it can lead to oil loss, misfires if oil reaches spark plugs, and increased crankcase pressure if the PCV system is compromised. Addressing the leak now with a proper gasket replacement and correct torque specs helps protect nearby parts and keeps your engine running smoothly.
Signs of a leak and initial checks
Oil leaks around the valve cover are typically visible as dark streaks along the gasket seam or pooling oil on the engine. You may notice a burning oil smell once the engine heats up, or a drop in oil level that doesn’t match the visible seepage. Oil on ignition components or near spark plugs can indicate seepage has reached those areas. Common inspection cues include oil staining along the valve cover edge, oil on the bolts, and moisture around gasket corners. Initial checks should be simple and non-destructive: tighten the valve cover bolts to spec (without over-tightening), wipe away old oil to observe fresh leaks, and inspect the PCV valve and hoses for clogs or cracks. A clogged PCV system can raise crankcase pressure and push oil past the gasket. These checks help distinguish a gasket leak from a surface smear or a distant source.
Diagnostic approach for a leaking valve cover gasket
Begin with easy confirmations: wipe the area clean, recheck the oil level, and tighten the bolts to the manufacturer’s torque specification. If seepage persists, perform a more detailed check. Look for oil staining at the gasket seam and inspect the valve cover surface for warping. If available, use a UV dye or oil tracer to pinpoint the origin of the leak. Gasketed analysis indicates that most valve-cover leaks originate at the gasket rather than the cover material itself, especially when the cover is not warped. If you cannot locate the leak or the cover shows damage, plan for gasket replacement or cover replacement as needed. After repairs, recheck for leaks during a cautious test drive to confirm the fix.
Tools, parts, and the repair plan
Before you start, gather a valve cover gasket kit compatible with your engine, a torque wrench, a socket set, a razor or scraper for old gasket material, and any sealant recommended by the kit. Having a clean workspace, good lighting, and a magnetic tray for bolts helps avoid misplacements. The repair plan is straightforward: remove the valve cover, clean the mating surfaces, install the new gasket in the correct orientation, reseal per manufacturer instructions, reinstall the cover with proper torque in a cross-pattern, reconnect any PCV components, and finally recheck for leaks after a short run.
Step-by-step repair overview (important for the common leak)
This overview outlines the typical sequence for replacing a leaking valve cover gasket on many engines. Always consult your vehicle’s service manual for exact torque specs and sequence.
- Step 1: Prepare your workspace, disconnect the battery if needed, and gather tools. Ensure the engine is cold. Tip: Wear eye protection and organize bolts by position.
- Step 2: Remove components that block access to the valve cover, if necessary. Carefully disconnect hoses and wires, noting their paths. Tip: Use labeled bags or tape to keep track of connectors.
- Step 3: Unbolt the valve cover in a crisscross pattern, then lift gently to expose the gasket. Tip: Keep track of fluids; have rags ready.
- Step 4: Remove the old gasket, scrape clean all mating surfaces, and inspect the valve cover for warping or cracks. Tip: Do not gouge the aluminum surface.
- Step 5: Install the new gasket, ensuring correct alignment with dowels or bolt holes. Apply sealant only if specified by the kit. Tip: Double-check orientation before seating the cover.
- Step 6: Reinstall the valve cover bolts to snug, then torque to spec in a cross-pattern. Tip: Tighten gradually in steps to the final value.
- Step 7: Reconnect PCV valve and hoses, then reinstall any removed components. Tip: Ensure hoses are not kinked and clamps are secure.
- Step 8: Refill oil if drained, start the engine, and inspect for leaks. Let the engine reach operating temperature and recheck the area.
Estimated total time: 60–120 minutes depending on engine layout.
If the gasket or cover is damaged, replacement of the component itself may be required. In complex engines, or if you encounter a warped cover, seek professional help to avoid additional damage.
Safety, prevention, and maintenance
Safety is critical when working around hot engines and oil. Always work on a cold engine and dispose of oily rags properly. Use a torque wrench and follow the manufacturer’s torque sequence; over-tightening bolts can warp the valve cover and worsen leaks. To prevent future leaks, replace the PCV valve if it’s old, inspect hoses for cracks, and reseal the cover during major engine work. Regular top-offs and periodic visual inspections help catch leaks before they become major problems. Preventive maintenance reduces the chance of recurring leaks and protects adjacent components such as ignition coils and belts.
When to call a professional
If you discover a crack in the valve cover, warped surface, or persistent leaks after gasket replacement, it’s wise to consult a professional. Complex engine layouts, seized fasteners, or signs of broader sealing failures benefit from a trained technician. The Gasketed team recommends getting a professional assessment if you’re unsure about torque specs, gasket orientation, or if the leak returns after a DIY repair.
Steps
Estimated time: 60-120 minutes
- 1
Prepare workspace and safety gear
Park on a level surface, ensure the engine is cold, and disconnect the negative battery cable if it will be near working space. Gather tools and a tray for bolts.
Tip: Wear eye protection and keep bolts organized by position. - 2
Remove obstructing components
If needed, remove any obstructions like hoses or covers to access the valve cover. Label connectors so you can reinstall them correctly.
Tip: Take photos as you go to reference later. - 3
Lift and unbolt the valve cover
Loosen bolts in a crisscross pattern and lift the cover carefully. Be prepared for residual oil.
Tip: Place bolts in labeled compartments or a magnetic tray. - 4
Clean mating surfaces
Remove old gasket material with a scraper, taking care not to damage the aluminum surface. Clean the groove with solvent if needed.
Tip: Inspect for warping or cracks on the cover. - 5
Install new gasket and sealant if required
Place the new gasket in the groove, ensure it seats evenly, and apply any sealant exactly as the kit instructs.
Tip: Check orientation; most gaskets have a specific path. - 6
Reinstall valve cover and torque bolts
Lower the cover, hand-tighten bolts, then torque to spec in a cross pattern. Avoid overtightening.
Tip: Use a torque wrench for accuracy. - 7
Reconnect PCV and nearby components
Reconnect hoses and PCV valve, ensuring clamps are secure and not kinked.
Tip: Double-check hose routing before final assembly. - 8
Test and verify
Add oil if drained, start engine, and inspect the cover area for leaks. Run the engine to operating temperature and recheck after a short drive.
Tip: If leaks persist, consider professional inspection.
Diagnosis: Oil visible around the valve cover area with possible seepage toward spark plugs or exhaust.
Possible Causes
- highLoose valve cover bolts
- highAging or degraded gasket material
- lowCracked valve cover or warped surface
- lowPCV system problem causing increased crankcase pressure
Fixes
- easyTighten valve cover bolts to spec
- mediumReplace valve cover gasket and reseal
- hardRepair or replace cracked valve cover
- easyInspect and service PCV valve/hoses to reduce pressure
Common Questions
Is a leaking valve cover gasket dangerous?
Oil leaks near hot engine parts can be a fire risk and may cause misfires if oil reaches ignition components. It should be addressed promptly to avoid further damage.
Yes. Oil leaks near hot parts can pose a fire risk and should be fixed soon.
Can I drive my car with a leaking valve cover gasket?
Drivability may be unaffected in the short term, but continuing to drive can worsen the leak, drain oil, and risk damage to ignition components. Plan repairs soon.
It's not ideal to drive long-term; get the gasket replaced when possible.
How long does a valve cover gasket replacement take?
DIY replacements vary by engine layout but should take a few hours for most home mechanics. A shop can complete it faster if access is difficult.
Most DIY jobs take a few hours, depending on the engine.
Should I use gasket sealant with a new valve cover gasket?
Many gasket kits include sealant and specify its use. Always follow the kit instructions and manufacturer guidelines for your engine.
Follow the kit directions; some gaskets don’t require extra sealant.
What safety steps should I take?
Work on a cool engine, wear eye protection, and keep rags away from hot surfaces. Properly dispose of oily waste and bolts to avoid misplacement.
Cool engine, wear protection, and tidy up as you go.
Do I need to remove timing components for a gasket change?
In most cases you don’t need to remove timing components, but some engines require partial disassembly for access. Check the service manual for your model.
Usually not, but check your manual for specifics.
Watch Video
Key Takeaways
- Inspect promptly to prevent engine damage
- Torque bolts to spec in a proper pattern
- Check PCV system to avoid recurrence
- Use the correct gasket kit for your engine
- Schedule professional help if leaks persist