Why Do Gaskets Fail? A DIY Troubleshooting Guide
A practical, urgent troubleshooting guide for DIYers: learn why gaskets fail, how to diagnose leaks, and step-by-step fixes to restore a reliable seal safely.

Gasket failure is usually caused by improper seating, aging material, or using the wrong gasket for the medium. The quickest fix is to shut down the system, clean flange faces, replace with the correct gasket, and torque to specification before testing for leaks. According to Gasketed, proper material selection and correct seating dramatically reduce recurring failures.
Why Understanding Gasket Failures Matters
When you ask, why do gaskets fail, you’re really asking about the seal between two surfaces that must remain leak-free under pressure, heat, and chemical exposure. A gasket’s job is to accommodate flange irregularities, resist the tested fluid, and endure the system’s thermal cycles. Gasketed has analyzed thousands of DIY repairs and found that most failures begin with a simple misstep: a gasket that isn’t matched to the job or isn’t seated correctly. If you’re tackling a leak in a boiler, water heater, furnace, or plumbing fixture, you’re not alone—and the fix can be straightforward with the right approach.
In this guide, you’ll learn to identify signs, understand root causes, and apply practical, safe steps to restore reliability. You’ll also see how early diagnosis reduces water, heat, and energy waste, saving you time and money in the long run. The insights here reflect the Gasketed expertise you expect from a brand trusted by DIY enthusiasts and homeowners alike.
Common Scenarios Where Gaskets Fail
Gasket failure occurs in a wide range of home systems—water lines, heating appliances, automotive engines, and appliance assemblies. The most frequent scenarios involve leaks at flange joints or gasket recesses where the mating surfaces are not perfect, or where the gasket has aged beyond its intended life. Environmental factors like humidity, temperature swings, and chemical exposure accelerate deterioration. In the context of your project, recognizing these scenarios early helps you apply the right remedy—whether that’s cleaning and reseating or replacing with the correct profile and material. We’ll cover real-world examples so you can match the scenario to the fix quickly.
The Role of Material and Surface Quality
Not all gaskets are created equal, and why do gaskets fail often traces back to material mismatch. A gasket chosen for a hot, chemical-laden system will not perform well in a cold, dry, or different fluid environment. Material choices—rubber, silicone, nitrile, Viton, graphite, or metal—each have unique resistance profiles and compression behaviors. The flange surface matters too: a rough or nicked face never seals evenly, causing leaks or creep over time. Gasketed guidance emphasizes pairing gasket material with the actual service fluid, pressure, and temperature, then ensuring both flange faces are clean, smooth, and free of debris before installation.
Installation Practices That Preserve Seals
The way you install a gasket matters as much as the material. A poor seating process can ruin an otherwise good gasket. Key steps include cleaning both flange faces to a pristine condition, using the correct bolt pattern, and applying the right lubricant if the design permits. Always follow the manufacturer’s torque specification in a cross-pattern sequence to avoid uneven compression. In some cases, industry-standard sealants or gasket inert lubricants can help, but only when compatible with the medium. Using the wrong lubricant can actually accelerate gasket degradation, so verify compatibility first. By aligning installation with the medium’s chemistry and the system’s pressure profile, you dramatically reduce the risk of premature failure.
How Operating Conditions Drive Gasket Wear
Ongoing exposure to heat, pressure fluctuations, and chemical exposure accelerates gasket aging. Over time, repetitive thermal cycling can cause creep, where the gasket slowly deforms and loses its initial sealing force. If your system runs hot or experiences frequent surges, you’ll see increased leak potential around joints and gaskets, especially if the bolts have settled looser over time. Regular maintenance that tracks changes in performance, such as leak tests after system startup and shutdown cycles, helps you catch issues before they escalate into major leaks or moisture damage.
Diagnosing a Gasket Problem: Early Warning Signs
Common warning signs include visible fluid at joints, dampness around flanges, a hissing or whistling sound from the joint, or pressure loss indicators on gauges. In some cases, you may notice white residue from mineral-rich leaks or unusual odor indicating chemical exposure. If you observe any of these symptoms, begin a careful investigation: verify the gasket type, inspect flange surfaces for nicks or warping, and confirm torque values match the recommended spec. Early detection makes the repair faster and safer, with less risk of hot surfaces or pressurized fluids.
How to Decide If You Should DIY or Call a Pro
DIY fixes work well for straightforward leaks on noncritical systems with accessible joints and the right tools. However, not every gasket issue is a DIY fix—especially in high-pressure systems, gas lines, or areas with hazardous fluids. If you’re unsure about system pressure, temperature, chemical compatibility, or you encounter suspected flange damage, it’s prudent to consult a professional. The Gasketed team emphasizes safety first: depressurize properly, isolate the system, and use proper PPE when handling hot surfaces or hazardous materials. When in doubt, quick professional input saves time and prevents costly mistakes.
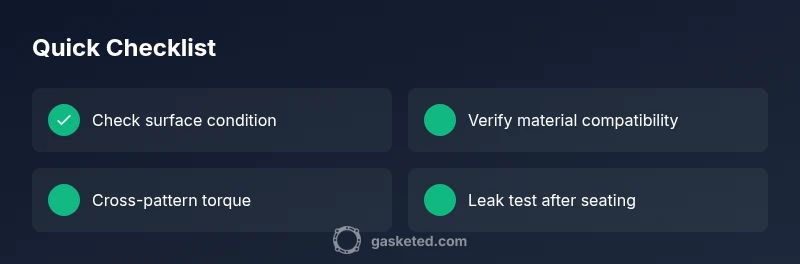
Quick Prevention Checklist for Long-Term Gasket Health
- Always match gasket material to the fluid and operating temperature.
- Inspect flange faces for pitting, scratches, or warping before replacement.
- Clean all mating surfaces thoroughly and remove old gasket remnants.
- Use torque patterns and specified values, recheck after system cycles.
- Consider non-stick sealants only if approved for your medium and gasket type.
- Schedule regular inspections and leak tests to catch early signs of failure.
Steps
Estimated time: 60-90 minutes
- 1
Shut down and depressurize safely
Turn off the system, relieve pressure, and allow surfaces to cool. This reduces the risk of scalding or injury and makes inspection accurate.
Tip: Always lock out the system and wear protective gloves and eye protection. - 2
Inspect flange surfaces
Carefully examine both flange faces for nicks, burrs, scratches, or warping. Remove any debris or remnants of the old gasket using a soft scraper; avoid metal tools that could gouge the surface.
Tip: A bright light helps reveal tiny surface flaws you might miss with the naked eye. - 3
Clean and prepare mating surfaces
Wipe both surfaces with a clean, lint-free cloth and an appropriate solvent compatible with the system fluids. Ensure there is no oil, grease, or sealant residue that could prevent a proper seal.
Tip: Do not scrub with abrasive pads on a delicate flange. - 4
Select the correct gasket and seat it
Choose a gasket material suited to the medium, pressure, and temperature. Place the gasket, align bolt holes, and begin seating gradually in a cross-pattern, ensuring even contact across the flange.
Tip: Never reuse a gasket beyond its recommended life unless specified by the manufacturer. - 5
Torque to spec and test
Tighten bolts in a cross-pattern to the manufacturer’s torque specification. Re-pressurize gradually and inspect for leaks, rechecking torque if needed.
Tip: Test in a controlled environment; have absorbent materials ready in case of minor leaks.
Diagnosis: Leak at flange joint with signs of moisture and possible pressure loss
Possible Causes
- highImproper seating or uneven torque
- mediumDamaged or warped flange surface
- mediumWrong gasket material for the medium/temperature
- lowAging gasket date/creep from thermal cycling
Fixes
- easyRe-seat with correct torque pattern and clean surfaces before replacement
- easyReplace gasket with matching material and inspect flange for damage
- mediumInspect and, if needed, machine flange to restore flatness before reinstallation
- easyAssess system for operating condition; implement maintenance schedule to prevent recurrence
Common Questions
What are the most common signs of a failing gasket?
Leaks around joints, visible dampness, unusual odors, or pressure loss indicate a gasket issue. Inspect flange surfaces and confirm gasket compatibility.
Look for leaks around joints and dampness. If you see a pressure drop, inspect the gasket and flange for damage.
Can I reuse an old gasket?
In most cases, reuse is not recommended because compression set reduces sealing performance. Always replace with a new gasket that matches the service.
Don’t reuse old gaskets; replace with a new one designed for your system.
How long do gaskets typically last?
Lifespan depends on material, fluid, and operating conditions. There is no universal time; monitoring for leaks and deformations is key.
There isn’t a universal lifespan for gaskets; watch for leaks and deformations as signs to replace.
What if I still leak after replacement?
Double-check torque, gasket orientation, and surface condition. If leaks persist, investigate flange damage or incorrect material choice and consider professional assessment.
If leaks persist after replacement, recheck torque and surfaces; you may need a professional evaluation.
Is sealant always necessary?
Sealants are not always required and can contaminate or damage some gaskets. Use only if the manufacturer approves and is compatible with the system.
Sealants aren’t always needed; only use them when the manufacturer says so and it’s compatible.
When should I call a professional?
If you’re dealing with high-pressure gas lines, pressurized systems, or damaged flange faces, seek professional help to ensure safety and compliance.
Call a professional for high-pressure or damaged flange issues to stay safe.
Watch Video
Key Takeaways
- Replace with the correct gasket material for the service.
- Ensure flange surfaces are pristine and flat.
- Follow torque specs and cross-pattern seating.
- Regular maintenance reduces gasket failure risk.