How to Change an Oil Filter Housing Gasket
Learn how to replace the oil filter housing gasket to stop leaks, protect the engine, and extend gasket life with a clear, step-by-step DIY approach from Gasketed.

To change the oil filter housing gasket, drain the oil, remove the housing, replace the worn gasket with a new one, reseal the housing, and refill the oil while checking for leaks. This simple maintenance task prevents leaks, preserves oil pressure, and protects the engine from contaminants.
Why changing the oil filter housing gasket matters
According to Gasketed, the oil filter housing gasket is a critical seal that prevents oil from escaping where the filter attaches to the engine. A failed gasket can lead to progressive leaks, reduced oil pressure, and the risk of engine damage if the oil level drops or contaminants enter the system. In many vehicles, the housing sits at a high-temperature zone and experiences vibrations, so a robust seal is essential. This guide explains how to determine if your gasket needs replacement, how to source the right gasket, and how to perform the replacement cleanly to avoid future issues. We will cover material choices, tool selection, and a step-by-step process that reduces the chances of re leaks after reassembly.
Safety and preparation for changing the gasket
Before any gasket work, ensure the engine is cool, the vehicle is on a level surface, and the battery is disconnected if you’ll be near electrical connections. Wear eye protection and gloves, and have a drain pan ready to catch old oil. If you notice oil on the driveway, place absorbent mats to contain drips. Work in a well-ventilated area and keep a clear workspace, labeling bolts and keeping track of parts. Avoid rushing, as rushed torque can warp the housing and create leaks after reassembly. By planning correctly, you set up a clean, safe environment for the job.
Gasket types and material considerations for the housing
Oil filter housing gaskets come in several materials, including rubber O rings, silicone seals, and composite gaskets. OEM or OE-equivalent gaskets typically provide the right fit, material compatibility, and sealing characteristics for your engine. Some housings use a pre-formed gasket, while others require an O-ring with a sealant compatible with engine oil. Check the service manual or gasket kit instructions for your vehicle. Avoid using generic sealants unless the manufacturer approves them, as improper sealant can contaminate oil passages and compromise longevity.
Tools and parts you’ll need for the gasket replacement
Before starting, gather the essential tools and parts listed below. A reliable replacement gasket specific to your engine is non-negotiable. A torque wrench helps you achieve even clamping force, while a scraper or plastic blade ensures a clean seating surface. Have a drain pan and rags on hand to manage oil spills, and use gloves for protection. Consider having fresh engine oil and an appropriate funnel for a clean refill. By assembling the right kit, you minimize the risk of leaks after reassembly.
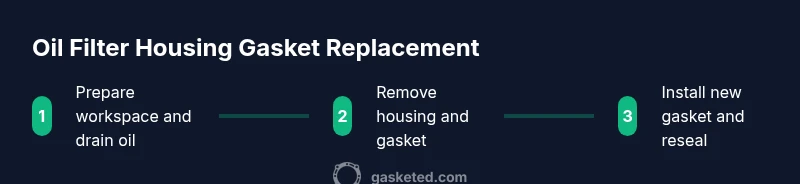
Step 1 — Prepare the workspace and drain oil
Set the vehicle on a level surface and let the engine cool. Position the drain pan under the oil pan or housing area, depending on your vehicle. Remove the oil drain plug if accessible and allow oil to drain completely. After draining, reinstall the drain plug and wipe up any spills. This step reduces the mess and ensures a clean environment for gasket replacement.
Step 2 — Remove the oil filter housing bolts and access the gasket
Use the appropriate socket or wrench to loosen and remove the housing bolts in a crisscross pattern to avoid warping the housing. Gently lift the housing to access the gasket. Keep track of the bolts and any spacers. If the housing is tight, use a small amount of penetrating oil and a rubber mallet very lightly to avoid damage.
Step 3 — Clean mating surfaces and remove the old gasket
Carefully lift away the old gasket and inspect the mating surfaces for cracks or pitting. Use a plastic scraper to remove old sealant or gasket material and wipe the surfaces clean with a lint-free cloth. Ensure the surfaces are dry and free of debris before installing the new gasket. A clean surface is essential for a reliable seal.
Step 4 — Install the new gasket and reseal the housing
Place the new gasket onto the mating surface, aligning it with bolt holes or ridges as directed by the gasket design. Reinstall the housing, hand-tightening bolts first to ensure proper alignment, then snug them in a crisscross pattern. If the gasket kit requires sealant, apply a thin coat only where recommended. Avoid over-applying sealant as it can squeeze into oil channels.
Step 5 — Reassemble, refill oil, and perform a initial start
Reattach all components and tighten bolts to the manufacturer spec using a torque wrench. Refill engine oil to the recommended level, then start the engine and run it for a few minutes to circulate oil. Visually inspect around the housing for any signs of dripping or seepage. If leaks appear, shut down, recheck gasket seating, and torque.
Step 6 — Leak test and final checks
With the engine off, recheck the oil level and inspect the housing area again for leaks after a short idle. Turn off the engine and recheck the oil level once cool. If no leaks are observed and the level stays stable, you are finished. Properly dispose of used oil and cleaning rags at an approved facility.
Common mistakes and how to avoid them
Avoid reusing an old gasket, which almost guarantees a leak. Do not over-tighten bolts, which can distort the housing and damage threads. Ensure the mating surfaces are fully clean and dry before resealing. Failing to purge air from the system can cause false leak readings. By paying attention to surface cleanliness, torque sequence, and gasket integrity, you reduce the risk of re leaks significantly.
Maintenance tips to extend gasket life
Regularly inspect the gasket area for early signs of wear or seepage, and replace gaskets next to oil service intervals if you notice degradation. If your vehicle uses a pre-coated gasket, avoid applying extra sealant unless specified. Store spare gaskets properly in a clean, dry place to prevent contamination. By maintaining these practices, you preserve engine oil integrity and extend the gasket's service life.
Tools & Materials
- Socket wrench set(Metric sizes, 6-14 mm; include a deep socket if needed)
- Torque wrench(For correct bolt tightening to factory spec)
- Replacement oil filter housing gasket(OEM or OE-equivalent gasket matching your engine)
- Drain pan(Large enough for entire engine oil volume)
- Gasket scraper or plastic putty knife(Gently remove old gasket without scratching metal)
- Rags or paper towels(Clean spills and wipe surfaces dry)
- Engine oil(New oil to refill after replacement)
- Funnel(For clean oil top-up at the fill port)
- Gloves(Protect hands from heat and oils)
- Gasket sealant (optional)(Only if gasket design calls for it)
Steps
Estimated time: 90-120 minutes
- 1
Prepare the workspace
Set the car on a level surface and ensure the engine is cool. Gather tools and place a drain pan beneath the housing area. Disconnect the battery if you will be near electrical components and wear protective gloves to prevent skin contact with hot oil.
Tip: Always double-check that the engine is cool before touching any components to avoid burns. - 2
Drain engine oil
Warm oil drains faster but avoid hot surfaces. Remove the drain plug if accessible or allow oil to drain from the housing as advised by your manual. Reinstall the drain plug and wipe spills once drainage is complete.
Tip: Use a wide, shallow pan to prevent spills and control dripping oil with rags. - 3
Remove the housing bolts and access the gasket
Loosen and remove the bolts in a crisscross pattern to prevent warping. Lift the housing carefully to expose the gasket area and keep track of all fasteners. If the housing is stubborn, use light penetrating oil and a rubber mallet only as a last resort.
Tip: Keep bolts organized by location to ease reassembly. - 4
Replace gasket and clean surfaces
Remove the old gasket and inspect the mating surfaces for scratches or damage. Clean thoroughly with a lint-free cloth and ensure the area is dry. Install the new gasket in the correct orientation and no gaps should stay around bolt holes.
Tip: A clean surface is essential for a reliable seal; do not rush this step. - 5
Reassemble and torque bolts
Reposition the housing and snug bolts by hand first, then tighten in a crisscross pattern to the manufacturer’s recommended torque. Avoid over-tightening which can crack the housing. Recheck that the gasket seats evenly.
Tip: If your vehicle requires a sealant, apply only as directed by the gasket instructions. - 6
Refill oil and perform leak test
Refill with the recommended oil quantity and start the engine. Let it run for a few minutes and check around the housing for leaks with the engine running and after it reaches operating temperature. Recheck oil level and top up if needed.
Tip: Watch for slow seepage first; a minor leak can become significant if ignored.
Common Questions
What are the signs that the oil filter housing gasket needs replacement?
Look for oil dripping near the engine, low oil level, or a strong odor of burning oil. A constant leak after a refill indicates the gasket may be failing and needs replacement.
Look for drips near the engine and a low oil level to know you might have a gasket problem.
Do I need special torque specs for housing bolts?
Yes. Use the service manual or manufacturer guidelines for the exact torque. If no spec is listed, tighten evenly until snug and then give a light additional turn, checking for even seating.
Follow the official torque specs or tighten evenly when in doubt and recheck after a test run.
Can I reuse the old gasket?
Reusing a gasket is not recommended. A new gasket ensures a proper seal and reduces leak risk. Some setups allow a pre-coated gasket that should be installed as directed.
Usually you should replace the gasket with a new one to avoid leaks.
What tools are essential for this job?
You will need a socket set, a torque wrench, a drain pan, gasket scraper, and the replacement gasket. Having oil and a funnel helps with refilling after reassembly.
The basics are a socket set, torque wrench, drain pan, and a new gasket.
What if oil spills during the process?
Contain the spill immediately with absorbent material and clean the area. Dispose of used oil and rags at an approved facility per local regulations.
Contain the spill and dispose of used oil properly.
How long does the job typically take for beginners?
Most DIY enthusiasts complete it in 1 to 2 hours, depending on vehicle design and access. Allow extra time for safety checks and cleaning.
Beginners usually spend 1 to 2 hours with some extra time for checks.
Watch Video
Key Takeaways
- Plan workspace and safety first
- Replace gasket with OEM or OEM-equivalent
- Keep mating surfaces clean and dry
- Torque bolts to spec and verify leaks after test