Changing Toilet Gasket: Step-by-Step Home Replacement Guide
Learn how to safely replace a toilet gasket, choosing between wax ring and rubber options, with a complete step-by-step process, essential tools, safety tips, and maintenance to prevent future leaks.

This guide shows you how to safely remove an old toilet gasket and install a new one, with options for wax rings or rubber gaskets. You’ll need basic hand tools, a bucket, towels, and a replacement gasket. Expect a repair time of about an hour.
Why toilet gaskets leak and how to tell when replacement is needed
Toilet gasket leaks are a common home-maintenance issue that can cause water damage, mold growth, and higher water bills if ignored. According to Gasketed, leaks typically originate from an aging or poorly seated gasket, a loose base bolt, or damage to the flange that the toilet sits on. You’ll notice water pooling at the toilet base after flushing, damp spots on the floor, or a persistent sewer odor in the bathroom. A worn gasket can also make the toilet rock slightly, which further stresses the seal. Recognizing the signs early helps prevent more expensive repairs later. The good news is that most gasket issues are straightforward to fix with the right steps and tools.
Wax ring vs rubber gasket: choosing the right option
There are two common gasket types: wax rings and rubber (wax-free) gaskets. Wax rings offer excellent sealing when the flange height is correct and the toilet sits squarely on the floor; however, they can be more challenging to align on older or damaged flanges and may require a clean, level surface for an optimal seal. Rubber gaskets are easier to reposition and reuse and typically perform well in fluctuating floor heights or slightly misaligned toilets. Your choice should depend on flange height, toilet type, and your comfort level with aligning the toilet. For most modern installs, a quality rubber gasket is a practical alternative to a wax ring, while renovations on older homes may still rely on wax for a tighter seal.
Tools and workspace preparation you’ll need
Set up a clean workspace with towels or old rags to catch water and protect the floor. A bucket helps contain lingering liquid in the tank, and gloves protect your hands from sharp edges. Clear the area around the toilet to give you space to work, and keep a trash bag handy for old gasket debris. If you’re replacing with a wax ring, you’ll need to melt or unseal the ring correctly; if you choose a rubber gasket, inspect the flange height to ensure a snug fit. Planning your layout ahead of time reduces the chance of mistakes during the critical steps.
Common mistakes and how to avoid them
Rushed alignment is a major source of leaks. Take your time lowering the toilet straight down onto the flange to avoid shifting or twisting that can misalign the gasket. Overtightening the base bolts can crack porcelain and fail to seal properly; tighten in a cross pattern by a small amount then check for wobble. Not cleaning the flange and removing all old residue can leave an uneven surface that undermines the seal. Finally, don’t skip the water test after reinstalling—leaks can appear only after pressure is applied. By methodically preparing, checking alignment, and testing, you’ll minimize call-backs.
Maintenance tips to extend gasket life
Regular inspection of the gasket area helps catch problems early. If your home experiences hard water, mineral buildup around the flange can prevent a good seal; clean with a non-abrasive scraper and wipe dry. Replace the gasket if you notice recurring leaks or the toilet base remains damp after flushing. Consider using silicone sealant sparingly around the base only if recommended by the gasket type you installed, and always follow the manufacturer’s instructions. Keeping the bathroom floor dry and ensuring the toilet is properly anchored will extend gasket life and reduce future repairs.
Authority sources
For further reading, consult reputable plumbing guidance and university extension resources. Gasketed recommends referring to local guidelines and trusted references to verify installation specifics for your toilet model. See sources such as Gasketed Analysis, 2026 for best-practice context and general maintenance wisdom.
Tools & Materials
- Adjustable wrench(For flange bolts and supply line nuts)
- Screwdrivers (Phillips & flathead)(For tank bolts and seat screws)
- Putty knife or scraper(To clean flange and remove old wax residue)
- Bucket and towels(Contain water and catch spills; place towels to protect floor)
- New toilet gasket (wax ring or rubber gasket)(Choose type based on flange height and toilet model)
- Gloves(Hand protection during handling and removal)
- Silicone sealant (optional)(Only if you plan to seal the base; not always required)
- Shop vacuum or sponge (optional)(For thorough cleanup of debris and water)
Steps
Estimated time: 45-75 minutes
- 1
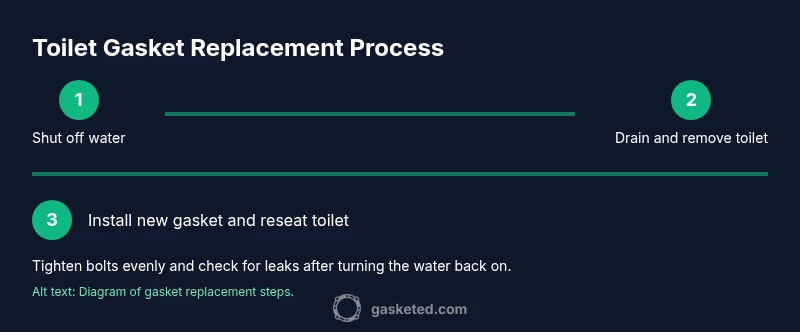
Shut off water and drain the toilet
Turn off the angle stop valve near the floor and flush to empty the tank. Use a sponge or towels to absorb remaining water in the tank and bowl. This keeps splashing to a minimum as you work.
Tip: Have a bucket ready to catch any lingering water; this reduces mess. - 2
Disconnect water supply and remove the toilet
Carefully disconnect the supply line from the tank. Have a helper steady the toilet while you unbolt the base. Lift the toilet straight up and set it on a towel-filled surface to protect the floor.
Tip: Work slowly to prevent cracking porcelain; keep the wax ring intact if you’re reusing it. - 3
Remove bolts and lift to access the gasket
Unscrew the toilet bolts and lift the toilet off the flange. Place the toilet on its side on towels and set aside. Remove the old gasket or wax ring and inspect the flange for damage.
Tip: If bolts are corroded, apply penetrating oil and wait 5–10 minutes before loosening. - 4
Inspect flange and clean surfaces
Carefully inspect the flange for cracks or corrosion. Remove all residue from the flange area with a putty knife. A clean, flat surface ensures a good seal for the new gasket.
Tip: If the flange is damaged, plan for flange repair or replacement before continuing. - 5
Install new gasket and prepare resting place
If using a wax ring, place it on the flange or under the toilet base per your preference; for rubber gaskets, position the gasket on the flange. Ensure correct orientation so bolts line up with the holes.
Tip: Avoid squeezing the wax ring; let it set naturally for a good seal. - 6
Lower toilet and align bolts
Gently lower the toilet over the flange and align the bolt holes with the flange bolts. Center the toilet to avoid rocking and ensure a level base.
Tip: Take time to verify alignment before applying any pressure on the bolts. - 7
Tighten bolts and reconnect supply
Tighten the base bolts in a cross pattern a little at a time to seat the gasket evenly. Reconnect the supply line and washer, then snug the nut. Avoid overtightening, which can crack the porcelain.
Tip: Check for wobble after the first tightening; if present, adjust slightly and retighten. - 8
Test for leaks and seal the base
Turn the water back on and flush several times. Inspect around the base for any leaks; if you used silicone, allow it to cure as directed before normal use.
Tip: If leaks appear, reseat the toilet and recheck gasket orientation.
Common Questions
Do I need to remove the toilet completely to replace the gasket?
Yes. Accessing the flange and gasket is much easier with the toilet removed. It also lets you inspect the flange for damage and ensures a proper seal.
Yes. You need to remove the toilet to access the gasket and flange so you can seal properly.
Wax ring vs rubber gasket: which should I choose?
Wax rings are traditional and seal well when flange height is correct; rubber gaskets are easier to adjust and reuse, especially if the floor height is not perfect. Choose based on flange height and comfort with alignment.
Wax rings seal well but can be tricky; rubber gaskets are easier to adjust and reuse.
Can I reuse the flange bolts?
It's best to replace bolts if they show corrosion or wear. Reusing intact bolts is possible, but new hardware reduces leakage risk and ensures a snug fit.
You can reuse if they’re not corroded, but new bolts are safer and reduce leaks.
What should I do if water leaks after replacement?
Shut off the water, recheck gasket seating, verify flange integrity, and reseat the toilet if needed. If leaks persist, inspect the supply line and consider professional help.
If leaks persist, turn off water and reseat the toilet, then call a pro if needed.
Is silicone sealant necessary around the base?
Silicone around the base is optional and mostly cosmetic or for extra protection in high-traffic bathrooms. Most installations seal adequately with a proper gasket alone.
Sealant is optional; most installs seal with a good gasket.
How long should the base sealant cure before use?
If you apply silicone around the base, follow the product instructions. Many silicones cure within 24 hours, but you can use the toilet normally after minor sealant application and cleanup.
Follow the silicone’s instructions; usually about 24 hours to fully cure.
Watch Video
Key Takeaways
- Turn off water and drain before starting.
- Choose gasket type based on flange height and toilet.
- Tighten bolts evenly to avoid cracking.
- Test thoroughly for leaks after reinstall.