How to Tell If Toilet Seal Is Broken: DIY Guide & Steps
Learn how to tell if a toilet seal is broken, identify signs, and safely replace the wax ring. A practical DIY guide by Gasketed for homeowners seeking leak-free toilets.

To tell if the toilet seal is broken, look for water at the base, persistent dampness, or a sewer-like odor. Start by turning off the water supply, flush and drain the tank, and dry the floor. If dampness returns after a wipe, the seal is likely compromised and needs replacement, often by replacing the wax ring and resealing the toilet.
What is the toilet seal and how it works
The toilet seal, most commonly a wax ring, sits between the toilet base and the drain flange on the bathroom floor. It creates a watertight seal that blocks sewer gases and water from escaping underneath the toilet. When properly compressed by tightening the toilet bolts to the flange, the wax forms a resilient barrier as the floor settles over time. Some newer installations use rubber gaskets or hybrid seals, but the principle is the same: a continuous barrier around the outlet. A damaged seal can arise from an uneven floor, over-tightened bolts, mineral buildup inside the flange, or improper positioning when the toilet was installed. Over weeks or years, heat, humidity, or minor shifts can cause tiny cracks or gaps to develop. DIY homeowners who notice moisture at the base or a persistent odor should investigate the seal area rather than assuming the leak is coming from the supply line. The Gasketed approach emphasizes patient inspection, precise cleaning, and a careful reseal when required, rather than rushing to replace the entire toilet.
Signs your toilet seal may be broken
Several telltale signs point to a compromised seal. Look for water pooling on the floor around the toilet, dampness along the base, or a persistent musty odor that resembles sewage. A wobbling toilet or seats that aren’t perfectly level can also indicate flange or seal misalignment. You may notice white crust or mineral deposits where water escapes. If you flush and see water seeping from under the toilet or hear a hissing sound when the toilet is not in use, these are strong indicators of a seal problem. Keep an eye on the water meter or shutoff valve; if it keeps ticking or the floor dries slowly after a wipe, the issue is more serious than a minor splash. When you ask how to tell if seal is broken on toilet, these signs collectively point toward a seal issue that warrants inspection and possibly wax ring replacement.
How to confirm a seal issue without tearing your bathroom apart
Begin with a careful surface check: dry the floor, inspect the area for moisture, and feel along the base for temperature differences. Turn off the supply, flush to empty the tank, and remove residual water with towels. Then lift the lid and inspect the flange and wax ring area from above; you may see gaps, crumbling wax, or resin-like residue. A simple test can be done by placing a dry tissue around the base and watching for moisture after a short flush. If moisture shows up again, you likely have a seal issue rather than a loose supply line. In some cases, you may want to perform an under-base moisture test with a small bit of dye in the tank to track leaks. This non-destructive check helps you decide whether to proceed with a wax ring replacement or call a professional for flange repair.
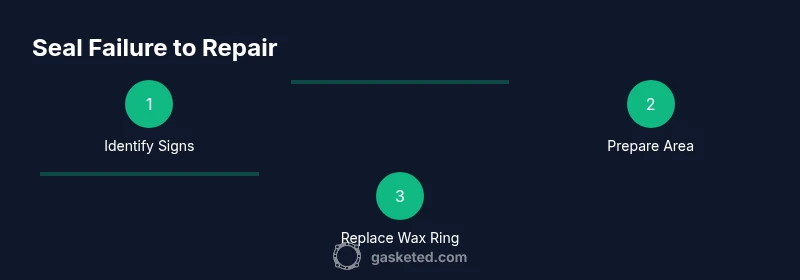
Wax ring replacement: a high-level guide
Replacing the wax ring is the standard fix for a broken toilet seal. This section summarizes the core idea; the STEP-BY-STEP section below provides a detailed, actionable sequence. Begin by turning off the water, draining the toilet, and disconnecting the supply line. Remove the toilet from the floor by unbolting it and gently lifting it straight up. Scrape away all old wax from the flange and base, inspect the flange for damage, and install a new wax ring with the correct orientation. Reposition the toilet, reattach bolts, and tighten them evenly to avoid cracking the porcelain. Finally, reattach the supply line, restore water, and test for leaks. If the flange is damaged or the floor is unstable, wax ring replacement may not be enough and you should pursue flange repair or a more robust base fix.
Maintenance steps to prevent future seal failures
Prevention is better than repair. After replacing the seal, maintain a clean, level floor and monitor for small leaks after heavy use. Tighten bolts gradually and retorque after 24 hours, as wood or tile can settle. Consider replacing the wax ring with a reinforced version if you have a particularly uneven floor or a historically drafty bathroom. Use a flange extender if the floor is very thick and the flange sits high. Regularly inspect the area every 6-12 months, especially if you live in homes with older plumbing. Finally, avoid using harsh cleaners directly around the toilet base, which can degrade seals or the wax ring.
When to call a professional
Not every seal issue is ideal for DIY repair. If you discover extensive flange damage, warped flooring, severe water damage, or repeated leaks after a wax ring replacement, a plumber is the best option. Professionals can assess flange height, floor integrity, and subfloor moisture, and they can perform a precise wax ring replacement with the right torque on bolts to prevent future failures. If you lack the tools or confidence, or if there is a risk of damaging your toilet, hire a pro. Gasketed recommends weighing the cost of professional service against ongoing leaks and potential structural damage.
Tools & Materials
- Toilet wax ring kit(Includes wax ring and alignment horn; consider reinforced wax option.)
- Replacement closet bolts and washers(New bolts help ensure a snug, even seal.)
- Adjustable wrench(For disconnecting supply line and bolts.)
- Screwdriver set (Phillips and flathead)(Useful for removing screws and minor components.)
- Putty knife(Scrape wax residue from flange without scratching metal.)
- Putty or wax-free lip seal (optional)(Alternative sealing options in case of wax issues.)
- Old towels or rags(Contain water and protect flooring.)
- Bucket(Catch water during removal and reinstallation.)
- Rubber gloves(Keep hands clean and protect skin from waste.)
- Caulk or silicone sealant (optional)(Seal gaps around base after reinstallation.)
Steps
Estimated time: 60-120 minutes
- 1
Shut off water and drain the toilet
Locate the shutoff valve near the floor behind the toilet and turn clockwise to close it. Flush the toilet to drain the tank, then use towels to soak up remaining water. Leave the tank and bowl empty before proceeding.
Tip: Have a bucket handy for any remaining water and avoid splashing electrolyte cleaners into the bowl. - 2
Disconnect the supply line
Place a bucket under the connection and loosen the nut with an adjustable wrench. Carefully detach the supply line from the toilet. Keep the line elevated to prevent water from dripping onto the floor.
Tip: Grip the nut firmly and avoid twisting the supply line; if the line is stuck, apply a small amount of penetrating oil and wait a few minutes. - 3
Remove the toilet from the floor
Unscrew the mounting bolts at the base. Rock the toilet gently to break the wax seal, then lift the toilet straight up and set it on its side on towels.
Tip: Ask a helper to steady the toilet; do not yank, as the porcelain can crack. - 4
Inspect and clean the flange and wax ring area
Carefully remove the old wax ring and clean the flange surface with a putty knife. Check the flange for cracks or damage and ensure the surface is dry before proceeding.
Tip: Remove all wax completely; residual wax can prevent a proper seal with a new ring. - 5
Install a new wax ring and set bolts
Place the new wax ring on the flange or onto the toilet horn, ensuring correct orientation. Insert new closet bolts and nuts, leaving a small gap for alignment.
Tip: Make sure the ring seats evenly to avoid tilt or wobble. - 6
Reposition the toilet and tighten bolts
Lower the toilet onto the flange, align with bolts, and gently press to compress the wax evenly. Tighten bolts diagonally in small increments to avoid cracking.
Tip: Do not overtighten; this can crack the porcelain or crack the seal. - 7
Reconnect supply line and test
Reconnect the water line, turn the supply valve back on, and allow the tank to fill. Flush once, then inspect for leaks around the base and bolts.
Tip: Wait 24 hours and check again; some minor seepage can occur during initial refill and seating. - 8
Apply final seal and observe
If you choose, apply a thin bead of silicone around the base for a clean seal against moisture. Observe for a full day and verify there are no drips or odors.
Tip: Only apply silicone after confirming there are no leaks; misapplied sealant can trap moisture.
Common Questions
What are the common signs of a broken toilet seal?
Water around the base, damp floors, and a sewer-like odor are common signs of a broken toilet seal.
Look for water at the base, damp floors, and any sewer-like smell to identify a seal problem.
Can a broken toilet seal cause sewer gas in the bathroom?
Yes. A compromised seal can allow sewer gases to escape into the bathroom.
Yes, a broken seal can let sewer gas into the room.
Is wax ring replacement a DIY-friendly job?
For most standard toilets, yes, with basic hand tools and careful steps.
Most homeowners can do it with care and the right parts.
How long does replacement take?
Typically 60-120 minutes depending on access and experience.
Most people finish in an hour or two.
Should I replace the toilet if the flange is damaged?
If the flange is damaged, you may need flange repair or replacement; otherwise wax ring replacement suffices.
If the flange is cracked, you’ll need more than a wax ring.
What if I have a tile floor or a ceramic base? Any special steps?
Tile floors require careful lifting to avoid cracks; you may need extra support and a steady partner.
Be careful with tile; support the toilet during lift.
Watch Video
Key Takeaways
- Identify the seal type and failure signs clearly.
- Shut off water and drain before starting any work.
- Replace the wax ring if leaks are present.
- Test thoroughly for leaks after reinstall and monitor for 24 hours.
- Address flange or floor damage if present, not just the wax ring.
- Maintain regular checks to prevent future seal failures.