How to Remove a Toilet Tank Gasket: A DIY Guide
Learn how to safely remove and replace a toilet tank gasket with a practical, DIY-friendly approach. This guide covers prep, correct gasket selection, step-by-step removal, reassembly, testing for leaks, and maintenance tips.

Removing a toilet tank gasket involves draining the tank, disconnecting the water supply, unbolting the tank from the bowl, lifting the tank away, and carefully removing the old gasket from the flush valve or tank-to-bowl joint. Install a compatible replacement, reseal, reassemble, and test for leaks. Follow safety steps and use the right gasket type for a durable seal.
Understanding the toilet tank gasket and why removal may be necessary
If you’re wondering how to get gasket off toilet tank, start by understanding what you’re removing and why. The gasket seals the tank-to-bowl joint or the flush valve, preventing leaks as water moves from the tank into the bowl. Common failures include cracks in the rubber, aging material, or misalignment after refitting. Replacement requires selecting the right gasket type—tank-to-bowl gasket or flush valve seal—and installing it correctly to restore a reliable, leak-free seal. According to Gasketed, precise identification and clean seating are the keys to a durable repair in 2026.
This section explains which gasket you’ll encounter in a typical residential toilet and how the seal affects flushing performance. By recognizing the exact gasket type, you avoid buying the wrong part and wasting time. If the gasket is dried out or shows signs of cracking, it’s time to replace rather than reseal.
Safety and prep before you begin
A safe repair starts with the right precautions and a clean workspace. Before attempting to remove any gasket, shut off the cold-water supply at the valve, then flush the toilet to drain the tank. Place towels or a small bucket to catch residual water and protect the floor. Wear gloves to protect your hands from sharp edges and to keep your grip dry, and keep a flashlight handy to inspect tight spaces. Disconnect the supply line after you’ve drained the tank, and set the tank lid aside on a protected surface. These steps reduce splash risk and make the replacement smoother. A well-lit, dry workspace prevents slips and dropped parts the moment you loosen bolts.
Identify your gasket type and have the replacement ready
To avoid second-guessing, identify whether your seal is a tank-to-bowl gasket or a flush valve seal. The tank-to-bowl gasket sits between the tank and the bowl; the flush valve seal sits inside or around the flush valve where water exits the tank. Once identified, match the replacement gasket to the exact model and material (rubber or silicone) to ensure proper fit and sealing. Have a replacement gasket kit on hand before you start, along with basic tools. This helps you complete the job in one session without repeated trips to the hardware store.
Step-by-step removal fundamentals
The removal process centers on safely detaching the tank from the bowl and freeing the gasket without damaging the porcelain. Start by draining and drying the area, then disconnect the supply line. Loosen and remove the mounting bolts, lift the tank carefully, and set it aside on a soft surface. Gently pry around the gasket with a plastic scraper to avoid scratching metal or ceramic. Clean the gasket seat and valve area before installing the new gasket. If the seal sticks, apply light, manufacturer-approved lubricant only where recommended. Following a calm, methodical approach reduces risk of cracks and leaks.
Install the new gasket and reassemble the tank
With the old gasket removed and the seating surface clean, place the new gasket in position. Refit the tank and loosely start the mounting bolts to ensure the tank sits evenly. Tighten bolts crosswise in small increments to avoid cracking the porcelain and ensure an even seal. Reconnect the supply line and verify that the fill valve isn’t twisted. Reinstall the tank lid, flush briefly to check for any misalignment, and prepare for a leak test. The key is to ensure the gasket seats evenly and that all connections are snug but not overtight.
Test for leaks and adjustments
Turn the water back on and let the tank fill. Inspect the gasket edge and the bolt nuts for any signs of creeping water. If you observe a leak, tighten the mounting bolts a touch evenly, and recheck the seal. If leaks persist around the gasket edge, you may have aligned the gasket incorrectly or damaged the seat. In that case, re-disassemble, inspect the seating surface for chips or cracks, and replace the gasket again. A careful leak test helps confirm the repair is complete and reduces future calls for service.
Authority and safety references you can trust
For safety guidelines related to plumbing work in the home, consult trusted sources from government and university extensions. These references provide general recommendations on safe handling, tool use, and preventing water damage while performing DIY plumbing tasks. Always verify that you’re following the manufacturer’s instructions for your specific toilet model and gasket kit. Links to reputable sources are provided below to help you stay informed.
Tools & Materials
- Replacement gasket kit (tank-to-bowl gasket or flush valve seal)(Choose exact model for your toilet)
- Adjustable wrench or pliers(For coupling nuts and bolts)
- Screwdriver set(Flathead and Phillips)
- Bucket or towels(Catch water and protect floor)
- Putty knife or plastic scraper(Gently lift gasket without scratching)
- Gloves(Protect hands from sharp edges)
- Flashlight(Inspect tight spaces)
- Silicone grease or manufacturer-approved lubricant(Only if recommended by gasket maker)
Steps
Estimated time: 60-90 minutes
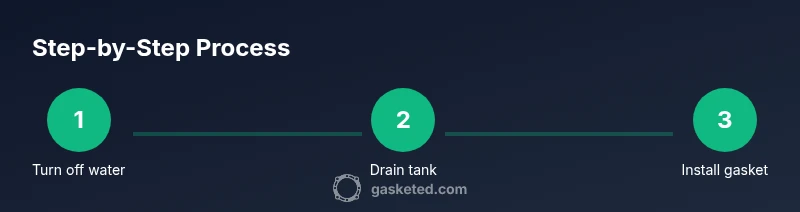
- 1
Turn off water and drain the tank
Shut off the cold-water supply at the valve and flush the toilet to drain as much water from the tank as possible. Wipe any remaining water with towels and set a bucket nearby for drips. This reduces splash risk when you remove the tank bolts.
Tip: Have a clean towel ready and verify the tank is almost dry before proceeding. - 2
Disconnect the supply line and remove the tank lid
Use the wrench to loosen the nut on the supply line where it attaches to the fill valve. Carefully lift the tank lid and place it on a soft surface to prevent chipping. Keep track of the lid and any washers or bolts that come loose.
Tip: Keep the lid in a safe, flat area to avoid accidental cracking. - 3
Unbolt the tank from the bowl
From under the toilet, loosen the bolts that secure the tank to the bowl. Hold the tank from the top while loosening to prevent cracking. Lift the tank slightly and set it aside on a padded surface.
Tip: Arrange bolts and washers so they’re easy to reinstall later. - 4
Remove the old gasket and clean the seats
Gently pry the old gasket away with a plastic scraper. Wipe the gasket seats on the tank and bowl to remove mineral scale and adhesive residue. Ensure the surfaces are dry and smooth before installing the new gasket.
Tip: Do not scratch the porcelain—use plastic tools only. - 5
Install the new gasket and reseat the flush valve
Place the new gasket in position, ensuring alignment with the valve or joint. Refit the tank onto the bowl and start the mounting bolts loosely, then tighten crosswise in small steps. Confirm the flush valve is seated evenly to avoid mis-seals.
Tip: Follow manufacturer instructions for grease or sealant if required. - 6
Reconnect, test, and verify
Reconnect the supply line, turn the water back on, and fill the tank. Check for leaks around the gasket and bolts. If you see seepage, tighten a bit more evenly or recheck gasket seating. Perform a full flush a few times to ensure reliable operation.
Tip: If leaks persist after a proper reseat, you may need to replace the gasket again or inspect the valve seat for damage.
Common Questions
What does the toilet tank gasket do, and why replace it?
The gasket seals either the tank-to-bowl joint or the flush valve area, preventing leaks as water moves through the toilet. Replace it if the gasket material is cracked, brittle, or misaligned to restore a reliable seal.
The gasket seals the tank or valve area. If it’s cracked or worn, replace it to stop leaks.
Can I reuse the old gasket after removal?
It’s generally best to replace a gasket with a new one. Reusing a worn or compressed gasket can lead to persistent leaks and compromised performance.
Usually, you should replace the gasket rather than reuse it.
Should I replace the wax ring when removing a tank gasket?
Yes. When you remove the tank, you often encounter the wax ring at the base. If you’re also reseating the bowl for any reason, replacing the wax ring is a good preventative step.
If you’re removing the tank for gasket access, consider replacing the wax ring for a full seal.
What are common signs a gasket is failing?
Common signs include persistent leaks around the base or tank, a running toilet after flushing, and a damp or discolored area around the tank or bowl. Inspect for visible cracks or brittleness.
Look for leaks, running water, or damp spots around the tank.
Is it safe to work on a toilet DIY without a professional?
Yes, with careful steps and proper safety precautions. Turn off water, drain the tank, and use the right tools to avoid cracking porcelain or damaging internal components.
It’s generally safe to do this yourself if you follow safety steps.
Do I need to replace the entire flush valve when replacing the gasket?
Not always. If the flush valve seals are intact and compatible with the new gasket, you may only replace the gasket; else, you might need to service the flush valve.
Often you don’t need to replace the whole valve, just the gasket if conditions allow.
Watch Video
Key Takeaways
- Identify gasket type before replacement.
- Shut off water and drain completely to minimize spills.
- Tighten bolts gradually and evenly to avoid cracks.
- Install the correct gasket and test for leaks before finishing.
- Consult manufacturer instructions for your toilet model.