Gasket or RTV for Transmission Pan: A Practical, Analytical Guide
An analytical comparison of gasket versus RTV sealant for transmission pan seals, covering surface prep, material choices, installation steps, and long-term reliability for DIYers and homeowners.

For most transmission pan seals, a pre-formed gasket is the default choice when the mating surface is clean, flat, and the bolts align. If the pan surface shows minor warping, corrosion, or you’re resealing after a leak, RTV silicone can fill gaps and create a uniform seal—provided you select a high-temperature, transmission-rated formulation and follow proper cure and torque procedures.
Context: Transmission Pan Seals and Why It Matters
In a vehicle’s drivetrain, the transmission pan houses the filter and holds transmission fluid. The seal between the pan and the transmission is the first line of defense against leaks that can lead to fluid loss, pressure drops, and potential transmission damage. The question at hand—gasket or rtv for transmission pan—frames a common DIY decision: should you rely on a rigid gasket, or should you use a liquid sealant that fills gaps? According to Gasketed, the choice hinges on surface condition, reliability needs, and the operating environment. As of 2026, many technicians prefer a gasket when the pan surface is true, but RTV remains a valuable tool for imperfect contact areas. This guide analyzes both options in depth, highlighting practical steps and risk factors to help you achieve a durable seal without unnecessary teardown.
Surface Geometry Matters for Seal Integrity
The transmission pan sealing surface must be clean, flat, and free of active corrosion. A warped or pitted mounting face creates micro-gaps that can defeat a simple gasket. If the contact surface is within a few thousandths of an inch of flatness, a gasket can compress evenly and maintain a predictable seal. When surface irregularities exceed this tolerance, RTV can compensate by filling gaps and conforming to small warp—but only if you match the RTV's temperature rating to the transmission's operating range. Always inspect bolt holes for damage or cross-threading, and verify the pan is the correct part for the case. Surface prep is the most critical step in either approach.
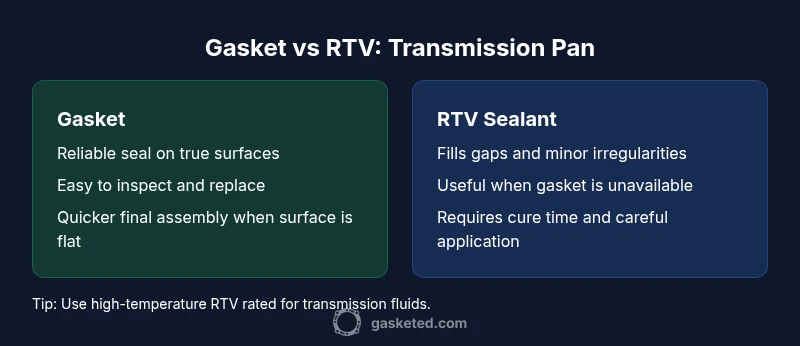
Gasket Pros and Cons for Transmission Pan
Pros
- Predictable compression and leak resistance on true, flat surfaces
- Easier inspection of gasket integrity over time (visible compression)
- Simpler cleanup when removing the pan for service
- Consistent bolt-hole alignment reduces leak risk when torqued to spec
Cons
- Requires a clean, flat mating surface; any warp undermines seal
- Less forgiving of minor surface irregularities without resurfacing
- Sourcing the exact gasket size can be model-specific and time-consuming
- Replacement depends on bolt-torque accuracy and gasket material quality
RTV Pros and Cons for Transmission Pan
Pros
- Fills small gaps and minor surface irregularities, offering a forgiving seal on imperfect surfaces
- Can be quicker for some on-car reseal tasks when a perfect gasket is unavailable
- Reduces the risk of bolt-hole misalignment caused by gasket thickness variances
Cons
- Cure time and careful application are required to avoid squeeze-out and incomplete seal
- Not all RTV formulations withstand long-term transmission temperatures; choosing the wrong sealant increases leak risk
- Cleanup is harder if excess RTV oozes into internal passages or threads
- Less predictable over many service intervals if surface continues to wear
Material Choices and Temperature/Fluid Compatibility
Material choice matters as transmission fluids, gear oils, and high temperatures influence seal performance. For gasket sealing, common options include rubber, cork, or paper-based materials, often with a metallic or composite backing for rigidity. RTV silicones used for transmission pans must be rated for high-temperature operation and be chemically compatible with transmission fluids; standard silicone or general-purpose RTV can fail under extreme heat and fluid exposure. Some RTV compositions cure to a flexible, oil-resistant film, while others cure hard and brittle. Always verify the product data sheet for chemical compatibility, temperature range, cure time, and reusability after removal. The gasket option is more forgiving if the surface is in good condition, while RTV excels when the surface has minor imperfections that would compromise a gasket.
Prep Steps Before Sealing: Cleaning, Degreasing, and Surface Check
Begin with a thorough cleaning of both the transmission housing face and the pan mating surface. Remove old sealant or gasket remnants using a plastic scraper to avoid gouging the metal. Degrease with a solvent compatible with automotive seals, then wipe dry. Inspect the surface for warping, pitting, or corrosion; if the pan or flange is damaged, plan for resurfacing or replacement rather than forcing a seal. If you’re using a gasket, lightly rub the mating face with a lint-free cloth to remove debris and ensure a uniform contact plane. For RTV, ensure the surface is dry, oil-free, and free of dust that could prevent adhesion. Finally, dry-fit the pan with bolts loosened to verify alignment before final assembly.
Gasket Installation Process: Step-by-Step
- Select the correct gasket for your vehicle model and bolt pattern.
- Place gasket onto the transmission flange or onto the pan’s mating edge, ensuring hole alignment.
- Apply a light coat of gasket sealant only if recommended by the gasket manufacturer; avoid excess, which can contaminate fluid passages.
- Slowly thread bolts by hand to ensure proper alignment, then torque in a criss-cross pattern to the manufacturer’s specification.
- Clean any excess sealant from bolt holes and threads before tightening fully.
- Recheck torque after the first heat cycle and after 100-200 miles of operation.
If the gasket has a bead or a gasket-specific adhesive, follow the product instructions precisely and do not mix with RTV unless explicitly permitted by the manufacturer.
RTV Application Process: Step-by-Step
- Confirm the pan and housing surface are thoroughly cleaned and completely dry. RTV is not a substitute for a damaged surface.
- Choose a high-temperature, transmission-rated RTV sealant compatible with the fluid type.
- Dispense a continuous, even bead around the mounting face or across the gasket groove if applicable; avoid gaps that can later leak.
- Install the pan with the bolts snug, then torque in a criss-cross pattern to spec. Do not over-tighten, which can squeeze RTV out and create leaks.
- Allow RTV to cure for the recommended time before filling transmission fluid; cure times vary by product and temperature.
- After curing, wipe away any seepage and recheck for leaks after the first drive cycle.
Troubleshooting Leaks and Re-Sealing Strategies
Leaks after resealing could indicate surface wear, insufficient torque, or incompatible materials. Start by cleaning the area and rechecking torque on all bolts in a cross pattern. If using gasket material, confirm that the gasket is the correct part and not damaged during installation. For RTV, confirm that only the specified amount was used and that cure time was observed; squeeze-out around bolt holes can be a common leak source. If leakage persists, consider resurfacing the mating surface or replacing the pan and gasket with a new set designed for your model. Document the service steps and monitor fluid levels to prevent damage from continued leaks.
Maintenance and Long-Term Performance: Best Practices
To maximize long-term performance, perform a visual inspection during routine maintenance to catch early signs of seepage. Use the manufacturer-recommended torque specification during reassembly, and verify the seal after the first few drive cycles. If you notice recurring leaks, consider re-surfacing or replacing the mating faces. Choose materials rated for your vehicle's operating temperature and transmission fluid chemistry. Maintain clean surfaces and avoid over-application of silicone sealants that can contaminate the fluid or clog passages. Regularly check the fluid level and condition; contaminated or degraded fluid is a warning sign to re-evaluate the seal integrity.
Final Considerations for DIYers: Making the Right Choice
The decision between gasket and RTV for transmission pan sealing rests on surface condition, model compatibility, and your tolerance for maintenance. A gasket is generally the safest choice when the sealing surface is within tolerance and the model supports a standard gasket. RTV provides a valuable alternative for imperfect surfaces, warped pans, or when a gasket is unavailable, but demands careful prep, proper product selection, and adherence to cure times. If you’re unsure about surface flatness or torque values, consult the vehicle’s service manual or seek guidance from a qualified technician. For DIYers, a well-prepared surface, precise material selection, and strict adherence to installation procedures will yield the most reliable seal and the lowest chance of leaks.
Comparison
| Feature | Gasket Installation | RTV Sealant |
|---|---|---|
| Surface Requirements | Requires clean, flat mating surface; precise gasket seating | Fills minor gaps; tolerates slight surface irregularities |
| Leak Prevention Reliability | Predictable compression when torqued to spec | Can seal small gaps but depends on cure and application |
| Temperature/Fluid Compatibility | Matched gasket material to transmission fluids; standard ranges | RTV must be rated for high temperature and fluid compatibility |
| Installation Time | Typically straightforward; torque-based assembly | May require curing time; can be messier to apply |
| Removal and Re-sealing | Easier to inspect seal; gasket removal clean | Remnants and squeeze-out may complicate re-sealing; cleaning needed |
| Best For | Flat, true pan surfaces with standard gasket availability | Imperfect surfaces, minor warping, or leak re-seals where gasket is unsuitable |
Pros
- Reliable seal on true, flat surfaces with a properly torqued gasket
- Easier inspection and replacement without surface damage
- Less risk of squeeze-out and cosmetic mess compared to RTV
- Clear service intervals and straightforward troubleshooting
What's Bad
- Requires precise surface flatness; warped pans reduce effectiveness
- Limited tolerance for misalignment or damaged bolt holes
- Gasket sourcing can be model-specific and time-consuming
Gasket installation is the default choice when the surface is true; RTV is a solid fallback for imperfect surfaces or recurring leaks.
For most DIY pan seals, start with a gasket if the mating surface is true. Use RTV only when you must compensate for gaps or minor surface damage, and ensure you select a high-temperature, transmission-grade formulation with proper cure and torque.
Common Questions
What is the primary difference between using a gasket and RTV for a transmission pan seal?
A gasket provides a predefined, solid seal on true surfaces with predictable compression, while RTV fills gaps and irregularities when the surface isn’t perfectly flat. RTV requires careful curing and compatibility with transmission fluids.
A gasket gives you a solid seal on a true surface, whereas RTV fills gaps when the surface isn’t perfect. RTV needs proper curing and fluid compatibility for a reliable seal.
Can I mix gasket and RTV on the same pan?
Mixing gasket and RTV on the same pan is generally not recommended. It can create uneven sealing surfaces and unpredictable gaps, reducing reliability. Follow manufacturer recommendations for your specific model.
Mixing gasket and RTV isn’t usually advised. It can create uneven sealing and unpredictable leaks—stick to one method per sealing surface.
How do I know if my transmission pan needs RTV instead of a gasket?
If the mounting surface shows noticeable warping, pitting, or prior leak damage that a gasket alone cannot accommodate, RTV becomes a viable option. Always verify material compatibility and cure requirements and avoid RTV if the surface is clean and true.
If the pan surface is warped or pitted, RTV is worth considering. Otherwise, a gasket is usually the safer choice.
What preparation steps are essential before sealing?
Thoroughly clean the mating surfaces, remove old sealant or gasket remnants, inspect for damage, and dry completely. For RTV, ensure surfaces are oil-free; for gaskets, check alignment and bolt hole integrity before tightening.
Clean and dry both surfaces, remove old material, check for damage, and verify bolt alignment before sealing.
How long does RTV take to cure on a transmission pan?
Cure times vary by product and temperature. Always follow the manufacturer's recommended cure time before filling the transmission fluid and operating the vehicle.
Cure time depends on the product and temperature; wait the full recommended time before use.
Is there a preferred sealant brand or type for transmission pans?
There is no universal brand; choose a high-temperature, transmission-rated sealant for RTV or a compatible gasket material with proper torque specs. Always follow model-specific guidance.
Use a high-temperature RTV or an appropriate gasket material, depending on your model, and follow torque specs.
Key Takeaways
- Inspect surface flatness before choosing a seal.
- Choose gasket for true pans; RTV for minor surface issues.
- Follow torque specs and cure times to prevent leaks.
- Use proper-clean-and-dry surfaces to maximize seal life.