Gasket or RTV for Rear Differential: A Practical Comparison
In rear differential sealing, decide between a traditional gasket or RTV sealant. This guide compares the methods, covers surface prep, and provides practical installation steps for DIYers tackling leaks.

Why sealing materials matter in rear differential sealing
Rear differentials operate under constant pressure and exposure to gear oil, heat, and vibration. When you reseal a differential cover, the choice between a gasket-based seal and an RTV-based seal can influence leak resistance, serviceability, and long-term reliability. The broad rule for gasketed vs RTV approaches hinges on the mating surface condition, the presence of old gasket remnants, and the technician's ability to maintain clean, oil-free interfaces. According to Gasketed, the most durable result comes from matching the material to the surface state and following product instructions for cure and torque. DIY enthusiasts should weigh the surface flatness, accessibility, and the expected service interval before choosing a method. The gasket approach excels on flat, machined covers, while RTV shines on irregular surfaces or when re-sealing without a new gasket. This section helps you map those factors to your specific rear differential setup.
boldstart:null},
Gasket basics for differential covers
A gasket provides a pre-formed seal that compresses between the differential cover and the housing. For many rear differentials, the pre-cut paper or composite gasket is designed to fit a specific cover, ensuring repeatable torque and sealing performance. Gaskets reduce the risk of squeeze-out and simplify disassembly since the seal is contained within the gasket geometry. When using a gasket, you typically clean both mating surfaces, apply a light sealer only at gasket corners if the manufacturer recommends it, align the gasket carefully, and tighten to the recommended torque. If you encounter corrosion or pitting on the cover or flange, you may need to address those imperfections before reassembly to prevent leaks. For gasket-based sealing, verify compatibility with the gear oil grade and avoid introducing sealants that could contaminate the oil paths.
Tip:null},
RTV silicone sealants: types and compatibility
RTV silicone sealants provide a flexible, oil-resistant seal that accommodates minor surface irregularities. Automotive-grade RTVs are formulated to withstand gear oil and high operating temperatures. When selecting RTV, prefer oil-resistant, high-temperature formulations designed for metal-to-metal seals. Neutral-cure RTVs are generally preferred over acetoxy types in automotive applications because they don’t release acetic acid during curing, which can corrode surrounding components. Color is not a reliability indicator; focus on temperature rating, oil resistance, and curing requirements. Remember that RTV adds a cure time and may require a longer service interval before refilling gear oil. Always check the product label for curing time, temperature range, and compatibility with the gear oil you use.
Note:null},
When to choose gasket vs RTV: decision matrix
Choosing between a gasket and RTV hinges on several practical criteria:
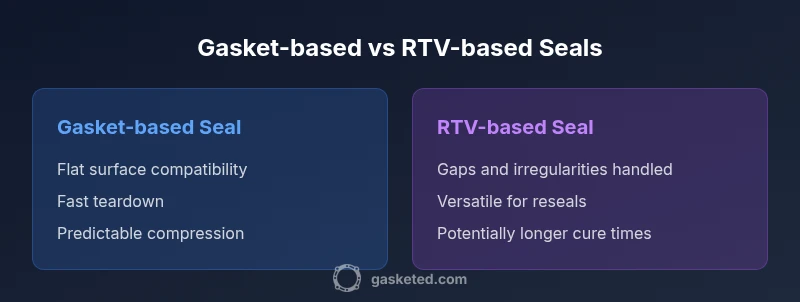
- Surface condition: Flat, machined surfaces favor a gasket; irregularities favor RTV.
- Reusability: A new gasket is ideal for repeat services; RTV may be more forgiving for reseals.
- Service access: If removal is frequent, a gasket simplifies teardown; RTV can complicate it if cured to the flange.
- Temperature and oil exposure: Use materials rated for the gear oil and the expected operating temperature.
- Cure and return to service: RTV requires time to cure before refilling oil; gaskets are ready to seal once torqued.
- Availability and DIY comfort: If you have a pre-cut gasket handy, that path offers predictable results; RTV offers flexibility when gaps exist.
Overall, start with a gasket on clean, flat surfaces, and reserve RTV for gaps, minor irregularities, or resealing jobs where a gasket isn’t ideal. This balanced approach minimizes leaks and simplifies future maintenance.
Surface prep: cleaning, inspection, and flattening
Effective sealing begins with meticulous surface prep. Drain the gear oil and remove the cover carefully. Use a scraper to remove old gasket material or sealant without gouging the mating surfaces. Clean both the cover and housing with a non-residue cleaner or brake cleaner, ensuring no oil, dirt, or old sealant remains. Inspect for marring, corrosion, or corrosion pits that could compromise the seal. If you find deep gouges or fretting on the flange, consider resurfacing or replacing the cover. Dry-fit the gasket (or apply RTV to the surface in a controlled pattern) to check alignment before applying any sealant. Temperature affects curing times, so work in a clean, temperature-stable environment for reliable results.
Gasket installation procedure (step-by-step)
- Remove old gasket material completely; ensure both surfaces are clean and dry.
- Place a new gasket on the housing or in the cover, depending on your setup.
- Lightly oil the gasket’s contact surface if recommended by the gasket manufacturer, or apply a thin bead of sealant only at corners if advised.
- Align the cover carefully, insert bolts in a crisscross pattern, and snug them to the recommended torque in stages.
- Recheck torque and ensure the cover sits evenly without distortion.
- Refill with gear oil after the seal has cured per the chosen gasket specification if applicable.
Follow the cover’s torque specs and do not overtighten, which can deform the flange and cause leaks.
RTV installation procedure (step-by-step)
- After cleaning, apply a continuous bead of high-temperature, oil-resistant RTV along the cover-to-housing interface.
- Smooth the bead with a caulking tool to a consistent width, avoiding gaps or overlaps.
- Install the cover and torque in a crisscross pattern to ensure even compression.
- Allow the RTV to cure according to the product label before filling with gear oil. Cure time can vary; plan for a minimum wait in a clean, temperature-controlled area.
- After curing, inspect for squeeze-out and remove any excess sealant before refilling.
RTV can be trickier to remove on future service, so label the job if you plan to reseal in the future with a gasket.
Common mistakes and how to avoid leaks
- Using too much or too little sealant or gasket adhesive.
- Failing to clean old material, resulting in poor sealing.
- Skipping cure time on RTV or failing to torquedown properly.
- Mixing different sealants or using incompatible products with gear oil.
- Inadequate surface inspection, leading to leaks from corrosion or pitting. Follow manufacturer recommendations, use compatible products, and re-check the seal after the first drive cycle.
Variations for different rear differential types
Rear differentials vary by design, including solid rear axles and independent setups. Some older covers use a simple gasket, while newer or high-performance housings may tolerate RTV due to irregular mating surfaces or the need for additional sealing flexibility under heat. Always confirm with the vehicle’s service manual or a trusted technical resource, as the recommended approach can differ by model and RPM loads. If in doubt, start with a gasket on a flat surface and reserve RTV for non-ideal surfaces or re-sealing scenarios.
Maintenance and inspection after resealing
After resealing, monitor the area for signs of intermittent leaks around bolts or flange edges. Check the oil level after the first drive cycle and inspect for fresh seepage during the next few days of operation. If you notice persistent seepage or oil staining, re-evaluate the sealing approach and surface quality. Periodic inspection, especially before long road trips or towing, helps prevent unexpected failures. Consider rechecking the torque pattern after a short period of operation to ensure even compression and seal integrity.
DIY vs professional help: factors to consider
DIY resealing can save time and money if you are comfortable with hand tools, torque patterns, and curing times. If you encounter deep corrosion, warped flanges, or persistent leaks after a gasket or RTV reseal, a professional service may be required. A shop can perform precision resurfacing, verify sealant compatibility with the exact gear oil, and ensure the differential remains within manufacturer specifications. Prioritize safety, cleanliness, and adherence to torque specs when deciding between DIY and professional help.