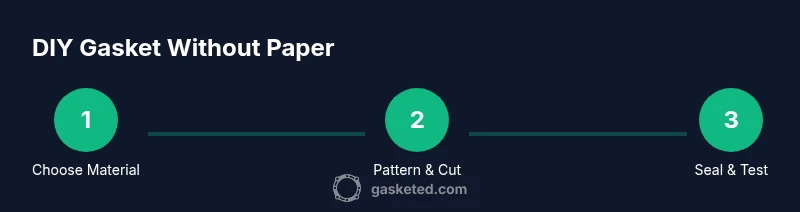
How to Make a Gasket Without Gasket Paper
Learn practical methods to craft a gasket without gasket paper using cork, silicone, and other substitute materials, plus patterns, sealing tips, and testing for leaks in 2026.

You can make a gasket without gasket paper by using substitute materials such as cork, silicone, or rubber sheets. Start with a precise pattern, cut cleanly, and seal edges with an appropriate adhesive or gasket sealant. Always test for leaks and ensure chemical compatibility with the fluids involved.
Why you might skip gasket paper
According to Gasketed, the most important factor is the seal's ability to resist the working fluid and maintain a stable compression under operating conditions. In many DIY repairs, gasket paper isn’t readily available, or you may want to reuse an existing component without sourcing new material. Substituting gasket paper with readily available materials can save time and money, but only if you choose the right substance for the job. Common substitutes include cork sheets, silicone rubber, neoprene, and fiber-backed elastics. Cork is inexpensive and compressible, making it suitable for low-pressure seals. Silicone rubber stands out for chemical resistance and broad temperature tolerance, but it can be more expensive and harder to cut precisely. Neoprene offers a balance of flexibility and oil resistance, though it may not seal well at very high temperatures. When selecting a substitute, consider chemical exposure, temperature ranges, pressure, and the gasket’s thickness tolerance. For non-critical repairs and temporary fixes, these options can perform well; for critical systems, use manufacturer-approved gasket materials.
Materials suitable substitutes
Choosing the right substitute starts with understanding exposure. Cork sheet, rubberized cork, and neoprene provide different compressibility and oil resistance. Silicone and fluorosilicone offer excellent chemical resistance and stable performance across temperature ranges, but cutting accuracy matters more with these harder materials. Sponge rubber is forgiving but can creep under sustained pressure. Fiber-backed materials can improve tear strength and allow for thin, multi-layer gaskets. When selecting density and thickness, aim for a gasket that matches the original thickness within 0.5–1 mm, and ensure the substitute can compress evenly across the entire face. If you’re repairing a water-based system, simple cork or nitrile may suffice; for automotive fluids or solvents, silicone or fluorinated compounds are typically safer choices. Always obtain material from reputable suppliers and check compatibility sheets to avoid reactions with fuels, lubricants, or cleaners.
Patterning and cutting without gasket paper
Start with a stable pattern transfer. If paper isn’t available, use a template cut from cardstock or thin cardboard to hold the shape. Trace the gasket outline carefully onto the substitute material using a sharp pencil or marker that won’t bleed. For accuracy, use a straight edge and a compass to reproduce circular components, and verify inner diameters with a caliper. Secure the material to a flat cutting surface with low-tack tape to prevent shifting. When cutting, use a sharp utility knife or razor blade and cut away from you to avoid injuries. Deburr edges with fine sandpaper or a sharpening stone so the gasket seats evenly without nicked edges. Check that all bolt holes line up and that the final piece lies flat against the mating surface before test fitting.
Sealing methods and adhesives
Not all non-paper substitutes require adhesive, but many do, especially when sealing faces with irregularities. RTV silicone, anaerobic gasket sealants, or oil-resistant sealants can help fill small imperfections and create a uniform seal. Apply a thin, even bead along the mating face, avoiding excess material that could squeeze out and contaminate the system. Use a light coating around bolt holes and along edges to assist seating. Ensure the adhesive is compatible with the substitute and the system fluids. Allow the sealant to cure fully per manufacturer guidance before assembling components, and avoid over-tightening bolts that could compress the gasket unevenly. For temperature-sensitive systems, select sealants rated for the expected range and verify shelf life.
Thickness, compression, and fit
The gasket’s thickness determines how well it seals under compression. A thicker sheet may seal more reliably in areas with minor surface irregularities, but it also requires more clamp force and matching bolt torque. A too-thin gasket can crack or allow leaks at edge interfaces. When using substitutes, aim to match the original gasket’s compression characteristics by selecting a material with similar shore hardness and surface compression. If you cannot measure hardness, run a quick test by placing the piece between two flat surfaces and tightening screws gently to observe how it seats. If the substitute drags, lifts, or deforms too much under a light load, switch to a stiffer material. The goal is to achieve even compression across the entire contact area without gaps.
Leak testing and safety checks
Before you trust a seal, test it in a controlled setting. With water or a safe inert fluid, pressurize the assembly gradually and inspect for drips or seepage along the joint. A leak at a bolt hole or seal edge indicates misalignment, insufficient camber, or inadequate compression. Check the contact surface for flatness using a straight edge and feeler gauges. If you detect leaks, adjust the gasket pattern, select a different material, or apply a fresh bead of sealant. Use PPE such as gloves and eye protection, and never pressurize a system beyond its rated limits. Document test results and replace the gasket if any damage or deterioration occurs.
Troubleshooting common issues
- Uneven seating: Sand or file the mating surface to restore flatness and re-cut the gasket.
- Edge leaks: Increase compression at the edges with a slightly different material or add a small outer sealant bead.
- Material creep: If the substitute relaxes under heat or exposure, switch to a stiffer sheet or a higher-grade silicone.
- Bolt torque: Re-check bolt torque after a short cycle to ensure the seal remains tight.
- Chemical compatibility: If fluid changes color or degrades the material, remove and replace with a compatible substitute.
Maintenance and long-term considerations
Non-paper substitutes can last longer with periodic inspection. Look for cracks, hardening, or swelling after each service interval. Replace the gasket whenever you notice deformation or leaks, and re-check the surface finish of the mating parts. Keep spare pieces of the chosen material on hand for future repairs, and store them away from direct sunlight and solvents to preserve elasticity. If you’re unsure about the suitability of a substitute, consult the system manual or seek professional guidance. The overall approach should balance practicality with reliability, especially in high-heat or high-pressure environments.
Quick safety reminders and quality checks
DIY gaskets demand careful handling. Wear eye protection and gloves when cutting materials and when applying sealants. Work in a well-ventilated area to avoid inhaling fumes from solvents or curing agents. Never reuse damaged or worn-out components; inspect the mating surfaces for corrosion, pitting, or warping. Verify the substitute’s chemical compatibility with the system fluids, and keep a spare gasket on hand for future maintenance. Finally, record the material type, thickness, and pattern for future reference. If you’re unsure, seek professional guidance rather than risking a leak.
Tools & Materials
- Cork sheet (0.5–1.0 mm thick)(Choose density suitable for low-pressure seals)
- Silicone sheet(High chemical resistance, easy to work with at room temp)
- Neoprene sheet(Good flexibility and oil resistance)
- Fiber-backed gasket sheet(Adds tear resistance for multi-layer gaskets)
- Gasket sealant or RTV silicone(Select oil/solvent resistant type)
- Cardstock template or thin cardboard(Used as a pattern backing)
- Sharp pencil or marker(Avoid marker bleed on final cut)
- Calipers or a vernier gauge(Helpful for inner/outer dimensions)
- Straightedge and compass(Ensures precise circular patterns)
- Utility knife or razor blade(Keep blades sharp for clean edges)
- Fine sandpaper (2000 grit)(Deburr edges)
- Low-tack tape(Hold pattern without shifting)
- Rags and cleaning solvent (isopropyl alcohol)(Remove oils before mounting)
- Gloves and safety glasses(Personal protection)
Steps
Estimated time: 2-4 hours
- 1
Prepare workspace and materials
Set up a clean, flat work surface. Gather cork, silicone or neoprene sheets, a pattern template, and the necessary tools. Verify you have all required items before cutting to avoid interruptions.
Tip: Lay out a 1:1 scale pattern and secure it with low-tack tape to prevent shifting. - 2
Create or obtain a pattern
If you don’t have gasket paper, use cardstock to draft the exact shape. Capture bolt hole locations and inner/outer diameters with precision. Double-check measurements against the mating surface.
Tip: Use a compass for circles and calipers for critical dimensions. - 3
Trace pattern onto substitute material
Place the template on the chosen sheet and trace with a sharp pencil. Ensure lines are clear and continuous to avoid miscuts. Keep the template flat and aligned with the grain of the material if applicable.
Tip: Mark center points for bolt holes and radii clearly. - 4
Cut the gasket piece
Cut slowly with a sharp blade, following the traced lines. Do not rush; mis-cuts cost material and time. Cut outward from the inside to minimize tear marks.
Tip: Cut with the pattern underneath to avoid marking the final piece. - 5
Deburr and inspect
Use fine sandpaper to smooth edges and remove burrs. Inspect all edges and holes for defects that could cause leaks or misalignment.
Tip: A smooth edge seats better and reduces leakage risk. - 6
Dry-fit on the mating surface
Place the gasket on the mating surface without adhesive. Check for alignment with bolt holes and verify it lies flat with no gaps.
Tip: If it doesn’t seat, re-check pattern accuracy and edge quality. - 7
Apply sealant or adhesive if needed
If you’re using a sealant, apply a thin bead along the face, especially around irregularities and bolt holes. Allow any adhesive to cure per product guidelines before assembly.
Tip: Do not over-apply; excess can contaminate the system. - 8
Assemble and torque correctly
Reinstall components and torque bolts to the manufacturer-recommended range. Tighten gradually in a criss-cross pattern to ensure even compression.
Tip: Start with light torque, then finish with a final pass once the gasket seats. - 9
Test for leaks
Gradually pressurize the assembly in a controlled environment and inspect for leaks. If leaks appear, reassess material choice or pattern and re-test after adjustments.
Tip: Use a safe testing fluid and record the results for future repairs.
Common Questions
Can cork be used as a gasket substitute for automotive systems?
Cork can work for non-critical, low-pressure seals in automotive gear where fluids are not highly aggressive. For any high-pressure or high-temperature application, prefer a material specifically rated for the fluid and operating conditions.
Cork can work for simple, low-pressure automotive seals, but use a rated gasket material for critical systems.
Is a non-paper gasket safe for high-pressure systems?
Non-paper gaskets can be used in some high-pressure contexts if the substitute material is rated for the pressure and fluid. Always consult manufacturer specs and perform controlled leak testing before regular operation.
Only use non-paper gaskets if the material is rated for the system’s pressure and you test it first.
How thick should a DIY gasket be compared to the original?
Aim to match the original thickness or achieve similar compression characteristics. If in doubt, start slightly thicker and test, then adjust based on seating and leaks.
Match the original thickness as closely as possible and test for a good seal.
What sealants are best for gasket substitutes?
Choose oil- or solvent-resistant sealants compatible with the substitute material. RTV silicone and anaerobic sealants are common choices, depending on the fluids involved.
Use sealants approved for the material and fluids involved, following label instructions.
How often should a DIY gasket be replaced?
Inspect for leaks, deformation, and surface wear after each service. Replace promptly if you notice signs of failure or deterioration.
Check periodically and replace if you see leaks or deformation.
What should I do if I’m unsure about material compatibility?
If unsure, discontinue use and consult the system manual or contact a professional. Using an incorrect substitute can cause leaks or damage.
If you’re unsure, don’t proceed—consult the manual or a pro.
Watch Video
Key Takeaways
- Choose substitute material with chemical compatibility in mind
- Pattern and cut with precision to prevent leaks
- Use appropriate sealants and cure times for reliability
- The Gasketed team recommends thorough leak testing and safe operation