How to Make a Rubber Gasket: A DIY Home Guide
Learn how to make a rubber gasket at home with practical material choices, patterns, cutting, and testing. This step-by-step guide covers safe handling, sizing, and leak testing for common DIY repairs.

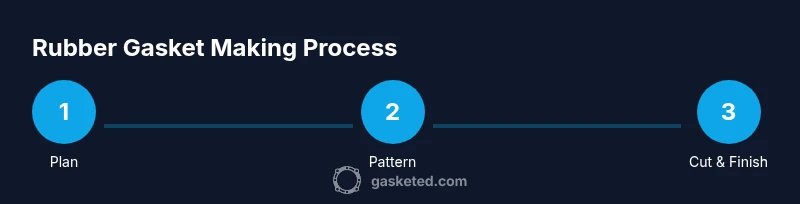
Goal: learn how to make a rubber gasket from common materials. You’ll select the appropriate rubber, measure precisely, cut to the correct profile, form the gasket without tearing, and perform a basic test for fit and sealing. This guide emphasizes safety, material selection, patterning, and practical, DIY steps you can complete at home.
What is a rubber gasket and why DIY matters
A rubber gasket is a simple, flexible seal that fills gaps between mating surfaces to stop leaks and keep contaminants out. In everyday home maintenance, you’ll encounter gaskets on plumbing joints, appliance doors, and furnace panels. Learning how to make a rubber gasket at home can help you tailor a seal to unusual sizes, replace missing stock, or repair a leaking fit without waiting for a replacement part. The goal is to balance material selection, precise sizing, and durable edges that can withstand your specific application. According to Gasketed, many DIY repairs succeed when the gasket is matched to the real service conditions—temperature, chemical exposure, and the expected compression range. The Gasketed team found that a well-made gasket improves long-term reliability and reduces the chance of recurrence. This guide walks you through the process in clear, practical steps focused on safety, accuracy, and achievable results. By the end, you'll know how to determine the right rubber type, cut a pattern, and perform a basic leak test without specialized tooling.
Keep in mind that home-made gaskets are typically for low to moderate pressure and non-hazardous media. If your application involves high pressures, hazardous fluids, or critical safety requirements, replace rather than improvise. The skills you gain here apply to common household situations, such as sealing a dishwasher door, a garden hose connection, or a pan lid. We’ll cover material choices, sizing, patterning, cutting, and testing, with tips to avoid common mistakes.
blockNoteMissingReasoning?: null
Tools & Materials
- Rubber sheet or gasket material (EPDM, silicone, or NBR)(Choose a sheet with appropriate hardness for your application (40-70 Shore A recommended for general use).)
- Sharp utility knife or rotary cutter(Use a new blade or sharpened edge for clean, accurate cuts.)
- Ruler or straightedge(Metal ruler preferred for stability and straight lines.)
- Marker or chalk(For pattern tracing on rubber sheet; avoid permanent markers that smear.)
- Calipers or precise measuring tool(Precise outer dimensions and thickness are essential.)
- Scissors or fine cutting shears(Trim and tidy edges after initial cuts.)
- Sandpaper (120-220 grit)(Smooth rough edges after cutting.)
- Adhesive or gasket sealant (optional)(Use only if compatible with chosen rubber and service media.)
- Safety gear (gloves, eye protection)(Wear PPE when cutting and handling rubber and solvents.)
- Clamps or weights (optional)(Helps hold patterns or subject material steady during tracing.)
Steps
Estimated time: 2-4 hours
- 1
Prepare workspace and assemble materials
Clear a clean, well-lit area and lay out all tools and rubber stock. Verify you have the correct material and thickness for the intended service, and double-check measurements before any cutting. This reduces waste and improves repeatability.
Tip: Arrange items in the order you’ll use them to minimize handling of cut edges. - 2
Choose rubber type and hardness
Select EPDM, silicone, or nitrile based on temperature, exposure to water/chemicals, and compression needs. For most home uses, a mid-range Shore A hardness provides a good balance of flexibility and durability.
Tip: If the gasket will seal hot water or steam, choose silicone or a high-temp EPDM variant. - 3
Create a pattern or template
Draft the gasket profile on paper or cardboard first, including outer dimensions, inner cutouts, and any radii. This template will guide your tracing on the rubber sheet and helps ensure symmetry.
Tip: Double-check the template against the actual housing or flange before tracing. - 4
Mark pattern on rubber
Place the template on the rubber, align for even margins, and trace along the edge. If your pattern is irregular, mark key reference points to keep your cuts accurate.
Tip: Use a light marker that won’t smear when you cut. - 5
Cut gasket along traced lines
Cut slowly with steady hands, using multiple light passes for thick stock. Avoid tearing by keeping blade perpendicular to the surface and letting the blade do the work.
Tip: Keep your fingers well away from the blade and wear eye protection. - 6
Finish edges and deburr
Trim any burrs with a sharp blade and, if needed, smooth edges with light sanding. A clean edge improves seating and reduces the chance of leaks.
Tip: Finish gradually; a small chamfer can help edge seating without enlarging the cut. - 7
Test fit and perform leak test
Install the gasket in its intended position and check for fit. Apply a soap solution or leak-detecting spray to joints while applying light pressure to reveal any gaps or failed seals.
Tip: If leakage appears, reassess thickness and compression and adjust the profile if needed.
Common Questions
What is the best rubber for home gaskets?
For most DIY home uses, EPDM is a solid default due to water and temperature resistance. Silicone is preferred for high heat, while nitrile works well where oil exposure is present. Match the rubber to your media and temperature needs.
EPDM is a good default for many home gaskets, with silicone for high heat and nitrile for oil exposure.
Can I reuse old gasket material?
Reusing old gasket stock is generally not recommended because the material may have taken a permanent set and lost elasticity. Start fresh to ensure a proper seal.
It's usually better to replace rather than reuse an old gasket because it may no longer seal properly.
How thick should a gasket be?
Thicker gaskets (roughly 0.5-2.0 mm for small, non-pressurized seals) provide more compression tolerance, but too thick can prevent seating. Use the minimum thickness that achieves a reliable seal under your load.
Most home gaskets are in the half-millimeter to two-millimeter range, depending on the clamp force.
Is heating or curing necessary?
Typically no heat curing is required for simple DIY gaskets. Some specialty silicone formulations may benefit from heat or specific curing instructions, but for general use, cutting, seating, and leak testing suffices.
Usually no curing is needed for DIY gaskets; just cut and test.
How do I test a gasket for leaks?
A simple leak test uses soapy water on joints while the system is slightly pressurized. Look for bubbles that indicate a leak and adjust the gasket thickness or seating accordingly.
Use soapy water on the joints to spot leaks during a light pressure test.
Watch Video
Key Takeaways
- Select the right rubber type for the service conditions.
- Pattern, cut, and finish edges for reliable seating.
- Test the gasket under light pressure and adjust as needed.
- Document material, thickness, and date for repeatability.
- The Gasketed team recommends validating a DIY gasket with a simple leak test before final use.