How to Make Gasket Stick: A DIY Adhesion Guide
Learn proven methods to make gaskets stick reliably. Prepare surfaces, choose the right sealant, apply evenly, and cure properly to prevent leaks in DIY gasket repairs.

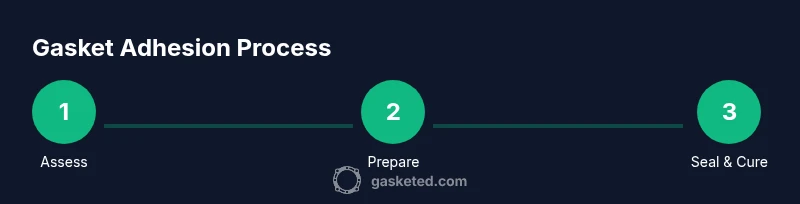
To make gasket stick reliably, start with clean, dry mounting surfaces, then choose the right adhesive or sealant for your gasket material. Apply a thin, even layer, align the gasket, and clamp or torque to spec while it cures. This guide covers surface prep, material-specific sealants, and troubleshooting to prevent leaks in DIY repairs.
Why gasket adhesion matters
Gasket failures are commonly caused by poor bonding between the gasket, the mating surfaces, and the chosen sealant. A durable seal prevents leaks, maintains system pressure, and extends the life of both the gasket and the equipment. A strong bond reduces creep, squeeze-out, and misalignment that lead to leaks. In DIY projects, following a clear adhesion strategy saves time and avoids costly rework. According to Gasketed, proper surface prep and material compatibility are the two most influential factors in successful gasket adhesion. When you take the time to clean, dry, and inspect the joint, you reduce the risk of leaks and equipment damage. This guide emphasizes practical steps you can take at home to achieve reliable results.
Assess your gasket material
Gaskets come in several materials, each with different bonding needs. Rubber gaskets (EPDM, silicone, nitrile) benefit from flexible sealants that accommodate movement. Paper or fiber gaskets are more sensitive to solvents and may require cement or light spray adhesives. Cork gaskets rely on mild tack and careful alignment. Before you buy adhesives, confirm the gasket material and its service (oil, fuel, temperature, pressure). This avoids selecting a sealant that chemically attacks the gasket or surface. Knowing the material also helps you pick cure times and temperature tolerances that won’t compromise the joint.
Surface preparation basics
Prepare both mating surfaces by cleaning with isopropyl alcohol and a lint-free cloth until there is no grease or residue. Inspect for nicks, burrs, or corrosion and smooth them with a fine abrasive if needed. A flat, dry surface ensures even contact and reduces the risk of voids. Do not introduce moisture into the joint; moisture trapped under the gasket is a common cause of leaks. If the area is oily, repeat cleaning until the surface looks uniform and dry to the touch. A clean surface also helps sealants cure evenly.
Choosing the right sealant or adhesive
Select a sealant that matches the gasket material and service. RTV silicone is common for rubber gaskets and non-porous metal joints, while anaerobic sealants work well on metal-to-metal joints with tight gaps. For fiber or paper gaskets, some manufacturers recommend a light cement rather than a viscous adhesive. Read the product labels for cure time, temperature tolerance, and compatibility with oils or fuels. Avoid mixing multiple sealants unless the manufacturer approves. If you’re unsure, start with a small test area to confirm compatibility.
When to use adhesive vs sealant vs gasket maker
In many gasket jobs you only need a gasket maker or sealant to improve initial seating, not a full adhesive bond. If the joint experiences movement or vibration, a flexible adhesive or sealant helps maintain a seal over time. For static joints under moderate heat, a thin layer on the gasket circumference can prevent squeeze-out. Always follow the gasket manufacturer’s recommendations and test a small area before full installation. When high heat or pressure is involved, a dedicated adhesive or cement may be required by the equipment’s service manual.
Application steps for rubber gaskets
Rubber gaskets require careful handling to avoid tearing. Start by removing the old gasket and inspecting the mating surfaces for damage. Clean both faces with isopropyl alcohol and dry completely. Apply a thin, even bead of RTV silicone to the gasket or the mating surface, depending on the manufacturer’s guidance. Align the gasket carefully and place it with even pressure along the full circumference. Reassemble and torque to spec using a proper sequence to prevent warping. Allow curing time as directed by the sealer’s label before testing the seal. If you notice squeeze-out, stop and re-seat the gasket before final tightening.
Application steps for paper gaskets
Paper and fiber gaskets are more sensitive to liquids and solvents, so keep handling minimal. Remove the old gasket and inspect the surface for damage. Clean with IPA and ensure the surface is dry. Use a light cement or a thin layer of sealant on the gasket per manufacturer guidance, or apply a small amount to the mating surface if recommended. Place the gasket with careful alignment and tighten in a criss-cross pattern to avoid distortion. Allow adequate curing time before pressurizing the system. Avoid soaking or over-wetting the gasket.
Application steps for cork gaskets
Cork gaskets require a gentle, consistent seating approach. Remove old cork and inspect surfaces for gouges or corrosion. Clean surfaces with IPA and dry completely. Apply a light coating of gasket cement or a compatible sealant if recommended, placing a thin film on the gasket edge to improve sealing. Align the gasket and tighten bolts or clamps evenly in a cross-pattern. Check for a slight squeeze and allow the sealant to cure per label directions before runtime. If cork compression seems uneven, re-check alignment and repeat the seating process.
Clamping, torque, and alignment
Even pressure is essential for a good seal. Use a torque wrench and follow the manufacturer’s torque spec in the correct sequence (cross-pattern for flanged joints). Start with finger-tight, then increment in small steps while maintaining alignment. When possible, use a gasket with alignment features or dowel pins to prevent shifting during clamping. Uneven torque can cause gaps and leaks, even if the adhesive cured correctly. After assembly, perform a light leak check with air or system pressure at a safe level.
Curing times and temperature considerations
Curing time varies by sealant type and temperature. Plan to avoid pressurizing the system until the recommended cure is complete. Warmer environments can shorten cure times, but overheating may impair the bond. If your service requires elevated temperatures, confirm the sealant’s maximum temperature rating and any special curing conditions. In general, keep the joint undisturbed during curing to prevent misalignment or squeeze-out.
Troubleshooting leaks and failures
If you detect a leak after assembly, pause operation and inspect for misalignment, gasket damage, or insufficient cure. Check the torque pattern and reseat the gasket if the surface shows signs of blotching or squeeze-out. Re-clean the joint, reapply an appropriate sealant if allowed, and re-torque evenly. For complex joints, consider replacing the gasket with a new one and using a compatible adhesive according to the manufacturer’s recommendations. Document the service and observe the system during a controlled test run.
Safety, cleanup, and maintenance
Wear gloves and eye protection when handling solvents and sealants. Work in a well-ventilated area and follow product safety data sheets for exposure limits. Clean tools with the appropriate solvent after use and store sealants upright to prevent spills. Dispose of waste and old gaskets according to local regulations. Regular inspection of gaskets and sealing surfaces helps you catch wear before leaks occur.
Tools & Materials
- Isopropyl alcohol (70%+)(Degrease and dry mounting surfaces)
- New gasket (same material and size)(Replace worn gasket; ensure compatibility)
- Gasket sealant/adhesive (RTV silicone, anaerobic)(Choose based on gasket type and service)
- Gasket remover / plastic scraper(Remove old gasket without surface damage)
- Lint-free cloths(Wipe and dry surfaces)
- Gloves(Protect hands from chemicals)
- Torque wrench(Meet manufacturer torque spec)
- Masking tape(Hold gasket in place during alignment)
- Caliper or ruler(Verify gasket dimensions)
- Detergent / degreaser(Alternate to IPA if needed)
- Surface cleaner(Additional degreasing option)
- Gasket cement (for fiber/paper gaskets)(Optional adhesive for paper gaskets)
Steps
Estimated time: 60-90 minutes
- 1
Remove old gasket and inspect
Power down the system and remove the fasteners. Peel off the old gasket carefully and inspect the mating surfaces for nicks, burrs, or corrosion that could prevent a seal. If you find damage, repair or resurface before proceeding.
Tip: Use the torque sequence to guide reassembly. - 2
Clean and dry the surfaces
Wipe both mating surfaces with isopropyl alcohol on a lint-free cloth until free of grease. Dry completely with a clean cloth before applying any sealant. Moisture or residue can prevent proper adhesion.
Tip: Ensure no lint or fibers remain on the surface. - 3
Select the right adhesive/sealant
Choose RTV silicone for rubber gaskets or anaerobic sealants for metal-to-metal joints. For fiber/paper gaskets, consider cement or a light-sealant if recommended by the manufacturer. Read the label for cure time and temperature limits.
Tip: Match the sealant to both material and operating conditions. - 4
Apply adhesive or sealant
Apply a thin, even layer to either the gasket or the mating surface, following the product’s instructions. Avoid thick beads that can squeeze into the joint and cause leaks. If using a liquid cement, spread a light coat.
Tip: Avoid excess; too much adhesive isolates air and creates voids. - 5
Position and align the gasket
Place the gasket into position, ensuring alignment with bolt holes or dowel pins. Use masking tape or a helper if needed to hold it in place during initial seating.
Tip: Double-check orientation to prevent misfit. - 6
Tighten bolts in a cross pattern
Tighten fasteners gradually in a criss-cross sequence to distribute pressure evenly. Start with finger-tight, then apply torque in increments until you reach spec.
Tip: Avoid a single tight corner that can warp the joint. - 7
Check for squeeze-out and reseat if needed
Look for any visible squeeze-out along the seam. If present, stop and reseat the gasket before final tightening. Clean any excess and re-torque as required.
Tip: Small adjustments now prevent leaks later. - 8
Cure and test
Allow the adhesive to cure per label directions before first use. Perform a controlled pressure test or leak check after curing to confirm the seal holds.
Tip: Test at safe pressure and monitor for 30 minutes after initial test.
Common Questions
What is the best sealant for rubber gaskets?
RTV silicone is commonly recommended for many rubber gaskets, but always check the gasket manufacturer’s guidance for your specific material and service. Some joints benefit from a dedicated gasket cement, especially on fiber-reinforced rubbers.
RTV silicone is a common choice for rubber gaskets, but always follow the gasket maker’s guidance for your material and service.
Can I reuse a gasket after applying sealant?
In most cases, you should replace the gasket rather than reuse it, especially if it’s damaged or compressed. If the manufacturer allows, you can reuse a gasket that shows no deformation and is compatible with the service after cleaning.
Usually, it’s best to replace the gasket. Reusing is risky unless the manufacturer says it’s okay.
How long should I wait before testing a new gasket?
Cure times depend on the sealant and temperature. Always follow the product label for curing duration and conditions, then perform a cautious leak test at a safe operating pressure.
Follow the sealant’s cure time and test carefully after the recommended period.
Is heat necessary to cure certain gaskets?
Some sealants tolerate higher temperatures and cure faster with heat, but not all. Check the product specifications for maximum temperature and curing recommendations before applying heat.
Heat may speed curing for some products, but always verify the sealant’s specs first.
What should I do if there is still a leak after resealing?
Re-check surface condition, gasket orientation, and torque sequence. If still leaking, you may need a new gasket of the correct material or a different sealant compatible with the service.
If leaks persist after reseating, re-check all steps and consider replacing the gasket or trying a different sealant.
Watch Video
Key Takeaways
- Start with clean, flat surfaces for best adhesion.
- Choose the right sealant for the gasket material and service.
- Tighten in a cross pattern to avoid warping.
- Allow proper curing before pressurizing the system.
- Test for leaks after installation and before full service.